
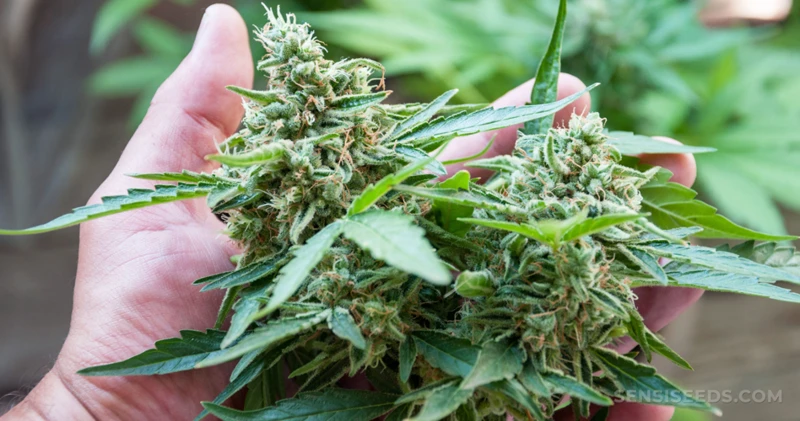
Harvesting Cannabis Buds: A Step by Step Guide
Introduction
Contents
Harvesting cannabis buds is a crucial process for all growers, whether they’re experienced or novice. It’s a task that requires careful consideration and meticulous attention to detail. Properly harvesting your cannabis buds is vital for getting the most out of your plants, both in terms of yield and potency. However, it’s not as simple as just picking some flowers off a plant. In this guide, we’ll take you step-by-step through the process of harvesting your cannabis buds, from determining the optimal time for harvest to drying and curing your buds. So, put on your gardening gloves, grab your pruning shears, and let’s get started!
Why Harvesting is Important
Harvesting your cannabis buds at the right time is crucial for achieving the highest possible quality of your yield. Here are some reasons why harvesting is important:
- Maximizes Potency: Waiting until the right time to harvest ensures that your buds have reached their maximum potency, giving you the best possible results.
- Protects Flavor Profile: Properly harvested cannabis buds will have a well-developed and preserved flavor profile, which can be easily affected by harvesting too late or too early.
- Increase the Yield: By waiting for the right time to harvest, you can optimize the amount of resin present in the buds, increasing your yield.
- Optimizes Health and Safety: Harvesting at the right time ensures that you minimize the risks of contamination or mold growth, allowing for safe consumption of your yield.
By following the steps in this guide, you can keep these important factors in mind and achieve a high-quality yield that satisfies your taste and potency preferences.
Step 1: Timing the Harvest
When it comes to harvesting cannabis buds, timing is everything. Harvesting too early can result in buds that don’t have their full potency, while harvesting too late can cause the buds to degrade and lose some of their potency. So, how do you know when the timing is just right? In this section, we’ll explore the factors that you need to consider and the methods you can use to check the trichomes, so you can determine the perfect time to harvest your cannabis plants.
Factors to Consider
When considering the timing of the harvest, there are several factors to take into account. These factors can affect the potency, flavor, and overall quality of the final product.
1. Cannabis Strain: Different cannabis strains have different ideal harvest times. Sativa strains usually require a longer flowering period than indica strains, and therefore have a later harvest window. It is important to research your specific strain and its ideal harvest time.
2. Trichome Color: Trichomes are tiny, mushroom-shaped glands on the buds that produce resin and contain cannabinoids. They change color during the flowering period, from clear to cloudy to amber. Clear trichomes indicate that the buds are not yet ready for harvest, while cloudy and amber trichomes indicate increasing levels of potency.
3. Pistil Color: Pistils are the tiny hairs that stick out from the buds. They change color from white to orange or brown as the plant matures. Harvesting at different stages of pistil color can result in different effects and flavors.
4. Weather and Environment: Weather and outdoor growing conditions can also affect the timing of the harvest. If there are heavy rains or high humidity, buds may mold or rot and need to be harvested earlier.
5. Personal Preference: Personal preference also plays a role in the timing of the harvest. Some people prefer a more uplifting, cerebral high and harvest earlier, while others prefer a more sedative, relaxing high and harvest later.
Taking these factors into consideration will help ensure that you harvest your cannabis at the optimal time for your specific strain and desired effects.
How to Check Trichomes
To determine whether your cannabis buds are ready for harvest, it’s important to check the trichomes. Trichomes are small, mushroom-shaped glands that produce the potent cannabinoids and terpenes that give cannabis its unique flavor and effects. To accurately check the trichomes, follow these steps:
- Get a magnifying tool: You’ll need a magnifying tool such as a jeweler’s loupe or a microscope to get a close look at the trichomes. Check your local gardening or hydroponic supply store or purchase one online.
- Look at the trichomes: The trichomes will change in appearance throughout the growing process. Initially, they will be clear and translucent. As the plant matures, the trichomes will turn a cloudy white color. This is an indication that they are producing more THC and other cannabinoids. If you are looking for a more uplifting effect from your cannabis, you may want to harvest when the trichomes are mostly cloudy white. If you are looking for a more sedative or relaxing experience, you may want to wait until they have turned amber or brown.
- Check the pistils: In addition to monitoring the trichomes, you can also check the pistils on the plant. Pistils are tiny hairs that grow out of the buds. When they are first emerging, they will be white or light-colored. As the bud matures, the pistils will turn darker in color, usually to an orange or brownish hue. When most of the pistils have turned dark, it usually means the plant is ready for harvest.
- Be patient: Checking the trichomes can be time-consuming and requires patience. It’s important to take your time and check the trichomes regularly as the harvest window can be quite small. A good rule of thumb is to check the trichomes every few days starting around week six of the flowering stage.
By following these steps and regularly monitoring the trichomes, you can ensure that you harvest your cannabis buds at the optimal time, maximizing their potency and flavor potential.
Step 2: Preparing for Harvest
The second stage of harvesting cannabis buds is an essential part of the process, and it requires a certain level of preparation to ensure that your yield is of the highest quality. Before you begin harvesting your plants, you need to have the right tools at your disposal and be aware of the techniques involved in flushing your plants. This step is all about getting your plants ready for the actual harvest, which will allow you to produce the best possible buds. Let’s take a closer look at the tools you’ll need and how to flush your plants.
Tools You’ll Need
In order to properly harvest your cannabis buds, you will need to equip yourself with the right tools for the job. Here are some of the essential items you will need:
- Pruning shears: These are used to cut the branches and remove the buds from the plant.
- Gloves: You should wear gloves to protect your hands from the resin and plants’ natural oils.
- Microscope: A microscope or magnifying glass can help you examine the trichomes on your buds to determine when they are ready for harvest.
- Buckets: Buckets can be used to carry your harvested buds and also to assist in flushing your plants before you harvest them.
- Fans: Fans can be used to promote air circulation in your drying area to help your buds dry evenly.
- Rope or string: This can be used to hang your buds up to dry after they have been harvested.
- Jars: Jars are useful for curing your buds once they are dry.
- Hygrometer: A hygrometer can be used to ensure you are keeping the correct humidity levels in your jars during the curing process.
Having all of these items on hand will ensure you are properly equipped to harvest and prepare your buds for drying and curing.
How to Flush Your Plants
Flushing your plants is an important step to ensure that your buds remain healthy and flavorful. Here’s a step-by-step guide on how to flush your plants:
Step 1: Begin flushing your plants two weeks prior to harvest. This will give enough time for the nutrients to be flushed out from the plant.
Step 2: Stop adding any nutrients to your plants. Only water your plants with plain, pH-balanced water.
Step 3: Make sure to water your plants until there is runoff from the drainage holes. This will help to wash away any excess nutrients.
Step 4: Repeat the process of watering with plain water until the runoff water is clear.
Step 5: You can also use a flushing agent, which is a product designed to help flush out any excess nutrients. Follow the instructions carefully and make sure to use the correct amount.
Step 6: Monitor your plants closely during the flushing process. Look for signs of nutrient deficiency, such as yellowing leaves, and adjust accordingly.
Step 7: Keep your plants in a controlled environment during the flushing process. Avoid extreme temperatures or humidity, as this can affect the quality of the buds.
By following these steps, you can ensure that your buds remain healthy and flavorful, without any unwanted aftertaste from excess nutrients.
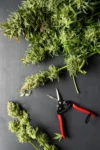
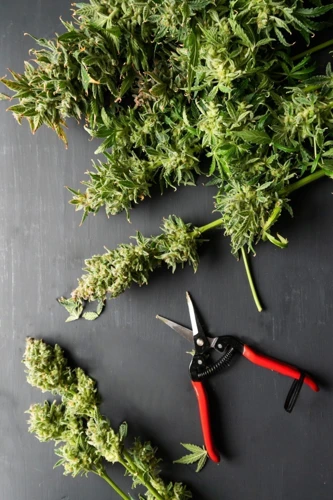
Step 3: Harvesting Your Cannabis Buds
As your cannabis plants reach their optimum level of ripeness, it’s time to move on to the exciting stage of harvesting your buds. This can be a daunting task for novice growers, but with the right tools and techniques, you’ll be able to harvest your cannabis with ease. In this stage, you’ll learn the essential steps of cutting and trimming your buds, and how to get the most out of your cannabis harvest. So, let’s delve into the details of the harvesting process and explore how to make the most of your cannabis buds.
How to Cut Your Plants
When it comes to cutting your cannabis plants, there are a few things to keep in mind to ensure you get the best possible yield. Here’s a step-by-step guide on how to cut your plants.
Step 1: Prepare Your Tools
Before you start cutting, make sure you have all the necessary tools. You’ll need:
- Pair of sharp scissors or pruning shears
- Clean, sharp blade
- Gloves (optional)
Make sure your tools are clean and sharp to avoid damaging your plants.
Step 2: Cut the Plant at the Correct Point
The first step is to cut the plant at the right point. You’ll want to cut the plant at the base of the stem, just above the soil line. This will remove the entire plant, including the roots.
Step 3: Remove Large Fan Leaves
Once you’ve cut the plant, remove any large fan leaves that are still attached. These leaves don’t contain as much THC as the smaller leaves around the buds, so removing them will make it easier to handle the buds.
Step 4: Trim the Buds
Next, it’s time to trim your buds. Use your scissors or pruning shears to carefully trim away any excess leaves or stems from the buds. You want to remove as much of this material as possible, as it can affect the taste and quality of your final product.
Step 5: Hang Your Buds to Dry
After you’ve trimmed your buds, it’s time to dry them. Hang your buds upside down in a cool, dark place with good air circulation. Make sure they’re not touching each other to avoid mold growth.
Once your buds are dry, you can move on to the curing process. Cutting your cannabis plants is a delicate process that requires careful attention to detail, but if you follow these steps, you’ll be well on your way to a successful harvest.
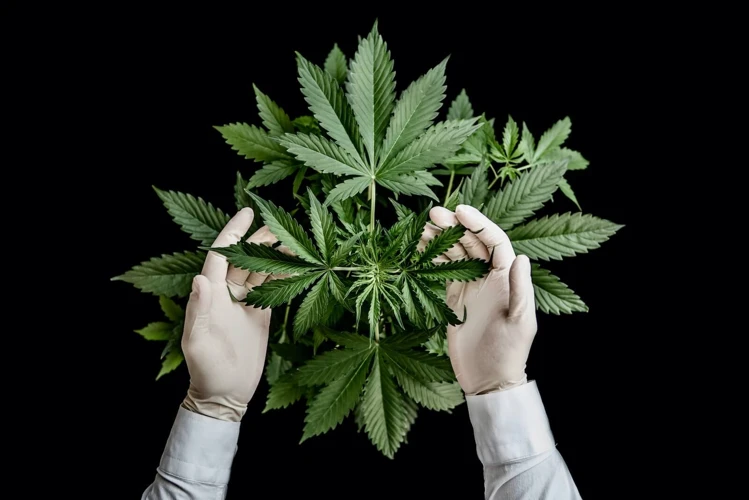
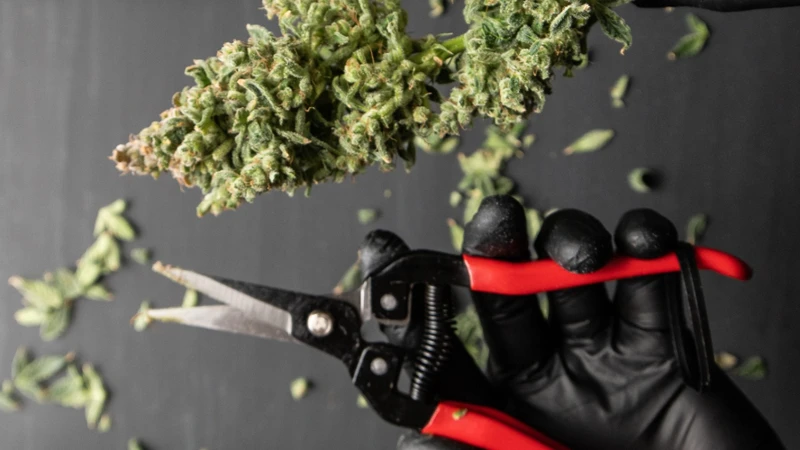
How to Trim Your Buds
Trimming your buds properly is another crucial step in the harvesting process. This process involves removing the large fan leaves from the buds and trimming away any excess material from the buds themselves.
Tools You Will Need for Trimming:
| Trimming Scissors | A sharp pair of small scissors will make trimming much easier and more precise. |
| Latex Gloves | Wearing gloves during trimming helps to prevent your hands from getting sticky from the resin on the buds. |
| Tray or Tarp | Place your buds on a tray or tarp to catch any trimmed material and keep your work area clean. |
The Trimming Process:
1. Start by removing the large fan leaves from the buds. These leaves do not contain much THC and can be discarded or used for other purposes.
2. Use your scissors to trim away any excess material from the buds themselves. Be careful not to trim too much or you may damage the buds.
3. Trim your buds until they are compact and have a uniform shape. This will help your buds to dry and cure more evenly.
4. As you trim, place the trimmed material in a separate container for later use. This material can be used for making concentrates or edibles.
Tips for Trimming:
– Take breaks often to prevent hand cramping and fatigue.
– Don’t rush the trimming process. It is better to take your time and do a thorough job.
– Use a magnifying glass to check for any missed leaves or excess material.
– Keep your work area clean and organized to prevent any loss of valuable material.
By following these steps for trimming your buds, you can ensure that they are properly prepared for the next steps of drying and curing.
Step 4: Drying and Curing
Now that you have successfully harvested your cannabis buds, it’s time for an important yet often overlooked step in the cannabis cultivation process – drying and curing. This step is crucial in the final quality and potency of your buds. Additionally, proper drying and curing can also improve the overall taste and aroma of your cannabis. In this section, we will guide you through the process of drying and curing your buds to ensure maximum potency, flavor, and aroma. Let’s dive in!
How to Dry Your Buds
After harvesting your cannabis buds, the next step is drying them properly. Proper drying is essential to ensure your buds maintain their potency, flavor, and aroma. Here are the steps to follow when drying your buds:
Step 1: Remove any excess water or moisture from your buds. This can be done by gently shaking them or using a clean cloth to pat them down.
Step 2: Prepare a drying area that is dark, dry, and well-ventilated. Avoid drying your buds in direct sunlight, as this can affect their potency and flavor.
Step 3: Hang your buds from a clothesline or drying rack. To avoid damaging the buds, ensure that they are not overcrowded and have enough space to breathe.
Step 4: Maintain the temperature and humidity in your drying area. Ideally, the temperature should be around 60-70°F (15-21°C), while the humidity should be around 50% to prevent mold growth.
Step 5: Allow your buds to dry for about 7-10 days or until they feel dry to the touch. You can check the dryness of your buds by bending the stem. If it snaps easily, they are ready for curing.
Step 6: Once your buds are dry, remove them from the drying area and trim off any excess leaves or stems.
Step 7: Place your dried buds in glass jars or airtight containers. This will allow them to cure and further develop their flavor and aroma. Store your jars in a cool, dark place and open them once a day for the first week to release any excess moisture.
By following these steps, you’ll be able to properly dry and cure your cannabis buds, ensuring that they maintain their potency, flavor, and aroma.
How to Cure Your Buds
Curing is a critical process after harvesting your cannabis buds, and it helps to enhance their flavor, potency, and overall quality. Here’s a step-by-step guide to curing your buds:
Step 1: Prepare Your Buds for Curing
Before curing, remove any excess leaves or stems from the buds. You can use a pair of clean scissors or pruning shears to trim the buds. Ensure that your hands and tools are clean to prevent any contamination.
Step 2: Place Your Buds in Jars
After trimming your buds, place them in clean, airtight jars such as mason jars. It’s essential to make sure that the jars are completely dry to prevent mold growth. Fill the jars with the buds until they’re about three-quarters full, but do not pack them too tightly as the buds need room to breathe.
Step 3: Burp Your Jars
During the curing process, your buds will release moisture and gases that can build up inside the jars. It’s crucial to ‘burp’ your jars by opening them a few times a day in the first week of curing. This helps to release any excess moisture and gases and ensure that your buds don’t rot.
Step 4: Monitor Temperature and Humidity
Monitor the temperature and humidity levels inside the jars daily. The ideal temperature for curing is between 60 to 70°F, while the humidity should be between 55% to 65%. If humidity is too high, remove the buds from the jars and allow them to dry for an hour before returning them to the jars. If the temperature is too high, move your jars to a cooler location.
Step 5: Store Your Jars
After burping for about the first week, you can begin to gradually decrease the frequency of burping your jars, and store them in a cool, dry place. Over the next few weeks, continue to check the jars once a week, ensuring the buds remain at optimal temperature and humidity levels.
Step 6: Enjoy Your Cured Buds
After three to four weeks, your buds should be adequately cured and ready for use. Remember to store them in a cool, dry place away from direct sunlight.
| Step | Action |
|---|---|
| 1 | Prepare your buds for curing by removing leaves and stems |
| 2 | Place your buds in clean, airtight jars |
| 3 | Burp your jars daily during the first week of curing |
| 4 | Monitor temperature and humidity levels in your jars daily |
| 5 | Gradually decrease the frequency of burping your jars and store them in a cool, dry place |
| 6 | Enjoy your cured buds! |
Conclusion
After successfully harvesting your cannabis buds, you are now ready to enjoy the fruits of your labor. However, the process of harvesting and preserving your buds does not end once you have cut them off the plant. It is important to dry and cure your buds properly to ensure the quality and potency of your harvest.
Drying your buds is crucial as it allows excess moisture to evaporate, preventing mold growth and preserving the potency of your buds. You can hang your buds upside down in a dark and well-ventilated room with a temperature ranging between 60-70°F and humidity of around 50%. This process usually takes 7-14 days, depending on the size, density, and humidity of your buds.
Curing your buds allows for the further breakdown of chlorophyll, making the taste and smell of your buds smooth and enjoyable. Curing also improves the potency and shelf-life of your buds. Place your dried buds in airtight jars and store them in a cool, dark, and dry place for another 2-4 weeks. Opening the jars once a day allows for any excess moisture to escape, preventing mold growth.
By following these steps, you can ensure that your cannabis buds are of the highest quality and potency. Proper timing, preparation, harvesting, drying, and curing your buds all contribute to the success of your harvest. Now sit back, relax, and enjoy the fruits of your labor.
Frequently Asked Questions
What is the ideal time to harvest cannabis buds?
The ideal time to harvest your cannabis buds is when the trichomes are mostly milky or cloudy, with a very small percentage still being clear.
How do I check trichomes?
You can check trichomes by using a jeweler’s loupe or a microscope with at least 60x magnification. Look for tiny, mushroom-shaped structures on the surface of the buds.
What tools do I need for harvesting cannabis?
You will need a pair of clean, sterilized scissors, gloves, a clean workspace, and a container for your harvested buds.
How do I flush my plants before harvest?
You can flush your plants by only watering them with plain water for the last 1-2 weeks before harvest. This helps to remove any excess nutrients and improve the taste of your buds.
How do I cut my plants during the harvest?
You can cut your plants by starting at the bottom of the stem and working your way up. Use clean, sterilized scissors to snip off each branch close to the main stem.
How do I trim my buds after harvesting?
You can trim your buds by removing any large fan leaves and excess stems. Use scissors to carefully trim around the edges of each bud, leaving a small amount of sugar leaves in place.
How do I dry my buds after harvesting?
You can dry your buds by hanging them upside down in a cool, dark, and well-ventilated area. Use string or wire to hang each branch, leaving enough space between each bud to allow for air circulation.
What is the ideal temperature and humidity for drying cannabis buds?
The ideal temperature for drying cannabis buds is between 60-70°F (15-21°C), and the humidity should be between 45-55%. Aim for a slow and steady drying process.
How do I cure my buds after drying?
You can cure your buds by placing them in airtight containers and burping them daily for the first week. After that, burp them every few days to release any excess moisture. Aim for a 2-4 week curing process.
Why is curing important?
Curing is important because it helps to improve the flavor, aroma, and potency of your buds. It also helps to preserve them for long-term storage.

