
Beginner’s Guide to Vermicomposting for Cannabis
Introduction
Contents
Starting a cannabis garden can be an exciting and rewarding experience, but it’s important to have the right tools and techniques to ensure the health of your plants. One technique that has gained popularity in recent years is vermicomposting, a method of composting with worms. In this guide, we will take a closer look at vermicomposting and how it can benefit your cannabis plants. We’ll cover everything you need to know to get started, from setting up your worm bin to troubleshooting common issues. By the end, you’ll have a thorough understanding of how to use vermicompost to improve the health and yield of your cannabis plants.
What is Vermicomposting?
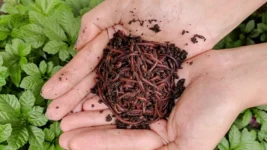
Vermicomposting is a type of composting that uses worms to break down organic matter and turn it into compost. It is an excellent way to create nutrient-rich soil amendments for cannabis plants.
How does it work?
Worms consume organic waste material such as food scraps, grass, and leaves, and then excrete it as a nutrient-rich castings known as vermicompost. Vermicompost is rich in nitrogen, potassium, phosphorus, and beneficial microorganisms that are essential for plant growth.
What are the benefits?
One of the main benefits of vermicomposting is that it is environmentally friendly. It reduces the amount of waste that goes into landfills and helps to create healthy soil. Vermicomposting also produces a high-quality compost that is beneficial for cannabis plants, as it helps to improve soil structure and fertility.
What are the different types of worms used in vermicomposting?
The most common type of worm used in vermicomposting is the Red Wiggler worm. These worms are hardy, reproduce quickly, and are excellent composters. Other types of worms that can be used for vermicomposting include European Nightcrawlers, African Nightcrawlers, and Canadian Nightcrawlers.
By using vermicomposting, cannabis growers can produce nutrient-rich soil amendments that are beneficial for their plants while also reducing waste and promoting a healthy environment. To learn more about composting basics for cannabis growing, check out our article Composting Basics for Cannabis Growing.
Why Vermicomposting is Good for Cannabis Plants
Cannabis plants require a nutrient-rich soil to grow and thrive, and vermicomposting is a great way to provide those nutrients in a natural and sustainable way.
Here are some reasons why vermicomposting is especially good for cannabis plants:
- Increased Nutrient Availability: Vermicompost is chock full of essential plant nutrients like nitrogen, phosphorus, and potassium. However, these nutrients are present in a form that is more readily available to plants than traditional compost. This means that your cannabis plants will be able to absorb the nutrients they need more quickly and efficiently, resulting in faster growth and better yields.
- Better Soil Structure: In addition to providing nutrients, vermicompost also helps to improve soil structure. The sticky, glue-like substance produced by worms as they break down organic matter helps to bind soil particles together, creating a more stable and aerated soil. This allows for better water retention and drainage, which are both important for healthy cannabis plants.
- Natural Pest Control: Worms aren’t the only creatures living in your worm bin – there are also a variety of beneficial microorganisms that help to break down organic matter and prevent harmful pests and diseases from taking hold. When you add vermicompost to your cannabis plants, you are not only providing them with essential nutrients, but also introducing these helpful microorganisms to your soil, which can help to prevent problems before they start.
- Sustainable and Eco-Friendly: By using vermicompost to grow your cannabis plants, you are making a sustainable and eco-friendly choice. Vermicomposting is a natural process that relies on worms and other microorganisms to break down organic matter, rather than relying on synthetic fertilizers and pesticides that can harm the environment.
In short, vermicomposting is a great way to provide your cannabis plants with the nutrients they need to thrive, while also improving soil structure, preventing pests and diseases, and making a sustainable and environmentally friendly choice.
Getting Started with Vermicomposting
If you’re interested in delving into the world of vermicomposting for your cannabis plants, then it’s important to understand the basics of getting started with this technique. Vermicomposting may seem daunting at first, but don’t worry, it’s actually quite simple! In this section of the article, we’ll explore what materials you’ll need to set up your worm bin, as well as steps to properly add worms to your bin to get started on the path to enriching your soil with nutrient-rich vermicompost. Whether you’re an experienced gardener or a complete newbie, you’ll find everything you need to get started with vermicomposting right here.
Materials Needed
Before starting with vermicomposting, it is important to have all the necessary materials. The following table lists the materials required for setting up your worm bin:
| Materials | Description |
| Container | A container with a lid to hold the worms and organic matter. |
| Bedding Material | Shredded newspaper or cardboard, coconut coir or peat moss to create a comfortable environment for the worms. |
| Red Worms (Eisenia fetida) | The recommended species of worms for vermicomposting. |
| Organic Matter | Fruit and vegetable scraps, coffee grounds, eggshells, grass clippings and other organic materials for the worms to feed on. |
| Sprayer Bottle | A sprayer bottle filled with water to keep the bedding material moist. |
| Black Plastic Sheet | To cover the worm bin and protect it from light. |
| Gloves | To handle the worms and organic matter without harming them. |
| Scale | To weigh the amount of organic matter added to the worm bin. |
Note: It is important to use organic materials and avoid using meat, dairy products, oily foods, pet waste or synthetic products as these can harm the worms and create unpleasant smells. With the right materials, you can now move onto setting up your worm bin.
Setting Up Your Worm Bin
One of the most important steps in starting a vermicomposting system is setting up your worm bin. This can involve a bit of planning and preparation to ensure that your worms are happy and healthy.
Firstly, you will need to decide on the type of container you want to use. There are a variety of options available, including plastic tubs, wooden boxes, or even repurposed furniture such as dressers or bookshelves. Be sure to choose a container that is deep enough to hold your composting materials and allow your worms to move around comfortably.
Once you have your container, you will need to drill ventilation holes in the lid and around the sides to allow for airflow. It is important to ensure that your lid fits securely on your container to keep out pests and prevent your worms from escaping.
Next, you will need to create a drainage system to prevent excess moisture from building up in your bin. This can be achieved by drilling several small holes in the bottom of your container or using a tray underneath to catch any excess liquid.
After your drainage system is in place, it’s time to add bedding material. This can be shredded newspaper, cardboard, coconut coir or a combination of these items. It’s important to avoid adding glossy paper or any material with colored ink, as these can be harmful to your worms. The bedding material should be damp, but not soaking wet.
Finally, add your worms to your bin along with a handful of pre-composted material or food scraps. Cover the contents of your bin with a layer of newspaper or cardboard to help retain moisture.
Setting up your worm bin is an important step in the vermicomposting process. Taking the time to ensure that your container is properly ventilated, drained, and filled with the right bedding material will help to ensure the health and well-being of your worms.
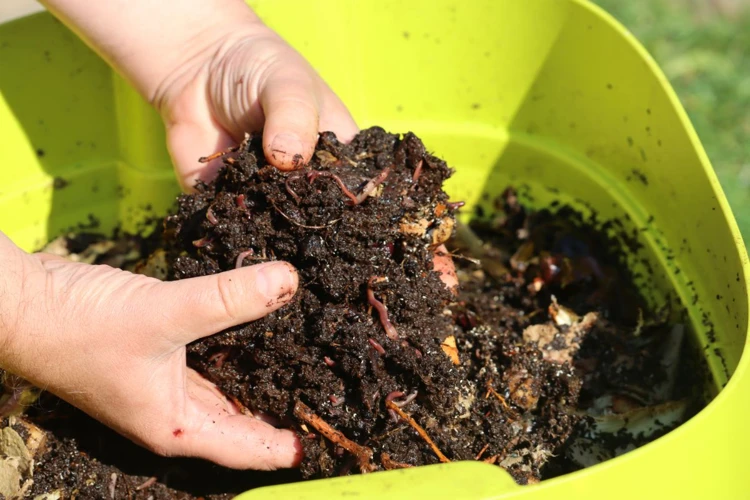
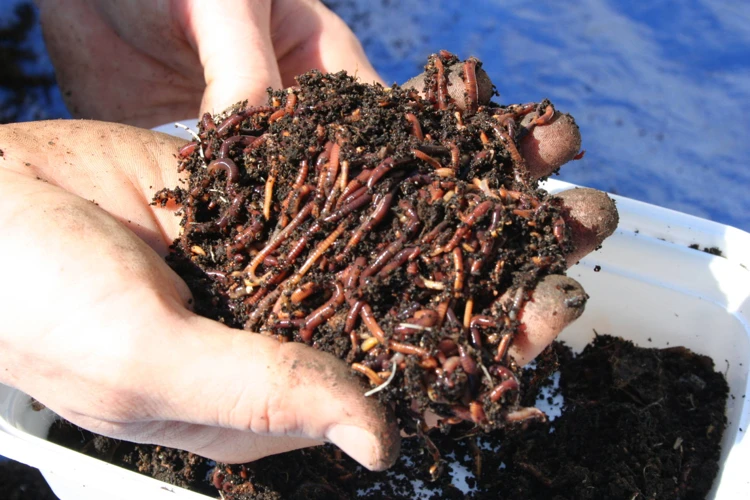
Adding Worms to Your Bin
Now that your worm bin is set up, it’s time to add the stars of the show – the worms! It’s important to choose the right type of worms for your vermicomposting bin. You’ll want to use a species called Eisenia fetida, also known as red wigglers.
When adding worms to your bin, there are a few important points to keep in mind:
| Step | Details |
|---|---|
| 1. Start small: | Begin with adding a pound of red wigglers to your bin. This is enough to start the process of breaking down your organic material into vermicompost. |
| 2. Spread them out: | Spread the worms out evenly over the bedding material to allow them to adjust to their new home. |
| 3. Give them food: | Red wigglers can eat up to half their weight in organic material per day, so be sure to add food scraps to the bin regularly. |
| 4. Avoid overfeeding: | While it may be tempting to add a lot of food scraps at once, it’s important not to overfeed the worms. Start with small amounts and gradually increase the quantity as the worms adjust to their new environment. |
| 5. Cover the food: | Always cover the food scraps with a layer of bedding material to prevent odors and fruit flies. |
| 6. Keep the bin moist: | Red wigglers breathe through their skin, so it’s important to keep the bedding material moist, but not soaking wet. |
| 7. Be patient: | It may take a few weeks for the worms to adjust to their new environment and begin composting the organic material. |
Adding worms to your vermicomposting bin is an exciting step in the process, and with a little bit of patience and care, you’ll soon have a thriving worm colony that will help you create nutrient-rich vermicompost for your cannabis plants.
Composting with Worms
Now that you have set up your worm bin, it’s time to start composting with worms. You may be wondering, how exactly does vermicomposting work? Well, it’s a simple and natural process where worms eat organic material and turn it into nutrient-rich worm castings, also known as vermicompost. The result is a highly effective and eco-friendly fertilizer that can greatly benefit your cannabis plants. But before you start composting, let’s take a closer look at what to compost and what to avoid, as well as how to troubleshoot any issues that may arise.
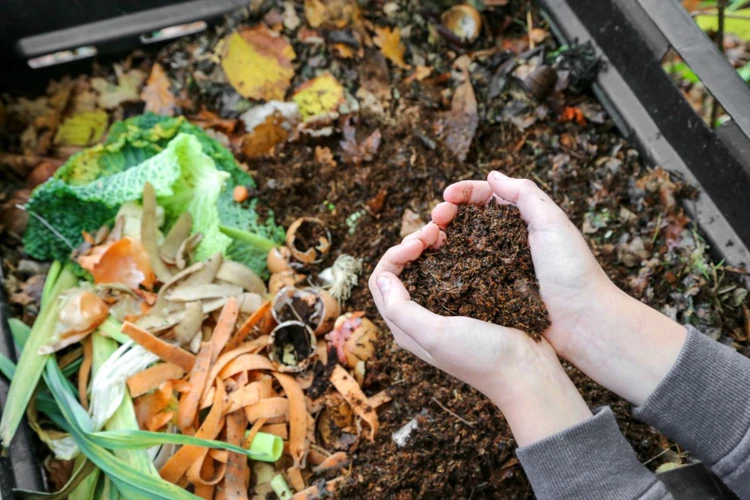
What to Compost
When it comes to composting with worms, it’s important to know what materials are suitable for your worm bin. Here are some items that can be successfully composted with worms:
| Fruit and vegetable scraps | Coffee grounds and tea leaves | Eggshells |
|---|---|---|
| Leftover fruits and vegetables are a great source of nutrition for your worms. Cut them up into small pieces to help speed up the decomposition process. | Coffee grounds and tea leaves are high in nitrogen which is essential for a healthy worm bin. They also help to balance the pH of the compost. | Eggshells provide calcium for your worms and can help to regulate the acidity of the compost. Crush them up before adding them to your bin. |
| Newspaper and cardboard | Leaves and grass clippings | Shredded paper |
| Newspaper and cardboard provide carbon which is necessary for a healthy worm bin. They also help to balance the moisture levels of the compost. | Leaves and grass clippings are good sources of nitrogen and can provide structure to the compost. Make sure they are chopped up before adding them to your bin. | Shredded paper is another great source of carbon. Avoid glossy or colored paper and make sure to soak it in water before adding it to the bin. |
By composting these materials, you can ensure that your worms have a balanced and healthy diet, which in turn will give you nutrient-rich vermicompost for your cannabis plants.
What Not to Compost
When it comes to composting with worms, there are certain things that you should avoid adding to your compost bin. Here are some items that you should not compost:
- Meat, dairy, and oily foods: These items can attract unwanted pests and can also cause unpleasant odors to emerge from your bin.
- Manure from carnivorous animals: Such as meat-eating pets as their manure can contain parasites and bacteria that can harm your plants.
- Large branches, twigs, or wood chips: These materials take a long time to break down and can take up valuable space in your compost bin.
- Chemically-treated wood or wood products: These materials can contain harmful substances that can be transferred to your plants.
- Coal or charcoal ash:
- Anything coated with synthetic chemicals: Such as glossy paper, colored paper, magazines or wrapping paper.
It is essential to keep in mind that in vermicomposting, worms play a crucial role in breaking down the organic matter into rich, nutrient-laden compost. Any waste items that can negatively impact or kill the worms should always be avoided. By following the above tips and keeping a close eye on your compost, you can ensure that your vermicompost stays healthy and free from unwanted substances.
Troubleshooting Common Issues
When composting with worms, there are some common issues that may arise. Here are some troubleshooting tips to help you overcome them:
| Issue | Troubleshooting |
|---|---|
| Moisture | Problem: Worm bin is too wet or too dry. Solution: To increase moisture, add water and mix bedding. To decrease moisture, stop adding water and add dry bedding material such as shredded paper or leaves. |
| Odor | Problem: The worm bin has a strong, unpleasant smell. Solution: Stop adding food scraps for a few days and add more bedding material to absorb excess moisture. Make sure the bin is well-ventilated. |
| Pests | Problem: Other insects such as fruit flies or mites are present in the bin. Solution: Put a layer of dry bedding material such as shredded paper or leaves on top of the bin to exclude light and discourage pests. |
| Worms Dying | Problem: Worms are dying unexpectedly. Solution: Check the moisture levels and adjust accordingly. Make sure the bin is not too hot or too cold. Avoid adding foods that are too acidic or salty. |
| Slow Composting | Problem: The composting process seems very slow. Solution: Make sure the worms have enough food to eat. Avoid adding too much food at once. Make sure the bin is not too dry or too wet. |
By following these tips, you can troubleshoot common issues when composting with worms and ensure a healthy and productive worm bin.
Using Vermicompost for Cannabis
After successfully setting up your worm bin and composting with worms, you will reap the rewards of your efforts in the form of nutrient-rich vermicompost. But what can you do with this magic soil amendment? Fear not, as we delve into the practical uses of vermicompost specifically for cultivating cannabis. From the benefits of vermicompost to how much to use and when, we’ve got you covered. Let’s explore the ways in which vermicompost can take your cannabis cultivation to the next level.
Benefits of Vermicompost
Vermicompost, also known as worm castings, is a nutrient-rich organic fertilizer that is produced by earthworms. There are many benefits of using vermicompost in your cannabis grow, including:
- Improved Soil Quality: Vermicompost improves soil structure, making it easier for roots to penetrate and absorb nutrients.
- Increase in Nutrient Availability: The organic matter in vermicompost is broken down by worms, releasing essential macronutrients (such as nitrogen, phosphorus, and potassium) and micronutrients (such as calcium, magnesium, and iron) that are vital for healthy plant growth.
- Reduction in Soil-Borne Diseases: Vermicompost contains beneficial microorganisms that help suppress soil-borne plant diseases, reducing the need for chemical pesticides and fungicides.
- Environmental Sustainability: Vermicomposting is an eco-friendly way to recycle organic waste and create a valuable resource that benefits both plant and soil health.
- Cost-Effective: Using vermicompost can reduce the need for costly synthetic fertilizers and other soil amendments, saving money in the long run.
Vermicompost is a highly beneficial and sustainable way to improve soil quality, increase nutrient availability, and promote healthy plant growth in your cannabis garden.
How to Use Vermicompost
Once you’ve successfully created vermicompost, it’s time to use it to give your cannabis plants a boost. The ideal way to use vermicompost is to combine it with soil to create a nutrient-rich growing medium. You can also use it as a top dressing or soil amendment.
To use vermicompost, follow these simple steps:
| Step | Instructions |
|---|---|
| 1 | Start by preparing your soil. If you’re using vermicompost as part of your growing medium, mix it with soil at a ratio of 1:4 (one part compost to four parts soil). This will create a nutrient-rich environment for your cannabis plants. |
| 2 | Alternatively, you can use vermicompost as a top dressing. Spread a thin layer of vermicompost on top of the soil around your cannabis plants. This will slowly release nutrients into the soil as it breaks down. |
| 3 | If you’re amending your soil with vermicompost, make sure to mix it in thoroughly. This will ensure that the nutrients are evenly distributed throughout the soil. |
| 4 | Water your plants as usual, taking care not to overwater. Vermicompost retains moisture well, so you may need to adjust your watering schedule accordingly. |
By using vermicompost, you’ll be providing your cannabis plants with a balanced blend of nutrients, including nitrogen, phosphorus, potassium, and calcium. These nutrients are released slowly over time, ensuring that your plants have a steady supply of nutrients throughout their growth cycle.
Remember, it’s important to source high-quality vermicompost from a reliable supplier to ensure that it’s free of contaminants and harmful pathogens. With the right care and attention, vermicompost can be a valuable tool for any cannabis grower looking to boost yield and improve plant health.
How Much to Use
When using vermicompost for cannabis, it’s important to know how much to use. Using too little won’t provide the full benefits, while using too much can potentially harm the plants. As a general rule, you can use about 1/4 to 1/2 cup of vermicompost per gallon of soil. However, the exact amount can depend on a few factors.
The type and quality of vermicompost: Not all vermicompost is created equal. Some may be more potent than others, and some may have a higher or lower nutrient content. Before using the vermicompost, it’s a good idea to test it to determine its nutrient levels.
The stage of growth: Plants may require different amounts of nutrients at different stages of growth. For example, during the vegetative stage, plants require more nitrogen for leaf and stem growth, while during the flowering stage, they require more phosphorus and potassium for bud development. It’s important to adjust the amount of vermicompost used accordingly.
The size of the pot: The larger the pot, the more soil and vermicompost you’ll need. Ensure you’re using the proper amount based on the size of your container.
To summarize, to determine how much vermicompost to use, consider the type and quality of the vermicompost, the stage of growth of the plants, and the size of the pot. Using a starting point of 1/4 to 1/2 cup per gallon of soil is a good rule of thumb. Remember, it’s always better to start with less and gradually increase the amount until you find the perfect balance for your plants.
When to Use Vermicompost
When to Use Vermicompost:
Determining when to use vermicompost for your cannabis plants depends on several factors, including the growth stage of the plants and the quality of the vermicompost. Here are some guidelines to follow:
| Growth Stage | When to Use Vermicompost |
|---|---|
| Seedling Stage | Wait until the plants have developed their first set of true leaves before adding vermicompost. Too much nutrients at this stage may harm the delicate roots. |
| Vegetative Stage | During this growth stage, cannabis plants require more nitrogen and other macronutrients. Vermicompost can be added to the soil or used as a top dressing every 4-6 weeks to supplement these nutrients. |
| Flowering Stage | It is best to limit the use of vermicompost during the flowering stage as too many nutrients can lead to excessive foliage growth and reduce the size and potency of the buds. Use a moderate amount of vermicompost during the first half of the flowering stage and stop using it during the last 2-3 weeks before harvesting. |
Note: It is important to monitor the pH levels of your soil when using vermicompost to avoid acidifying the soil. Test the pH levels regularly and adjust as needed. Also, it is important to use high-quality vermicompost that is free from contaminants and pathogens. Check for any unusual odors or appearance before use. By following these guidelines, you can ensure that your cannabis plants receive the proper amount of nutrients from vermicompost at the right time to promote healthy growth and high-quality buds.
Conclusion
In conclusion, vermicomposting is an excellent method of composting for cannabis plants. By using worms to break down organic matter, you can create a nutrient-rich soil amendment that is perfect for promoting healthy growth, strong root development, and higher yields.
Benefits of Vermicompost
Vermicompost has a number of benefits over traditional composting methods. Firstly, it is much faster, as the worms digest the organic matter much quicker than bacteria alone. Secondly, the end product is much more nutrient-rich, with high levels of beneficial microorganisms, enzymes, and minerals that are essential for plant growth. Finally, vermicompost is also more pH balanced, making it perfect for cannabis, which prefers a slightly acidic soil.
How to Use Vermicompost
Using vermicompost is easy. Simply mix it into the soil in a 1:1 ratio or top dress your plants with a 1/2 inch layer once a month. This will provide your plants with a slow-release source of nutrients and beneficial microorganisms that will improve the health and resilience of your cannabis plants.
How Much to Use
When using vermicompost as a soil amendment, aim to use around 20-30% by volume in your soil mix. If top dressing, use a 1/2 inch layer once a month.
When to Use Vermicompost
You can use vermicompost throughout the entire cannabis growing cycle, from start to finish. However, it is particularly beneficial during the vegetative and flowering stages, when your plants require a lot of nutrients and energy to produce healthy foliage and buds.
In summary, vermicomposting is a simple and effective way to produce high-quality compost that is perfect for cannabis plants. By following the steps in this beginner’s guide, you can create a worm bin, compost your organic waste, and use the resulting vermicompost to promote healthy growth and higher yields in your cannabis plants.
Frequently Asked Questions
Can I use any type of worm for vermicomposting?
No, it is recommended to use red wriggler worms (Eisenia fetida) for vermicomposting.
What materials can I compost with worms?
You can compost organic materials such as fruit and vegetable scraps, coffee grounds, tea bags, eggshells, and shredded paper with worms.
How long does vermicomposting take?
Depending on the size of your worm bin and the amount of organic materials you add, vermicomposting can take anywhere from 2-6 months.
Do I need a special container to vermicompost?
Yes, you will need a container specifically designed for vermicomposting. You can purchase one or make your own.
Can I add cannabis waste to my vermicomposter?
No, cannabis waste should not be added to your vermicomposter as it can attract unwanted pests and contain harmful chemicals.
How do I know if my worms are healthy?
Healthy worms will be active, eat regularly, and produce dark, crumbly castings.
Can vermicompost be used in hydroponic systems?
Yes, vermicompost can be used in hydroponic systems as a nutrient-rich soil substitute.
How often should I feed my worms?
Worms should be fed every 2-3 days, or when their previous food scraps have been consumed.
Can vermicomposting be done indoors?
Yes, vermicomposting can be done indoors as long as there is proper ventilation and the container is not in direct sunlight.
What should I do with excess vermicompost?
You can use excess vermicompost as a soil amendment for other plants or save it for future use.

