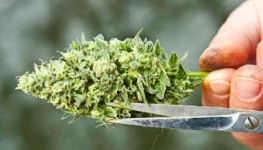
Different Techniques for Trimming Cannabis Buds
If you’ve ever grown or used cannabis, you probably know that one of the most important steps in the process is trimming the buds. However, with so many techniques and tools available, it can be overwhelming to choose the right one for your needs. That’s why we’ve put together this comprehensive guide to help you navigate the world of bud trimming. Whether you’re looking to improve potency and flavor, or just want to store your buds properly, we’ve got you covered. So sit back, grab your trimming tools, and get ready to learn all about the different techniques for trimming cannabis buds.
Why Trim Buds?
Contents
If you’ve ever wondered why trimming buds is such an important step in the cultivation process of cannabis, you’re not alone. But as it turns out, trimming buds serves a crucial purpose in enhancing the potency and flavor of the final product. By removing excess leaves and stems, you enable the buds to shine and deliver a more potent experience with no harsh, grassy taste. In the following sections, we’ll explore the different techniques and tools involved in trimming cannabis, so you can elevate your growing game and enjoy a premium harvest.
Improve Potency and Flavor
One of the most important reasons to trim your cannabis buds is to improve potency and flavor. When you remove excess leaves and stems from your buds, you increase the flower-to-leaf ratio, which results in a more concentrated and potent product. This is because the trichomes, which contain the cannabinoids and terpenes that give cannabis its psychoactive and aromatic properties, are concentrated on the flower buds.
Excess leaves and stems can detract from the flavor of your cannabis, making it taste harsh and unpleasant. By removing these parts, you can improve the smoke quality and flavor profile, resulting in a more enjoyable experience.
To further understand the benefits of trimming, refer the following table:
| Benefits of Trimming | Explanation |
|---|---|
| Higher potency | Removing excess leaves and stems concentrates the trichomes, which contain the cannabinoids and terpenes that give cannabis its psychoactive and aromatic properties. |
| Better flavor | Excess leaves and stems can detract from the flavor of your cannabis, making it taste harsh and unpleasant. By removing these parts, you can improve the smoke quality and flavor profile. |
| Improved appearance | Trimming your buds removes excess foliage, resulting in a more attractive and aesthetically pleasing product. |
| Better airflow | Removing excess leaves and stems allows for better airflow, which can prevent the growth of mold and other harmful pathogens. |
Tools Needed for Trimming Buds
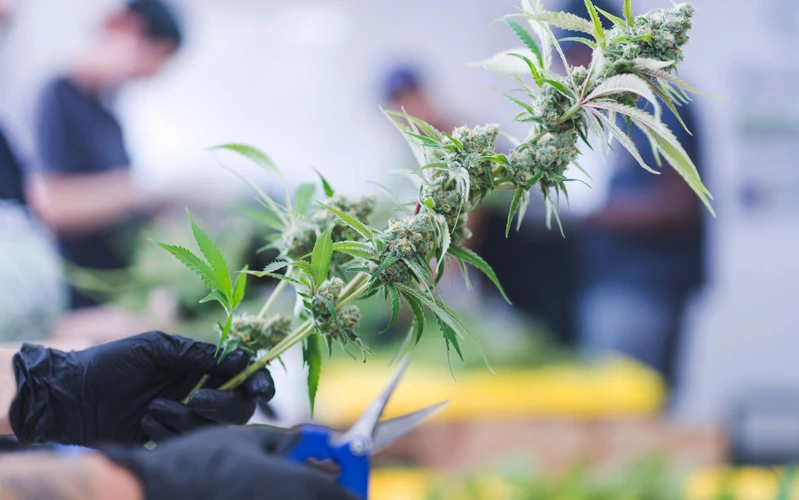
When it comes to trimming cannabis buds, having the right tools is essential for achieving a quality finished product. The list of tools needed for trimming buds includes a pair of sharp trimming scissors, pruning shears or a simple pair of scissors for removing larger leaves, gloves to keep your hands clean and protect the trichomes, a large flat surface to work on, and containers for storing the trimmed buds.
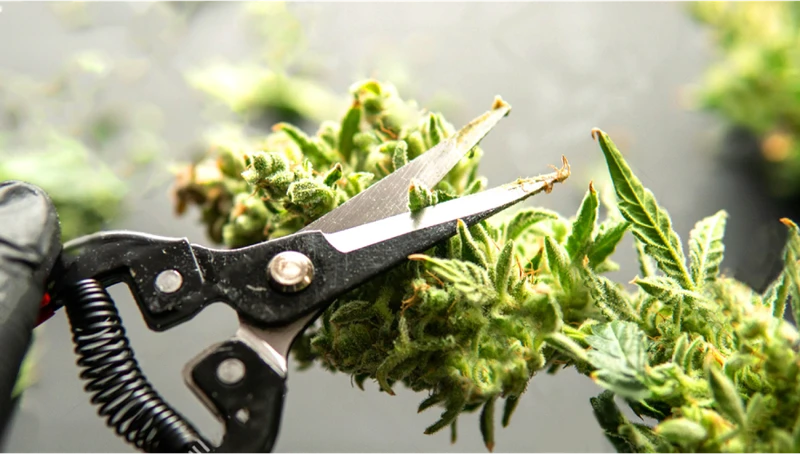
One of the most important tools for trimming cannabis buds is the scissors. Sharp trimming scissors are crucial for precision trimming and will make the process much easier and more efficient. Another option for removing larger leaves is pruning shears, which are ideal for larger plants with broad leaves. A simple pair of scissors can also be used in a pinch for removing larger leaves.
Wearing gloves during the trimming process is highly recommended. Not only will this help keep your hands clean, but it will also prevent the sticky trichomes from sticking to your skin and potentially reducing the potency of the buds.
Having a large flat surface to work on, such as a table or tray, is also essential for a smooth trimming process. This surface should be clean and free from debris, and ideally positioned at a comfortable height to prevent strain on your back and neck.
Finally, containers are necessary for storing the trimmed buds. These can include large jars, plastic or glass containers, or bags specifically designed for cannabis storage. It’s important to choose a container that will keep the buds fresh and prevent them from drying out or becoming too moist.
Having the right tools on hand will make the trimming process easier, quicker, and more enjoyable, and will ultimately result in a higher quality finished product.
Wet Trimming vs. Dry Trimming
The process of trimming cannabis buds is crucial for achieving high-quality end products. However, before you start the trimming process, there is an important decision to make: whether to wet trim or dry trim your buds. Both techniques have their benefits and drawbacks, and choosing the right one can be perplexing for novice growers. In this section, we will guide you through the differences between wet and dry trimming, their pros and cons, and help you make an informed decision for your cannabis trimming process.
Benefits and Drawbacks of Wet Trimming
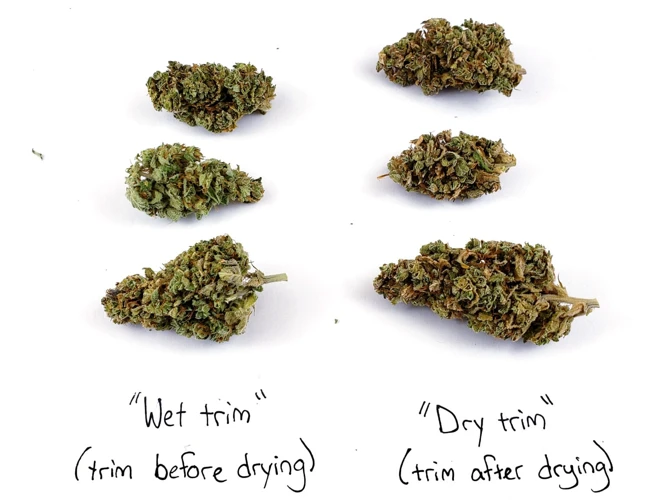
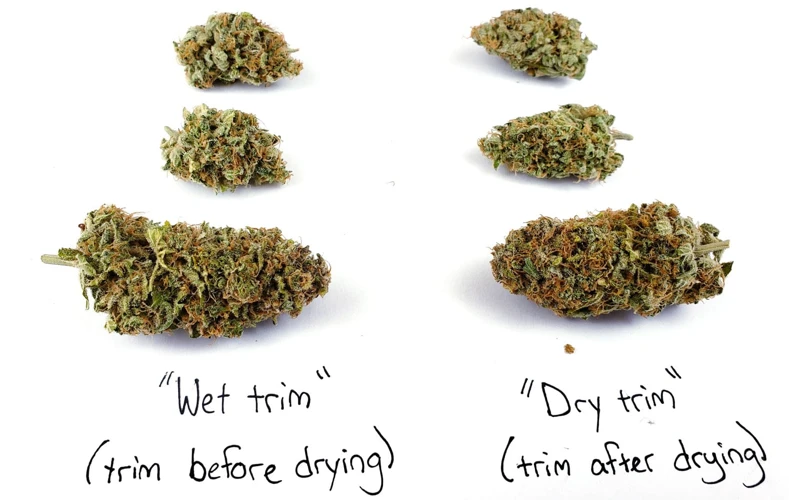
Wet trimming and dry trimming are the two main techniques for trimming cannabis buds. Wet trimming involves cutting down and trimming the plants immediately after harvest while they are still wet. Here are the benefits and drawbacks of wet trimming:
| Benefits of Wet Trimming | Drawbacks of Wet Trimming |
|---|---|
| Quicker turnaround time: Wet trimming allows for a quicker turnaround time since the buds can be dried and cured immediately after trimming. | Risk of mold and mildew: Wet buds are more susceptible to mold and mildew growth during storage since they still contain moisture. |
| Easier to handle: Since the buds are still wet, they’re easier to handle and manipulate during the trimming process. | Less flavor: Wet trimming can result in a loss of flavor and aroma since the terpenes are still present in the wet buds and can be lost during the trimming process. |
| Less trichome damage: Wet trimming can result in less damage to the trichomes since they are still plump with moisture and less likely to break off during handling. | Sticky residue: Wet trimming can leave a sticky resin residue on your trimming tools, making them harder to clean and maintain. |
Wet trimming can be a good option for those looking for a quicker turnaround time and easier handling during the trimming process. However, it’s important to keep in mind the drawbacks such as the risk of mold and mildew growth and loss of flavor/aroma.
Benefits and Drawbacks of Dry Trimming
Dry trimming involves trimming the buds after they have been dried. Here are the benefits and drawbacks of this method:
| Benefits of Dry Trimming | Drawbacks of Dry Trimming |
|---|---|
| Dry trimming is easier to do since the leaves are dry and don’t stick to each other. | Some trichomes may fall off during the drying process, resulting in lower potency and flavor. |
| You can take your time since the buds will not dry out too quickly as in wet trimming. | It is easier to damage the delicate trichomes while handling the dry buds. |
| Dry trimming allows for better control over the final appearance of the buds. | Dry trimming can take more time and effort than wet trimming since each bud must be handled individually. |
| The buds will have a longer shelf life since they will not contain excess moisture that could lead to mold growth. | If the buds are not properly trimmed, they may contain excess plant material that could affect the taste and smoothness of your smoke or vapor. |
Overall, dry trimming is a good option for those who want more control over the final appearance of their buds and who want to take their time during the trimming process. However, it can result in lower potency and flavor if trichomes are lost during the drying process. It takes more time and effort to dry trim, but it can lead to higher quality buds if done correctly.
Hand-Trimming vs. Machine Trimming
When it comes to trimming cannabis buds, the age-old debate between hand-trimming and machine trimming still rages on. While some cannabis growers swear by hand-trimming for its precision and care, others recommend machine-trimming for its speed and efficiency. Both techniques have their pros and cons, and ultimately the decision of which method to use depends on a grower’s personal preference and the size of their crop. Let’s take a closer look at the benefits and drawbacks of each technique.
Pros and Cons of Hand-Trimming
Pros of Hand-Trimming:
- Hand-trimming ensures each bud is given individual attention, resulting in a cleaner trim compared to machine-trimming.
- Hand-trimming allows for greater control over the final shape and appearance of the buds, preserving their unique characteristics.
- Hand-trimming tends to be more gentle on the buds, resulting in less damage to trichomes and preserving overall potency.
- Hand-trimming can be a meditative and relaxing process for some, allowing for a stronger connection to the plant and resulting in higher quality trimming.
Cons of Hand-Trimming:
- Hand-trimming can be time-consuming and labor-intensive, especially for large quantities of buds.
- Hand-trimming is more subjective and relies heavily on the skill and experience of the trimmer, which can lead to inconsistent results.
- Hand-trimming can potentially lead to physical strain or repetitive motion injuries for the trimmer.
- Hand-trimming may require additional tools and equipment such as specialized trimming scissors or gloves, increasing the cost of the trimming process.
Hand-trimming is a preferred method for many cannabis connoisseurs and craft growers who prioritize the appearance, potency, and overall quality of their buds. However, it may not be the most efficient method for large commercial operations or those with limited time and resources.
Pros and Cons of Machine Trimming
Using a machine for trimming cannabis buds has several pros and cons. Here are some of them:
- Pros:
- Ease and speed – using a machine for trimming buds is faster and easier when compared to hand-trimming. It is especially beneficial when working with a large number of plants.
- Consistency – a machine can provide consistent trimming, ensuring that all buds are evenly cut and of similar size and shape. This can be difficult to achieve with hand-trimming.
- Reduced labor costs – since machines are faster, you may need fewer employees for your trimming process, which can save you money on labor costs.
- Cons:
- Lack of control – using a machine takes away the control that you have with hand-trimming. It can also trim off more leaves and trichomes, which can reduce the potency and flavor of your buds.
- Expensive – purchasing a quality trimming machine can be expensive upfront. Additionally, maintenance costs and repairs can add up.
- Potential damage to buds – machines can be rough on buds, which can damage them or knock off trichomes. This can result in lower quality buds.
It is important to weigh the pros and cons of each trimming method before deciding which one to use. Machine-trimming may be a good option for large-scale operations, but hand-trimming may be preferred for smaller, high-quality growers who value attention to detail and quality control. Ultimately, the choice depends on the size of your operation and your personal trimming preferences.
How to Hand-Trim Cannabis Buds
When it comes to trimming cannabis buds, many growers prefer to do it by hand. The process of hand-trimming allows for delicate precision and control, ensuring that only the necessary parts are removed. However, for those who are new to this technique, it can be overwhelming to know where to start. In this section, we will take a closer look at the step-by-step process of hand-trimming cannabis buds, as well as some helpful tips for a successful trim.
Step-by-Step Guide to Hand-Trimming
When it comes to hand-trimming cannabis buds, having the right tools and technique is key. Here is a step-by-step guide to successfully hand-trimming your buds:
| Step | Action |
|---|---|
| Step 1 | Prepare your workspace: Set up a clean, well-lit area with a comfortable chair to sit in. Consider using a trimming tray or large baking sheet to catch excess trim and keep your workspace organized. |
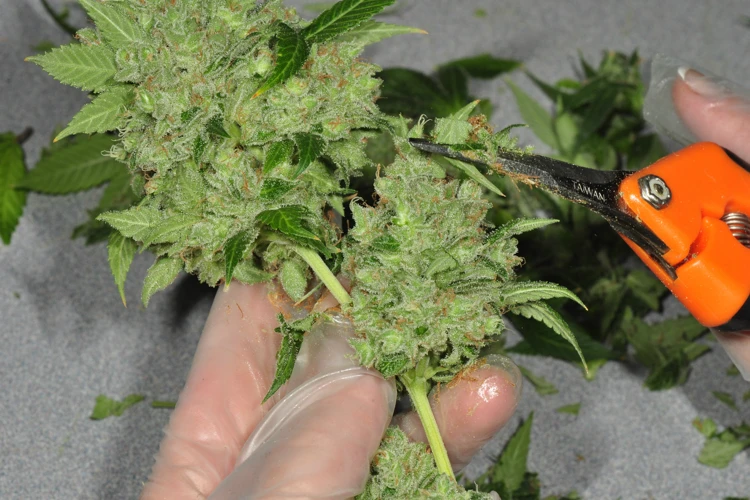
| Step 2 | Prepare your buds: Use a pair of scissors or pruning shears to remove larger fan leaves and stems from your buds. This will make it easier to focus on trimming the smaller sugar leaves. |
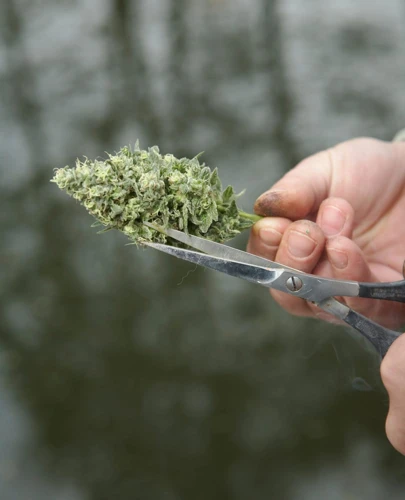
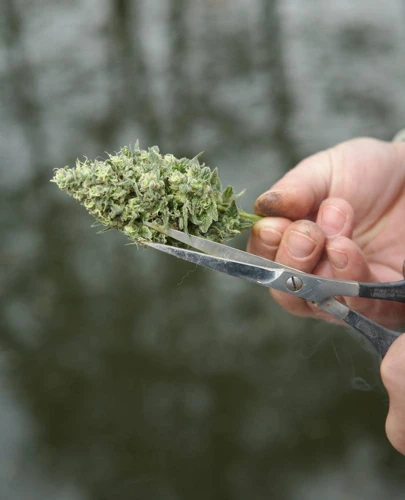
| Step 3 | Start trimming: Hold a bud in one hand and use a pair of sharp scissors in the other hand to carefully snip off the sugar leaves that surround the buds. Work your way around the bud, taking care not to cut off too much or damage the trichomes. |
| Step 4 | Continue trimming: Move on to the next bud and repeat the process until all of your buds are trimmed. Take breaks as needed to rest your hands and avoid cramping. |
| Step 5 | Clean up trim: Once you have finished trimming, use a scraper or brush to collect any excess trim on your trimming tray or baking sheet. |
| Step 6 | Inspect your buds: Take a close look at your buds to make sure they are evenly trimmed and free from any excess sugar leaves or hairs. If you notice any areas that need further trimming, carefully snip away any remaining leaves. |
| Step 7 | Final touches: Gently shape and manipulate your buds to improve their appearance and remove any excess trim. You may also want to weigh your buds at this stage to measure your yield. |
Remember, hand-trimming takes time and patience. Be sure to take breaks as needed to rest your hands and avoid cramping.
Tips for a Successful Hand-Trimming
To ensure that your hand-trimming process goes smoothly, here are some tips that you can follow:
- Use sharp trimming scissors: Dull scissors can make the trimming process more difficult and may damage the buds. Make sure you use sharp trimming scissors that can provide a clean cut.
- Keep your trimming scissors clean: Resin buildup on your trimming scissors can make them sticky and harder to use. Use rubbing alcohol to clean your trimming scissors regularly.
- Work in a clean and organized space: Trimming can be a messy process. Make sure your workspace is clean and organized to minimize the mess and reduce the risk of contaminating your buds.
- Choose a comfortable seating position: Hand-trimming can be a time-consuming process, so make sure you’re comfortable. Choose a seating position that won’t strain your back or neck.
- Trim slowly and carefully: Take your time when trimming your buds to avoid accidentally cutting off too much or damaging the buds.
- Trim the larger leaves first: Start by trimming the larger fan leaves before moving on to the smaller sugar leaves. This can help you get a better view of the buds and ensure a more precise trim.
- Use the right amount of pressure: Apply enough pressure to remove the leaves but not so much that you damage the buds. It may take some practice to find the right balance.
- Take breaks: Trimming can be tedious work, so take breaks frequently to rest your hands and avoid fatigue. This can also help you maintain focus and attention to detail.
- Wear gloves: Wearing gloves can help prevent contamination of your buds and minimize damage from the oils on your skin.
By following these tips, you can improve the quality and uniformity of your hand-trimmed buds. Remember to take your time, stay focused, and enjoy the process.
How to Machine-Trim Cannabis Buds
For some people, hand-trimming cannabis buds is simply too time-consuming and labor-intensive. If you’re one of those folks, consider a machine trimmer to get the job done faster. These devices are becoming increasingly popular, but many people are unsure how to use them properly. In this section, we’ll walk you through the steps on how to machine-trim cannabis buds, so you can get the job done quickly and efficiently.
Step-by-Step Guide to Machine-Trimming
When it comes to machine-trimming cannabis buds, it’s important to have the right equipment and to follow the proper steps to ensure a successful trimming process. Here is a step-by-step guide for machine-trimming cannabis buds:
Step 1: Make sure your trimming machine is properly set up and cleaned. This includes ensuring the blades are clean and properly lubricated, and the machine is adjusted to the appropriate trimming level for your buds.
Step 2: Remove any large stems or leaves from your cannabis buds before placing them in the trimming machine.
Step 3: Load your buds into the trimming machine, being careful not to overload it. You may need to run smaller batches through the machine to ensure a thorough trim.
Step 4: Turn the machine on and let it run for the appropriate amount of time, typically around 5-10 minutes depending on the strain and size of the buds.
Step 5: Once the machine has finished trimming, turn it off and remove the buds. Use a small brush to remove any excess plant material left behind by the machine.
Step 6: Inspect your buds for any missed spots or areas that may need further trimming. Hand-trim any remaining areas as necessary.
Step 7: Dry and cure your trimmed buds according to your preferred method.
Remember, while machine-trimming can be a time-saving option, it may not always provide the same level of precision as hand-trimming. Always supervise the machine during the trimming process and be prepared to hand-trim any missed areas.
Tips for a Successful Machine-Trimming
Successful machine-trimming requires careful planning and execution. Here are some tips to ensure the process goes smoothly:
- Choose the right machine: There are many different types of trimming machines available, each with its own set of features and benefits. Research and invest in a high-quality machine that’s suited to your needs and budget.
- Prepare your buds: Before placing your buds in the trimming machine, make sure they are correctly dried and cured. Buds that are too moist or still attached to the stem will not trim properly and will clog the machine.
- Run a test batch: Before running a full batch, test the machine with a small amount of buds to make sure it’s functioning correctly. This will also give you an idea of how long the trimming process will take.
- Monitor the process: Keep an eye on the trimming process to ensure the buds are being evenly trimmed. Adjust the machine settings if necessary to achieve the desired trim level.
- Clean the machine: After each use, thoroughly clean the machine to prevent buildup and clogging. This will also ensure the longevity of the machine.
- Quality check: Once the trimming process is complete, take some time to inspect the buds. Remove any remaining leaves or stems manually to ensure the final product looks and smokes great.
By following these tips, you can achieve a successful machine-trimming process and produce high-quality buds efficiently.
Dry and Cure Your Trimmed Buds
After spending hours meticulously trimming your cannabis buds, the last thing you want is for them to lose their flavor and potency. This is where the drying and curing process comes in. Properly drying and curing your buds can enhance their flavor and aroma, and increase their potency. In this section, we will discuss the important steps of drying and curing your trimmed buds. We’ll explore different techniques and highlight some common mistakes to avoid, so you can enjoy the fruits of your labor to the fullest.
How to Dry Your Buds after Trimming
Drying your buds properly is an essential step in the post-trimming process. Here are some steps you can follow to dry your buds after trimming:
| Step | Description |
|---|---|
| Step 1: | Hang your trimmed buds upside down in a cool and dry room that has good ventilation. Do not expose them to direct sunlight or high temperatures. This will help the buds to dry evenly without getting too crisp or losing potency. |
| Step 2: | Use a fan or air circulator to provide proper airflow to the buds. This will prevent the growth of mold or mildew on the buds while they dry. Be careful not to aim the fan directly at the buds as it may dry them out too quickly. |
| Step 3: | Check your buds daily for dryness by gently squeezing them. If they feel crunchy on the outside but still moist on the inside, they need more drying time. If they are springy on the outside and dry on the inside, they are ready for the next step, which is curing. |
| Step 4: | When your buds are dry, remove them from the hanging area and separate the buds from the stems. This will make it easier to store and cure them. |
Proper drying will help to preserve the flavor and potency of your buds. It will also help prevent mold or mildew growth, which can spoil your entire crop. Be patient and follow these steps carefully to ensure that your buds are properly dried before storing or curing them.
How to Cure Your Buds after Trimming
Curing your buds after trimming is an important step in the process that shouldn’t be overlooked. By curing your buds, you not only ensure they retain their quality and flavor, but also reduce the risk of mold growth. Here are some steps to follow when curing your buds:
- Step 1: Place your trimmed buds in a large, airtight container. Glass jars work well for this purpose.
- Step 2: Keep the jars in a cool, dark place, such as a closet or storage room. The temperature should remain between 60-70 degrees Fahrenheit.
- Step 3: Open the jars for 10-15 minutes each day to allow the buds to “breathe” and release any excess moisture. You can also use humidity packs to regulate the humidity if needed.
- Step 4: Check the buds regularly for mold or mildew, discarding any that appear damaged.
- Step 5: Continue the curing process for 2-4 weeks, depending on your preferences. The longer you cure the buds, the smoother and more potent they will become.
When your buds are fully cured, you’ll notice a distinct improvement in their flavor and potency. By following these steps, you’ll be able to enjoy the full benefits of your freshly trimmed cannabis buds.
How to Store Your Trimmed Buds
After the long and careful process of trimming your cannabis buds, it’s important to store them correctly to maintain their potency and flavor. Storing them properly will also extend their shelf life and prevent mold and bacterial growth. However, with so many different storage options and methods available, it can be perplexing to decide which one is the best for your trimmed buds. In this section, we’ll give you some pointers on the best storage practices and how to keep your buds fresh for as long as possible.
Best Storage Practices for Trimmed Buds
Proper storage of trimmed cannabis buds is crucial to maintain their potency and flavor. Below are some best practices for storing trimmed buds:
| Storage Approach | Recommendations |
|---|---|
| Airtight Containers | Store buds in sealed containers such as mason jars, plastic containers, or vacuum-sealed bags to prevent air and moisture exposure. |
| Dark and Cool Location | Keep the sealed containers in a cool and dark place, away from direct sunlight and heat. Excessive heat and light can dry out and degrade the buds. |
| Humidity Control | Use a humidity control pack such as Boveda to maintain optimal humidity levels of 60-65%. This will prevent buds from getting too dry, which can impact their potency and flavor, or too moist, which can promote mold growth. |
| Rotation | Avoid keeping buds in storage containers for too long. Rotate the buds every few weeks to prevent the growth of mold or mildew and to ensure they maintain their potency and flavor. |
Following these storage practices will help you preserve your trimmed cannabis buds for months without losing their potency, flavor, or aroma. By taking care of your buds properly, you can enjoy a high-quality smoking experience every time you use them.
How to Keep Your Buds Fresh
After trimming and curing your buds, you want to make sure they stay fresh for as long as possible. Here are some tips for keeping your buds fresh:
| Tip | Description |
|---|---|
| Glass Jars | Store your buds in airtight glass jars. This prevents air and moisture from getting in, which can cause mold and mildew to grow on your buds. |
| Humidity Packs | Use humidity packs to maintain a consistent humidity level. Boveda packs are a popular brand that offers humidity packs specifically for storing cannabis. |
| Dark, Cool Place | Store your jars in a dark, cool place, such as a pantry or closet. Light and heat can damage cannabinoids and terpenes in your buds, affecting potency and flavor. |
| Avoid Freezing | Freezing can cause trichomes to become brittle and break off, reducing potency and flavor. If you need to store your buds for an extended period, opt for a fridge instead. |
| Avoid Plastic Bags | Plastic bags can trap moisture, leading to mold growth. They can also create static electricity, which can damage trichomes and affect potency. |
| Handle Carefully | When handling your buds, avoid touching them with your bare hands, as the oils on your skin can affect flavor. Use gloves or a set of tweezers instead. |
By following these tips, you can ensure that your buds stay fresh and potent for months to come. Remember to check on your buds periodically to ensure they are still in good condition, and discard any buds that show signs of mold or mildew.
Troubleshooting Trimming Problems
As much as we would like the trimming process to go smoothly every time, sometimes things don’t go as planned. It’s not uncommon to run into a few bumps along the way, no matter which technique or tools you choose to trim your buds. But don’t worry, with a little know-how and some troubleshooting skills, you can easily fix any issues that arise during trimming. In this section, we will explore some common problems that may occur during trimming and offer some solutions to help you salvage your precious buds.
How to Fix Over-Trimmed Buds
When it comes to trimming buds, it can be easy to get carried away and accidentally over-trim your buds. This can be a problem as it can result in a loss of potency and flavor, as well as a less visually appealing finished product. However, this issue can be fixed with a few simple steps.
Step 1: Assess the extent of the over-trimming. If it’s only a small amount, you may be able to salvage some of the excess material to use as shake or for making concentrates. However, if you’ve removed a significant amount, you may need to move on to step 2.
Step 2: If you’ve over-trimmed your buds, it’s important to rehydrate them. Dry buds can be harsh and unpleasant to smoke or vape, so by rehydrating them, you’ll not only help to restore some of the lost moisture, but you’ll also improve the overall quality of the buds.
Step 3: To rehydrate your over-trimmed buds, start by placing them in an airtight container with a humidity control pack. You can also use a small piece of fresh bread or a citrus peel to help add moisture to the buds.
Step 4: Leave the buds in the airtight container for 24-48 hours, checking them periodically to make sure they aren’t getting too moist. If you’re using a humidity control pack, be sure to follow the instructions to ensure proper use.
Step 5: After the buds have been rehydrated, you can then assess their quality. While rehydrating will help to restore some of the lost moisture, it may not fix all of the aesthetic issues caused by over-trimming. However, the buds should still be usable and have improved potency and flavor.
Step 6: If the buds still don’t look aesthetically pleasing, you can consider using them for making extracts or tinctures. While they may not be suitable for smoking or vaping, they can still be useful for other purposes.
While over-trimming buds can be frustrating, it’s important to remember that it can be fixed with a few simple steps. By taking the time to rehydrate and assess the quality of your buds, you can salvage your over-trimmed material and turn it into something useful.
How to Fix Under-Trimmed Buds
When it comes to trimming buds, it can be easy to accidentally under-trim certain areas. This can result in an uneven appearance and potentially affect the quality of the final product. However, there are ways to fix under-trimmed buds. Here are some steps you can take:
- Identify the under-trimmed areas: Take a close look at the buds and identify where the trimming is lacking. It could be on the sides, tops, or bottoms of the buds.
- Use trimming scissors: To fix under-trimmed areas, you’ll need a pair of trimming scissors. These are small, sharp scissors that allow you to carefully trim away excess leaves without damaging the buds.
- Gently trim away excess leaves: Starting with the under-trimmed areas, use the trimming scissors to gently trim away any excess leaves. Be careful not to cut into the buds themselves, as this can damage the trichomes and affect potency and flavor.
- Take breaks: Trimming can be a tedious and time-consuming task, so it’s important to take breaks and rest your hands as needed. This can help prevent mistakes and ensure that you’re able to trim effectively.
- Revisit the buds: Once you’ve trimmed the under-trimmed areas, take another close look at the buds to make sure they’re evenly trimmed. Repeat the trimming process as needed until you’re satisfied with the final result.
By following these steps, you can fix under-trimmed buds and ensure a high-quality final product. It may take some time and patience, but the end result will be well worth the effort.
How to Deal with Trichome Damage
When it comes to trimming cannabis buds, one of the most important considerations is the preservation of trichomes. Trichomes are tiny resin glands that contain the majority of the cannabinoids and terpenes that give cannabis its unique properties. Damage to trichomes can result in a loss of potency and flavor in your final product. Here are some tips on how to deal with trichome damage during the trimming process:
| Problem | Cause | Solution |
|---|---|---|
| Broken trichomes | Over-handling or rough trimming | Handle the buds gently during trimming, and use a sharp pair of trimming shears to reduce damage. |
| Missing trichomes | Under-trimming or trimming too close to the buds | Leave a small amount of plant matter on the buds to protect the trichomes during trimming. Use a magnifying glass to identify the trichomes and ensure they are preserved. |
| Discolored trichomes | Excessive heat or light exposure | Store your buds in a dark, cool place to prevent damage from light and heat. Avoid touching the buds with bare hands, as the oils from your skin can also damage the trichomes. |
Remember that trichome damage can occur at various stages of the growing and trimming process. It’s important to handle your buds gently and carefully to preserve these valuable resin glands. By taking the time to ensure that your buds are properly trimmed and cared for, you can produce a high-quality, potent final product that is sure to impress.
Conclusion
In conclusion, trimming cannabis buds is a crucial step in the post-harvest process that helps to improve the potency and flavor of your cannabis flower. Whether you choose to wet trim or dry trim, hand-trim or use a machine, the tools and technique you select will play a significant role in the quality of your final product.
It’s important to choose the right trimming method that works best for your needs and allows you to achieve the desired result. Moreover, proper drying and curing will ensure that your buds maintain their potency, flavor, and overall quality before storage.
By following the step-by-step guide and tips mentioned in this article, you’ll be able to trim your cannabis buds like a pro and avoid common trimming problems such as over-trimming, under-trimming, and trichome damage.
Remember, trimming is an art that requires patience, skill, and attention to detail. But with practice and the right tools, you’ll be able to master the art of trimming and produce quality cannabis buds that meet your personal standards. So, happy trimming and enjoy the fruits of your labor!
Frequently Asked Questions
What is the purpose of trimming cannabis buds?
Trimming cannabis buds improves their potency and flavor, as well as makes them more visually appealing.
What tools do I need for trimming cannabis buds?
You will need a pair of trimming scissors or shears, safety goggles, gloves, and a clean work surface.
What is the difference between wet trimming and dry trimming?
Wet trimming involves trimming buds immediately after harvesting, while they still contain moisture. Dry trimming involves waiting until the buds have dried before trimming.
What are the benefits of wet trimming?
Wet trimming is faster and easier, as the leaves are more pliable and easier to trim. It also helps to maintain the color and aroma of the buds.
What are the drawbacks of wet trimming?
Wet trimming can potentially damage the buds if they are handled too roughly. It also increases the risk of mold if the buds are not properly dried afterwards.
What are the benefits of dry trimming?
Dry trimming allows the buds to develop a more robust flavor profile and helps to preserve trichomes, which are the resinous glands that contain cannabinoids and terpenes.
What are the drawbacks of dry trimming?
Dry trimming is more time-consuming and labor-intensive. It also requires more storage space, as the whole plant must be hung up to dry before trimming.
What is the difference between hand-trimming and machine-trimming?
Hand-trimming involves using scissors or shears to carefully trim away excess leaves and stems from the buds. Machine-trimming is done using specialized equipment that mechanically cuts away the excess plant matter.
What are the pros of hand-trimming?
Hand-trimming allows for greater precision and control over the trimming process, which can result in higher quality buds with fewer trichomes lost during the trimming process.
What are the pros of machine-trimming?
Machine-trimming is faster and less labor-intensive than hand-trimming. It also reduces the risk of carpal tunnel syndrome, which can be a common problem associated with hand-trimming.

