
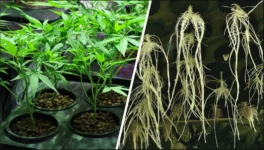
Transplanting Seedlings from Soil to Hydroponics: A Step-by-Step Guide
Starting a hydroponic garden can be a daunting task, especially if you’ve never done it before. However, with some basic knowledge and a bit of patience, anybody can learn how to grow healthy plants using a hydroponic system. One important step in this process is to transplant seedlings from soil to hydroponics. This can be tricky, but by following these step-by-step instructions, you can successfully move your plants to a hydroponic system and enjoy the benefits of faster growth and higher yields. Let’s get started.
Step 1: Prepare the New Hydroponic System
Contents
Before transplanting your seedlings from soil to hydroponics, it’s important to prepare your new hydroponic system to ensure the health and growth of your plants. This crucial step involves choosing a suitable location for your system, setting it up properly, and ensuring all necessary components are in place. By preparing your hydroponic system ahead of time, you’ll have everything you need to successfully transplant your seedlings and provide them with the optimal growing conditions they need to thrive. Let’s dive deeper into the process of preparing your new hydroponic system.
Choose a Location
One of the first steps in transplanting seedlings from soil to hydroponics is choosing a location to set up your new hydroponic system. This decision can greatly impact the success of your plants. Here are some factors to consider when choosing a location:
| Factor | Considerations |
| Lighting | Where will the hydroponic system receive enough natural or artificial light for the plants to grow properly? |
| Space | Do you have enough space to set up the hydroponic system and allow for proper airflow around the plants? |
| Temperature | Is the location easily temperature-controlled, with a range of 60-80 °F (15.5-26.6°C)? |
| Accessibility | Can you easily access the system for maintenance and monitoring? |
| Electricity and Water | Do you have access to a reliable source of electricity and water to power and fill the hydroponic system? |
Once you have taken these factors into consideration, you can choose the best location for your hydroponic system. This will ensure that your plants have optimal growing conditions and a higher chance of success.
Set Up the Hydroponic System
When setting up the hydroponic system, there are a few key steps to follow to ensure success. The following table outlines what you need to do:
| Step 1: | Choose a location |
| Step 2: | Assemble the system |
| Step 3: | Fill the system with water |
Step 1: Choose a location
When choosing a location for your hydroponic system, consider the following:
- The system should be placed in a spot that receives adequate sunlight or artificial light. Plants need light to grow, so make sure you choose a spot that receives at least six hours of sunlight per day.
- The system should be placed in an area with good air flow. This will help prevent mold and other issues by keeping the air circulating around the plants.
- The system should be placed on a stable surface. Make sure the surface can support the weight of the system once it’s filled with water.
Step 2: Assemble the system
Before filling your system with water, you need to assemble it. The exact steps will depend on the type of system you’re using, but most hydroponic systems will require you to:
- Attach the growing containers or trays to the system.
- Attach the tubing and pump to the system. The tubing will carry water from the reservoir to the growing containers or trays, while the pump will help circulate the water.
- Attach any other necessary components, such as a timer or air stone.
Step 3: Fill the system with water
Once your system is assembled, you can fill it with water. You’ll need to fill the reservoir with enough water to reach the bottom of the growing containers or trays. At this point, you can also add any nutrients to the water that your plants will need to grow properly.
By following these steps and setting up your hydroponic system correctly, you can ensure that your seedlings have the best possible chance of thriving in their new environment.
Step 2: Water the Soil
Now that you have prepared the new hydroponic system, it’s time to begin the process of transferring your seedlings from soil to the hydroponic setup. Before you can do this, you will need to ensure that the seedlings are well hydrated. This can be achieved by thoroughly watering the soil in which they are currently growing. It is important to note that the soil should be moist, but not waterlogged. In this step, we will go over the process of watering the soil in preparation for transplanting the seedlings to the hydroponic system. Let’s get started!
Water the Soil of the Seedling Container
Before transplanting your seedlings from soil to hydroponics, it’s essential to ensure that they are hydrated. To do this, you need to water the soil in the seedling container. This step prepares the seedlings for the transition from soil to water. Here are the steps to follow:
| Step 1 | Water the Soil of the Seedling Container |
| 1. | Fill a watering can with water. |
| 2. | Slowly pour the water over the soil in the seedling container. |
| 3. | Ensure that the soil is evenly moist, but not saturated. |
| 4. | Avoid getting water on the leaves of the seedlings, as this can cause damage or disease. |
This step is crucial, as it ensures that the seedlings will not experience shock when transplanted from soil to hydroponics. If the soil is too dry, the roots can become damaged during the removal process. On the other hand, if the soil is too wet, the roots will have a harder time adjusting to the new water-based environment. It’s important to ensure that the soil is evenly moist and not overly saturated. Once you have watered the soil, wait for it to soak up the water before moving on to the next step.
Allow the Soil to Soak Up the Water
Once you have watered the soil of the seedling container, it is important to allow it to soak up the water before attempting to remove the seedlings. This ensures that the soil is moist enough and will help prevent damage to the fragile roots of the seedlings. Here are the steps to properly allow the soil to soak up the water:
- Be patient: It can take anywhere from 30 minutes to a few hours for the soil to fully absorb the water. Avoid the temptation to rush the process by overwatering or attempting to remove the seedlings too soon.
- Check the soil: Gently press down on the soil with your finger to check if it is fully hydrated. You should aim for the soil to be damp but not waterlogged.
- Adjust as needed: If the soil is still dry, carefully add more water to the container. If the soil is too wet, you may need to wait a bit longer for it to dry out or consider using a paper towel to absorb some of the excess moisture.
- Keep an eye on the water level: As the soil soaks up the water, it may drain out of the bottom of the container. Make sure to keep an eye on the water level and add more water as needed to ensure the soil stays sufficiently moist.
By allowing the soil to properly absorb the water, you can ensure that your soil-to-hydroponic transplant goes smoothly and your seedlings have the best chance for success in their new growing environment.
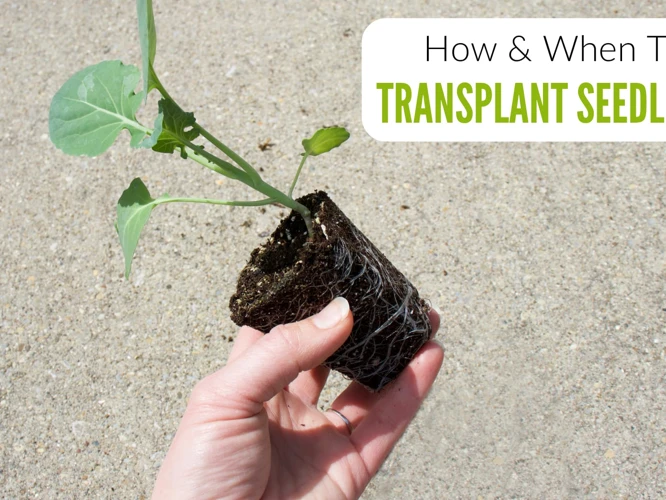
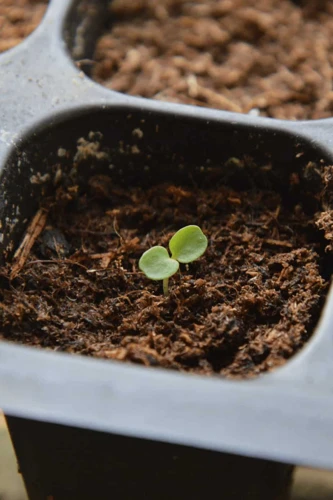
Step 3: Remove the Seedlings from the Soil
Now that you have prepared your new hydroponic system and watered the soil, it’s time to remove the seedlings from their current soil. This step may seem daunting, but with the right technique, you can transplant your seedlings into their new hydroponic home with minimal damage to their delicate roots. Follow the gentle steps outlined below to carefully remove your seedlings from the soil and prepare them for their new home in the hydroponic system.
Gently Loosen the Soil around the Seedlings
When it comes to transplanting seedlings from soil to a hydroponic system, it’s important to handle them with care. Before taking the seedlings out of the soil, it’s necessary to loosen the soil around them gently to avoid any damage to the roots. This process can be achieved by following the steps listed in the table below:
| Steps | Description |
|---|---|
| Step 1 | Water the soil of the seedling container before transplanting |
| Step 2 | Wait for the soil to soak up the water for a few minutes |
| Step 3 | Gently press down on the sides of the container to loosen the soil |
| Step 4 | Slide a plastic knife or fork along the edges of the container to loosen the soil further |
| Step 5 | Turn the container upside down, holding the seedlings firmly by the leaves |
| Step 6 | Tap the bottom of the container to loosen the soil around the roots |
| Step 7 | Slowly and carefully remove the seedlings from the soil, making sure not to damage the roots |
By gently loosening the soil, the roots can be safely removed from the soil without being damaged. It’s important to take the necessary precautions while transplanting the seedlings to ensure they have the best chance of growing successfully in a hydroponic system.
Carefully Remove the Seedlings from the Soil
When removing the seedlings from the soil, it’s essential to do so carefully to avoid damaging the roots. Here are some steps to follow during this process:
| Step 1: Hold the seedling gently | Hold the seedling stem between two fingers and be gentle to avoid crushing or pinching the stem. |
| Step 2: Firmly hold the leaves | While holding the stem, gently grip the leaves of the seedling between your other fingers to provide additional support. |
| Step 3: Loosen the soil around the roots | Using a spoon or small trowel, gently loosen the soil around the roots of the seedling. Ensure you don’t pull or tug the plant as you try to loosen the soil. |
| Step 4: Remove excess soil from the roots | Once you’ve loosened the soil around the roots, use your fingers to gently remove any excess soil. This step will make it easier to transfer the plant into the hydroponic system without causing any damage to the delicate roots. |
| Step 5: Hold the plant at the base of the stem | When transferring the plant to the hydroponic system, hold it by the base of the stem for support. Be careful not to hold the plant by the leaves or root system, as this may cause damage to the plant. |
By following these steps, you’ll be able to carefully remove the seedlings from the soil, ensuring they are healthy and ready to be transplanted into the hydroponic system.
Step 4: Rinse and Trim the Roots

Now that you have successfully removed the seedlings from the soil, it’s time to focus on the roots. The roots of the seedlings may have become entangled or may have grown too long in the soil. It’s important to properly rinse and trim the roots before placing them in the hydroponic system. This step is essential to ensure that the seedlings can absorb water and nutrients effectively from the hydroponic system. Let’s take a closer look at how to rinse and trim the roots.
Rinse the Roots
Once the seedlings have been carefully removed from the soil, it’s important to clean their roots before placing them in the hydroponic system. Here are the steps to rinse the roots of your seedlings:
- Prepare a container of clean water: Fill a clean bucket or tub with enough water to submerge the roots of your seedlings.
- Place the seedlings in the water: Gently place the seedlings in the water, making sure their roots are fully submerged.
- Swirl gently: Use your hands to gently swirl the seedlings around in the water, allowing the water to wash over and through the roots. This will help remove any leftover soil or debris from the roots.
- Inspect the roots: As you rinse the roots, inspect them for any signs of damage or disease. Trim away any damaged or dead roots using a pair of clean scissors or shears.
- Repeat as necessary: If the water becomes too cloudy or dirty, pour it out and refill the container with clean water. Repeat the rinsing process until the roots are fully clean.
- Remove the seedlings: When you’re satisfied that the roots are clean and any damaged roots have been removed, carefully remove the seedlings from the water and shake off any excess moisture.
By taking the time to thoroughly rinse the roots of your seedlings before placing them in the hydroponic system, you’ll be helping to ensure their overall health and success.
Trim Any Damaged Roots
After rinsing the roots, it’s important to carefully inspect them for any damage. Sometimes roots can become tangled or injured when they are removed from the soil. If you notice any roots that appear brown or mushy, it’s a sign they are decaying and need to be removed. Here are the steps to trim any damaged roots:
- Prepare your tools: You’ll need a pair of sharp, clean scissors or pruning shears to trim the roots. Make sure the blades are sterile so you don’t introduce any unwanted bacteria to your hydroponic system.
- Identify damaged roots: Look for roots that are discolored, mushy, or have black spots. These are all signs of damage or decay.
- Trim damaged roots: Using your scissors or pruning shears, carefully trim away any damaged or decaying roots. Cut the roots at a slight angle to prevent them from sitting flat on the bottom of your hydroponic system, as this can interfere with oxygen flow.
- Repeat as needed: Continue to inspect the rest of the roots for any additional damage. It’s important to remove all damaged roots as they can rot and spread disease to the healthy roots and seedlings.
Remember, it’s better to remove too much than too little when trimming the roots. It’s important to have a healthy root system for your seedlings to thrive in the hydroponic system. Taking the time to trim any damaged roots will pay off in the long run with healthy, vibrant plants.
Step 5: Place Seedlings in Hydroponic System
Now that you have prepared your hydroponic system and successfully removed the seedlings from the soil, it’s time to place them in their new home. This step requires careful handling of the delicate seedlings to ensure their survival and growth in the hydroponic environment. In this section, we will discuss the proper techniques for placing the seedlings in the hydroponic system and creating the ideal growing conditions for them to thrive. Follow these steps with precision to set your seedlings up for success in their new hydroponic home.
Fill Hydroponic System with Water
Before placing the seedlings in the hydroponic system, it is necessary to fill it with water. This step is crucial to ensure that the roots of the seedlings have constant access to water and nutrients.
The following is a step-by-step guide on how to fill the hydroponic system with water:
| Step 1: | Start by preparing the water that will be used to fill the hydroponic system. It is important to use clean, pH-balanced water, as any impurities or incorrect pH levels can harm the seedlings. |
| Step 2: | If the hydroponic system has a water level indicator, fill the system with water up to the indicator level. If not, fill the system until the water level is about 1 inch below the surface of the hydroponic growing medium. |
| Step 3: | Once the system is filled with water, turn on the hydroponic system’s water pump to circulate and oxygenate the water. This helps the seedlings grow strong, healthy roots and ensures that the nutrients in the water are properly distributed throughout the system. |
| Step 4: | Throughout the growing process, it is important to regularly monitor the water level in the hydroponic system and make sure to top it off as needed to keep the roots submerged in water. |
By following these steps, you can ensure that the water in your hydroponic system is properly balanced and the seedlings have the necessary access to nutrients and water for healthy growth.
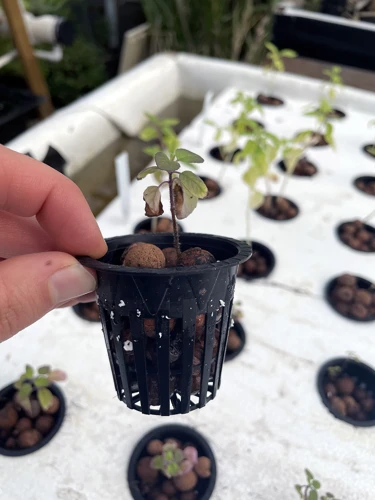
Place Seedlings in Net Cups and Add Hydroponic Growing Medium
After rinsing and trimming the roots, it’s time to transfer the seedlings to the hydroponic system. This involves placing the seedlings in net cups and adding the hydroponic growing medium. Here are the steps to do it properly:
- Select the correct net cup size: The net cup should be large enough to accommodate the roots of the seedlings. Typically, a 2 inch net cup is suitable for small seedlings.
- Fill the net cup with the hydroponic growing medium: There are different types of hydroponic growing mediums that can be used such as rockwool, perlite, vermiculite or coco coir. It’s important to choose a medium that has good drainage and aeration properties.
- Place the seedlings in the net cups: Carefully place the seedlings in the net cups making sure that the roots are spread out and not bunched up.
- Add the hydroponic growing medium: Once the seedlings are in the net cups, add more of the selected growing medium to the cups. The idea is to ensure that the roots have good contact with the medium and that it provides support so that the seedlings stand upright.
- Insert net cup into hydroponic system: Finally, insert the net cup with the seedling and growing medium into the hydroponic system.
It’s worth noting that after placing the seedlings in the net cups and adding the growing medium, it’s important to keep the system moist but not too wet. This can be achieved by using a spray bottle or mister to water the medium as needed. This will allow the roots to grow and establish properly in the new hydroponic environment.
Step 6: Monitor and Adjust pH and Nutrient Levels
Ensuring that the pH and nutrient levels are properly maintained in your hydroponic system is crucial for the health and growth of your seedlings. Without the right levels, your plants may suffer from nutrient deficiencies or toxicities that could stunt or even kill them. It’s important to monitor and adjust these levels regularly to ensure optimal growing conditions for your plants. In this step, we’ll go over the process of testing and adjusting the pH and nutrient levels in your hydroponic system.
Test pH Level of Water
Testing the pH level of the water is an important step in transplanting seedlings from soil to hydroponics. A pH test measures the acidity or alkalinity of the water in which the seedlings will grow. This step is crucial for ensuring that the seedlings are able to absorb the necessary nutrients from the hydroponic system.
To test the pH level of the water, you will need a pH testing kit. These kits can be purchased from a garden supply store or online. The kit typically includes pH testing strips and a color chart for interpreting the results.
Here are the steps to test the pH level of the water:
| Step 1 | Take a small sample of the water from the hydroponic system using a clean container or cup. |
| Step 2 | Dip the pH testing strip into the water for a few seconds, then remove it and shake off any excess water. |
| Step 3 | Compare the color of the testing strip to the color chart included in the kit. The color on the testing strip will correspond to a specific pH level. |
| Step 4 | Record the pH level of the water. |
It’s important to test the pH level of the water regularly, as changes in pH can occur due to factors such as nutrient levels, plant growth, and evaporation. Aim for a pH level between 5.5 and 6.5, as this is the optimal range for most hydroponic plants.
If the pH level is outside of the optimal range, adjustments will need to be made to bring it back into the correct range. This can be done using pH adjusters, which are also available at garden supply stores. Be sure to follow the instructions carefully when using pH adjusters, as adding too much can be harmful to the plants.
By testing and adjusting the pH level of the water, you can ensure that your seedlings have the best possible start in their new hydroponic environment.
Adjust pH Level as Needed
Adjusting the pH level of the water in your hydroponic system is a crucial step in ensuring the health and growth of your seedlings. The pH level refers to the acidity or alkalinity of the water and can have a significant impact on how well your plants absorb nutrients. A pH level that is too high or too low can cause nutrient deficiencies or toxicities, which can stunt the growth of your plants or even kill them.
To adjust the pH level, you will need a pH testing kit and a pH adjuster solution. The pH testing kit will enable you to measure the current pH level of the water, and the pH adjuster solution will help you make the necessary adjustments to achieve the optimal pH level for your specific plant type.
Here is a table highlighting the optimal pH levels for common plants:
| Plant Type | Optimal pH Level |
|---|---|
| Lettuce | 6.0-7.0 |
| Tomatoes | 5.5-6.5 |
| Basil | 5.5-6.5 |
| Strawberries | 5.5-6.5 |
Once you have determined the optimal pH level for your specific plant type, you can begin adjusting the pH level of the water in your hydroponic system. If the pH level is too high, you can use a pH down solution to lower it. If the pH level is too low, you can use a pH up solution to raise it. It is important to follow the instructions on the pH adjuster solution carefully to avoid over-correcting the pH level.
After making the necessary adjustments, it is recommended that you retest the pH level to ensure that it has reached the optimal range. Regular monitoring and adjustment of the pH level will help ensure the health and growth of your seedlings in a hydroponic system.
Add Nutrients to Water
Once the pH level of the water has been adjusted, it’s important to add nutrients to the hydroponic system. Plants grown in hydroponics systems rely on the nutrients found in the water to thrive, since they are no longer in soil that naturally provides nutrients. Adding the right balance of nutrients is crucial for healthy plant growth.
There are a variety of commercially available hydroponic nutrient solutions that provide the right balance of essential nutrients for plant growth. When choosing a nutrient solution, consider the specific needs of the plants being grown, as different plants may require different nutrient levels. It’s also important to choose a solution that matches the stage of growth of the plants, as nutrient requirements can change as plants mature.
To add nutrients to the hydroponic system, start by preparing the nutrient solution according to the manufacturer’s instructions. Typically, this involves measuring the appropriate amount of concentrate and diluting it with water to reach the desired strength.
Once the nutrient solution has been prepared, it can be added to the hydroponic system. This can easily be done by pouring the solution into the water reservoir, taking care not to overflow the container.
To ensure that the plants get an even distribution of nutrients, it’s important to stir or agitate the water regularly. This can be done by using an aquarium air stone or gently stirring the water with a clean tool. Regular monitoring of nutrient levels and pH levels is also important.
Table: Nutrient Solution Preparation
| Nutrient | Amount per Gallon of Water |
|---|---|
| Nitrogen | 200 – 400 ppm |
| Phosphorus | 50 – 100 ppm |
| Potassium | 200 – 400 ppm |
| Calcium | 100 – 200 ppm |
| Magnesium | 50 – 100 ppm |
| Sulfur | 50 – 100 ppm |
| Iron | 2 – 10 ppm |
| Manganese | 0.5 – 5 ppm |
| Zinc | 0.5 – 3 ppm |
| Copper | 0.1 – 0.5 ppm |
| Boron | 0.5 – 1 ppm |
By providing the right balance of nutrients, plants grown in a hydroponic system can thrive and produce healthy crops.
Step 7: Provide Adequate Light and Temperature
As your seedlings acclimate to their new hydroponic environment, ensuring that they receive the right amount of light and are kept at an appropriate temperature is crucial for their growth and overall health. Although different plants have varying lighting and temperature requirements, there are certain general principles that can guide you towards providing the best growing conditions. In this step, we’ll explore how to set up suitable lighting and temperature conditions, helping your seedlings thrive in their new hydroponic home.
Provide Sufficient Lighting
To provide sufficient lighting for your newly transplanted seedlings in the hydroponic system, you need to pay attention to a few key factors:
- Choose the right type of light: LED grow lights are the most efficient and effective type of lighting for indoor hydroponic systems. They produce less heat and use less energy compared to other types of bulbs, which is especially important when cultivating plants indoors.
- Adjust the distance of the light: Different plants require different levels of intensity and duration of light exposure. You need to adjust the distance of the grow lights from the seedlings accordingly. Generally, the light should be kept about 12-24 inches away from the plants to avoid heat damage.
- Provide adequate light duration: Typically, most plants require 14-16 hours of light per day. You need to ensure that your grow lights are set on a timer to provide consistent and adequate light duration.
It is essential to ensure that the lighting levels and duration are appropriate for the specific plants in your hydroponic system. Be careful not to overexpose your seedlings to light, as this could result in stunted growth or even burn the plants. By providing sufficient lighting, your seedlings will grow healthy and strong in your hydroponic system.
Maintain Appropriate Temperature
Maintaining appropriate temperature is crucial for the successful growth of seedlings in a hydroponic system. Here are a few things to keep in mind:
- Optimal Temperature Range: The optimal temperature range for most seedlings in a hydroponic system is between 65-75°F (18-24°C). Anything above or below this range can cause stress and slow down the growth of the plants.
- Avoid Extreme Temperatures: Avoid exposing the seedlings to extreme temperatures, such as direct sunlight or cold drafts. This can cause damage or even kill the plants.
- Use a Thermometer: Use a thermometer to monitor the temperature in your hydroponic system regularly. This will help you identify any potential issues and make adjustments as needed.
- Adjust Lighting: Keep in mind that the lighting in your hydroponic system can also affect the temperature. If the lights generate too much heat, you may need to adjust their positioning or use lower wattage bulbs.
- Consider Adding a Heater or Cooler: Depending on the environment in which your hydroponic system is located, you may need to add a heater or cooler to maintain optimal temperatures. For example, if your system is in a cold basement, a heater may be necessary to keep the temperature within the appropriate range.
By keeping the temperature within the appropriate range and monitoring it regularly, you can help ensure that your seedlings thrive in their new hydroponic environment.
Conclusion
In conclusion, transplanting seedlings from soil to hydroponics can be a bit of a daunting task, but with the right tools and procedures, it can be accomplished successfully. When preparing the new hydroponic system, it is important to choose a suitable location and carefully set up the system. Watering the soil thoroughly before removing the seedlings is also crucial to prevent damage to the sensitive roots.
When removing the seedlings from the soil, it is vital to do so gently and with care, as to not harm the plant. Rinsing and trimming the roots is also a crucial step in the process. Once the roots have been prepared, the seedlings can then be placed in the hydroponic system, which should be filled with water and hydroponic growing medium such as perlite or clay pellets.
Monitoring and adjusting the pH and nutrient levels of the water is essential to ensure the plants receive the necessary nutrients to grow and thrive. Additionally, providing sufficient lighting and maintaining an appropriate temperature is critical for the success of the seedlings in the new hydroponic system.
Overall, by following these step-by-step guidelines, transplanting seedlings from soil to hydroponics can result in a successful and fruitful harvest. So, take your time, follow the procedures carefully, and enjoy the benefits of growing plants in a hydroponic system!
Frequently Asked Questions
Can any plant be grown in a hydroponic system?
Yes, most plants can be grown in a hydroponic system. However, some plants are easier to grow than others and some may require specific modifications to the system.
Do I need to change the water in my hydroponic system?
Yes, it is important to change the water in your hydroponic system regularly to prevent the buildup of harmful bacteria and to maintain proper nutrient levels.
What is the best pH level for a hydroponic system?
The best pH level for a hydroponic system is between 5.5 and 6.5. This range allows for optimal nutrient uptake by the plants.
Can I use tap water in my hydroponic system?
Yes, you can use tap water in your hydroponic system but it may need to be filtered or have its pH adjusted to ensure it is suitable for growth.
Do I need to use artificial grow lights in my hydroponic system?
It depends on the location and availability of natural light. If the hydroponic system is not receiving enough natural light, artificial grow lights can be used to supplement and provide the necessary light the plants need to grow.
What type of growing medium is best for a hydroponic system?
There are various types of growing mediums, such as coconut coir, perlite, and vermiculite, that work well in hydroponic systems. It is important to choose a growing medium that is appropriate for the particular type of plant you are growing.
What nutrients do I need to add to my hydroponic system?
The specific nutrients needed will depend on the type of plant being grown. Generally, a mix of nitrogen, phosphorus, and potassium (NPK) is necessary for healthy growth.
How often should I check the pH and nutrient levels in my hydroponic system?
It is recommended to check the pH and nutrient levels of the hydroponic system every 2-3 days to ensure they are in the optimal range for plant growth.
Can I grow organic plants in a hydroponic system?
Yes, it is possible to grow organic plants in a hydroponic system. However, specific guidelines must be followed to ensure the system meets organic certification standards.
Is hydroponic farming more sustainable than traditional soil-based farming?
Hydroponic farming has the potential to be more sustainable than traditional soil-based farming as it uses less water and can produce higher yields with less space. However, the energy required for artificial lighting and control systems must also be taken into consideration.

