
How to Grow Weed (Full Guide) Weeks 1-2
In this article, I’ll be taught you how to carry growth through its first few weeks of life. I’ll be covering everything from transplanting, feeding, watering, and also creating the perfect environment for cannabis plants to thrive in during the vegetative stage. I also discovered something that could potentially put a stop to one of our growth before it’s even started.
I started all three of my grows, showcasing three different methods of germination. Finally, I planted each strain in the respect of homes. Now that my seedlings are planted, it’s time to get some much-needed work done in the garden to ensure their overall success and survival.
First things first, let’s talk about the environment. Young cannabis plants are incredibly delicate and can easily die if their environment is out of whack. Before even planting your seeds, I’d recommend testing your setup for at least a week prior to planting. You want about 60 to 70% RH for the first part of the veg, with your temps resting somewhere between about 67 to 78 degrees Fahrenheit (ca. 26 °C). You also want to ensure that your growing medium is staying moist, as under-watering the seedling can almost guarantee a death overnight. For my space bucket, I’m using only two cheap PC fans to intake and exhaust the hot air. That means that there is no other support equipment affecting their environment other than the CFL bulbs which increase the temperature.
To handle humidity, I’m going in every day and misting the sidewalls with the spray bottle to help bring up the RH. Thankfully, these CFLs don’t put out a ton of heat, so maintaining the perfect temperature is pretty easy.
For my closet growth, I’m using a few pieces of equipment to affect the environment. The first is a portable humidifier that is fully adjustable. I currently have it set to 70% RH. With this tent being so compact and small, I find it maintains the humidity quite well and I’m only having to refill the res every day or so. I’m also using the small fan to push air close to the canopy and I’m also using another extractor fan to remove the hot air from the tent. I did end up dropping my lights now that my seedlings are rooted and fully established. Vivosun recommends hanging between about 24 to 32 inches (81.28 cm), but I’m going to drop mine down right to 24 inches (60.96 cm).
My Bryan Diego photos are still living in the seed starter that I germinated them in. I’m holding off on transplanting until I see roots developing out at the bottom of the Rockwool cubes. Thankfully maintaining their environment is fairly easy, seeing as the domes retain most of the humidity. All I have to do is add water every day or two and let them do their thing. I’m starting to notice a few issues with these plants, which will require some immediate attention. I ended up germinating a few extra seeds, however, I don’t have room to grow all of them, so the first thing I need to do is pick the six strongest-looking plants to transfer into the DWC system. I ended up discarding a few that were showing some early signs of mutations and also threw out a start that had the taproots growing out of the top of the Rockwool.

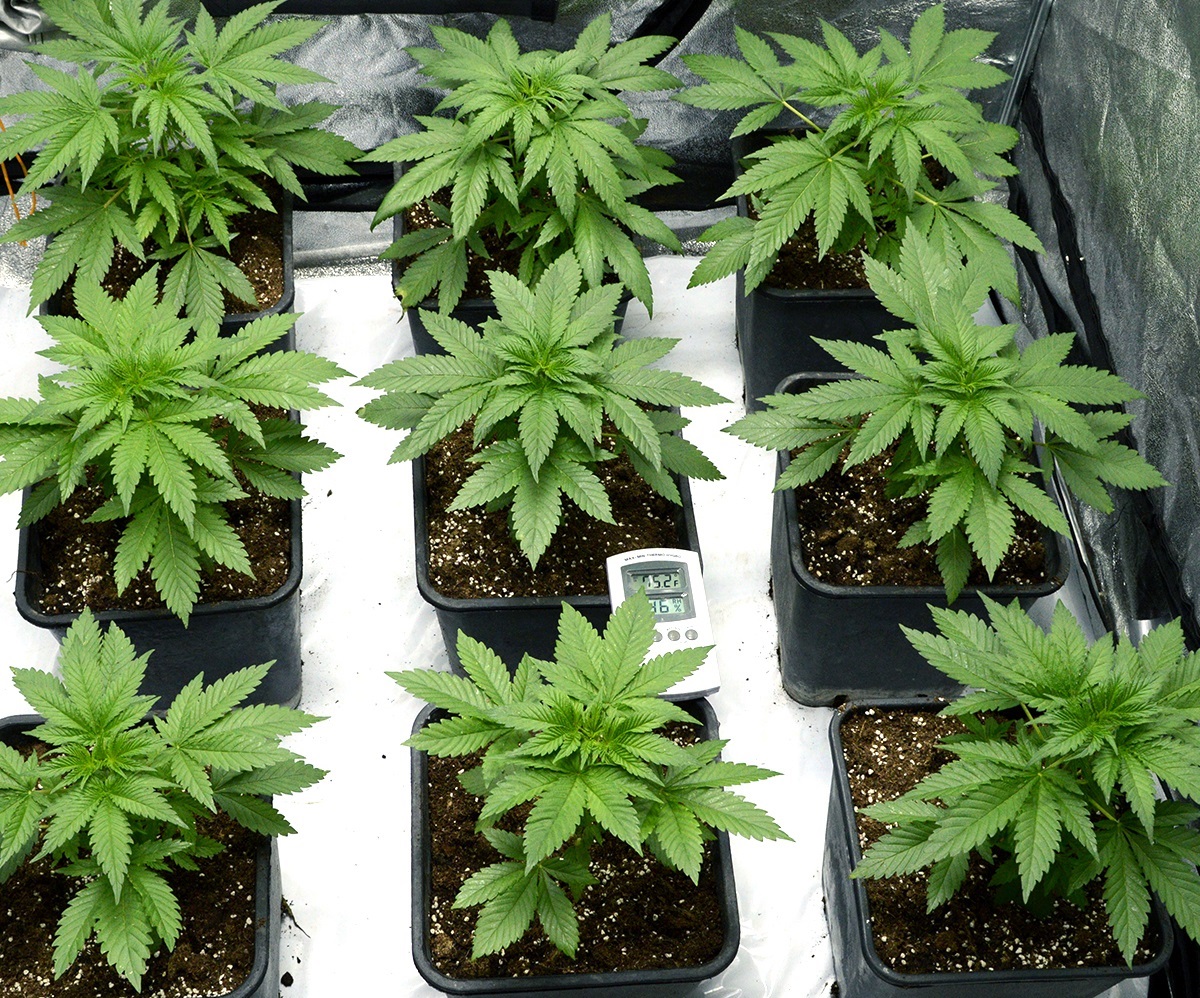
This left me with six healthy-looking plants that all transferred into the DWC system. But while sifting through them, I noticed some yellowing towards the bottom leaves, which indicates that they’re starting to get hungry. Now for this tent, I’ll be using the Lotus nutrient line, which is a water-soluble powder nutrient. Although they aren’t classified as organic, all the ingredients are natural and I found them to be extremely easy to use in my past growth. Because these plants are so young, they only require a small number of nutrients. You can see how big the plants got by literally adding nothing to them other than just water. Lotus’ feed schedule recommends half of a teaspoon per gallon of their growth nutrient while the plants are still young. This also goes to show why I’m not a big fan of adding nutrients when the plants are really young. You can see that even in Rockwell, which has no additional nutrients added into it, the plants are able to thrive and actually get a pretty decent size. The most common thing that I see with young cannabis plants is people overfeeding them and burning them.
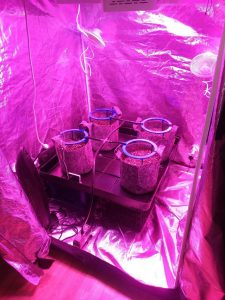
After mixing in the growth powder and adjusting the pH to 6.1 it was time to feed the plants. Now, instead of watering the Rockwell directly, I’m actually adding the water directly to the bottom of the plastic pan. In theory, this should promote the roots to grow down the bottom of the rock wool. Sure enough, after waiting another 48 hours, I had roots establishing themselves towards the bottom, which means that I can finally transplant them into their bubbler buckets. The transplant process is pretty straightforward. Moving bucket by bucket, I use my hand to create a small hole in the hydrogen, and then I gently placed it in the starts. I’m using a small amount of hydrogen to cover the Rockwool and finally, I’m placing a paper towel over the Rockwool to completely block off any light from reaching the root zones or the water below.
Not only can light damage the roots but if the light’s ability to hit the water, it can also cause algae. Because transplanting can cause a lot of stress on a plant, I’ll be using a small plastic cup to help retain the humidity for the next few days. It’s pretty easy to tell when a plant is suffering from transplant shock, the leaves tend to appear droopy and wilted, and sometimes you’ll notice some discoloration in the leaves as well. Although it might look like your plants are dead, it’s important to stay patient and let the plants recover which can sometimes take just a few days.
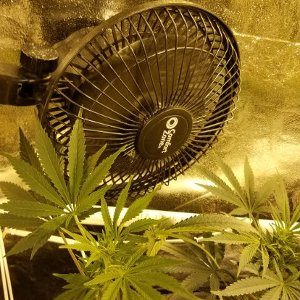
Once my plants finally bounced back, I added a few pieces of equipment which will better control and maintain their environment. I first added this thin tower fan to help move the air around the canopy and finally added in my large humidifier. I specifically chose this humidifier because it has two large reservoirs that only have to be filled up one or two times per week. The last thing I need to do here is lower my lights. Now, XO100 is a very powerful light. When using the older model in my Jack Herer grow, I encountered some light bleaching because the plants got too close to my light. Keeping this in mind, I’ll be following the manufacturer’s recommendations to the T, bringing the light to exactly 32 inches (81.28 cm) above the canopy. As the plants continue to grow larger, I will continue to raise this thing as needed.
You might’ve noticed, that I haven’t talked about feeding my two soil grows yet and that’s because the medium actually holds enough to carry the plant for the first 20 to 30 days. I’ll be needing to apply my dry amendments early next week, so expect to see some more information about that in the next video, but for now, they’re kind of just coasting. I’ll also be using some compost yeast to further boost the microbial life in the medium itself.
While tending to the garden this week, I noticed something extremely strange with the space bucket growing. The first cause for concern was my plant seemed very reluctant to grow after sprouting. I thought the slow growth might’ve been caused by the CFL’s inefficient nature. However, as the days progressed, I noticed its first node site completely died off. The plan appeared to be auto-topping itself. What is auto topping?
Well, let’s first go over what topping is for those of you who don’t know. Topping is a form of high-stress training, which promotes horizontal growth instead of vertical. This can increase the width of your canopy and also creates more tops, which will eventually become colas later on in flower. Topping is essentially removing the new growth tip from the main stem, which then turns into two new tops. Auto topping is when a plant mutates and does this without any human intervention. Some breeders actually try to produce phenols that auto-top. However, I’ve never seen a plant top itself before it’s even grown its first node site. This is extremely dangerous for a plant and to be honest, I was almost positive that it was going to die off.
I let it do its thing for a few days, and to my surprise, the plant recovered completely and sure enough, had two separate tops growing from its main stand. In fact, this is actually one of the most ideal things that could have happened to this plant, seeing as we’re growing in such a tiny space. I was planning on mainlining this plant to keep it low to the medium and produce four to six main shoots. The fact my first topping job has already been done while the plant is so small will just make my job that much easier in the long run. You’ll also get to see me apply a ton of different training techniques in next week’s episode. I’ll be focusing on ways of boosting yields and achieving that perfect canopy, so make sure you guys stay tuned for that.

