

Master the Art of Trimming with Different Techniques for Different Strains
As a cannabis cultivator, achieving the perfect harvest is the ultimate goal. While factors such as lighting, nutrients, and water are important, trimming is also a crucial step in the process. But with so many strains and different trimming techniques, it can be overwhelming to know where to start. Proper trimming can lead to higher quality buds and prevent the growth of mold and pests, but it requires a keen understanding of strain-specific techniques and choosing the right tools. In this guide, we’ll explore the different trimming techniques, tools, and tips to ensure a successful harvest. So, roll up your sleeves and get ready to take your cannabis cultivation skills to the next level.
Why is trimming important?
Contents
When it comes to growing cannabis, trimming is a crucial step that cannot be overlooked. Trimming involves removing unwanted leaves and stems from the buds, and it is an important step that affects the overall quality of your harvest. But why is it so important? Well, for starters, trimming helps to remove the excess plant material that can hinder the growth of your buds. Additionally, it can help to improve the quality of your buds by redistributing nutrients and allowing for better light penetration. Finally, trimming aids in identifying mold or pests on the buds which could be harmful to health. Ultimately, understanding the importance of trimming and how to do it properly can make all the difference in the potency and flavor of your cannabis.
Remove the excess
When growing cannabis, it is important to remove any excess foliage from the plant. This excess foliage can not only take away from the appearance of the buds but can also decrease the potency of the final product. Removing excess foliage helps to direct energy to the flowering buds instead of into the leaves. The leaves also produce less trichomes, which contain the majority of the cannabinoid compounds. Removing excess foliage also aids in the drying and curing process.
To perform a proper trimming, you should first remove any fan leaves that are yellow, dead, or hanging on by a thread. Next, you should remove any small leaves that are growing off of the buds. These leaves are called “sugar leaves,” and they contain resinous trichomes that are full of valuable cannabinoids. However, leaving too many sugar leaves on can give the buds a harsher flavor and make them more difficult to smoke.
When removing excess foliage, it is important to be careful not to accidentally remove any of the larger, more trichome-rich leaves that are growing from the buds. These leaves are called “fan leaves” and are often responsible for the beautiful colors and aroma of the plant. Removing them would also reduce the surface area available for photosynthesis, and the plant may have trouble producing energy.
Improve the quality of buds
One of the key benefits of a proper trimming technique is that it can significantly improve the quality of buds. Here are some reasons why:
- Increased potency: Trimming removes excess leaves and stems, which can dilute the concentration of cannabinoids and terpenes in the buds. By removing these unwanted plant materials, the remaining buds become more potent, with a higher concentration of the active ingredients that produce the desired effects.
- Better flavor and aromas: Trimming also helps to improve the flavor and aroma of the buds. This is because excess leaves and stems can give the buds a grassy, vegetal taste or smell, which can be overpowering and unpleasant. By removing these plant materials, the buds can develop their natural, distinct flavors and aromas, which can vary depending on the strain.
- Improved appearance: Trimming can also enhance the visual appeal of the buds. Excess leaves and stems can make the buds look less attractive, and can also hide the true density and structure of the buds. By removing these plant materials, the remaining buds can showcase their unique shape, texture, and color, which can be important for users looking for a specific strain or quality.
So, by trimming your buds properly, you can unlock the full potential of your cannabis plants, making them more potent, flavorful, and visually appealing.
Aids in identifying mold or pests
Trimming not only helps to remove excess foliage, but it also plays an important role in identifying mold or pests on the plant. Regular upkeep and inspection during the trimming process can help you spot these issues early on and prevent them from damaging your entire crop. Here are some ways trimming aids in identifying mold or pests:
- Clear View: Trimming away excess foliage and leaves can provide a clear view of the plant and its buds. This unobstructed view allows you to better identify any discolored areas or signs of mold.
- Spotting Pest Infestations: During trimming, you may find traces of pests such as spider mites or aphids on the leaves or buds. You can then take appropriate action to get rid of them and prevent further damage.
- Prevent the Spread of Mold: Identifying mold during trimming allows you to remove the affected area immediately. This prevents it from spreading to other parts of the plant or other plants in the grow area.
- Protect Your Crop: Regular trimming and inspection help to protect your crop from mold or pest infestations, which can lead to a significant loss of yield and quality.
It is important to stay vigilant and conduct regular checks during the trimming process to spot any signs of mold or pests early on. This can ultimately save your crop and ensure that you end up with high-quality buds.
Understanding Strain-specific trimming techniques
When it comes to trimming cannabis, there’s no one-size-fits-all approach. Different strains require different techniques to achieve the best results. It can be perplexing to know where to start or which methods to use. However, understanding strain-specific trimming techniques is crucial to producing the highest quality buds. In this section, we will explore the various trimming techniques for indica and sativa strains, so you can feel confident in your trimming abilities.
Indica
Indica strains are known for their bushier, wider structure and broader leaves. Proper trimming techniques for Indica strains can significantly improve the quality of the final product. Here are some trimming techniques that work best for Indica strains:
| Technique | Description |
| Top pruning | Top pruning involves the removal of the top of the plant’s central stem. This technique is helpful for preventing upward growth, encouraging bushier growth, and promoting bigger and more robust buds. |
| Leaf pruning | This technique involves the removal of leaves that may be blocking light to lower parts of the plant. It’s important to keep in mind that even though Indica strains have broader leaves, they still require light to penetrate through to the lower parts of the plant. |
| Finger pruning | This technique involves manually breaking off extra branches using your fingers. It requires a gentle touch to avoid damaging the remaining plant tissue. This technique can help control the shape of the plant, allowing it to grow in a more compact and bushy way. |
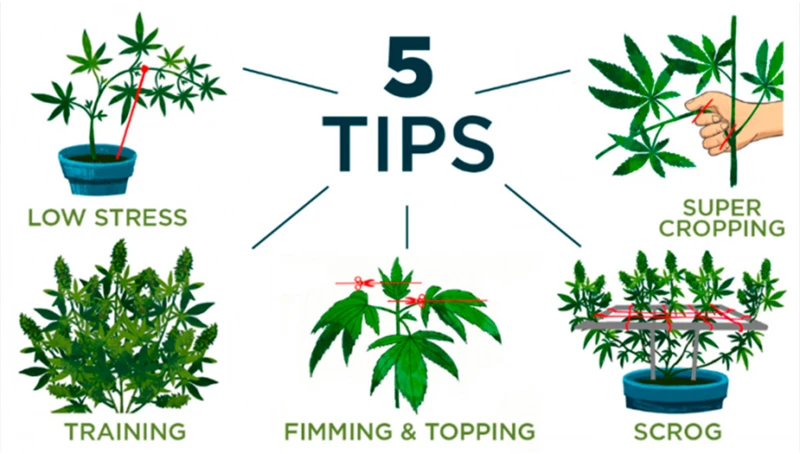
Using these techniques, you can help your Indica plants become more compact and bushier, leading to bigger and more robust buds. Proper pruning and training techniques are essential for raising cannabis plants with high yields and superior quality.
Sativa
When it comes to trimming Sativa strains, there are some strain-specific techniques that you should keep in mind. Sativa strains tend to have longer, thinner buds and leaves, with a high concentration of trichomes. This means that trimming Sativa strains requires a bit more finesse and attention to detail.
Technique: Fingers Only
Description: The finger trimming technique is the most delicate and time-consuming trimming method. With Sativa strains, this method works best for small leaves that hug the buds very closely. The idea of this technique is to separate the leaves from the buds using only your fingers. Start at the base of the leaf stem, and gently pluck the leaf away from the bud. This method also allows you to preserve trichomes, providing you with the highest quality buds.
Technique: Tumble Trimming
Description: Tumble trimming is a method that uses machines to do the work for you. This method is a great time-saver for larger batches of Sativa plants. It involves placing the buds in a tumbler machine that rotates, separating the leaves from the buds. This method is quick and efficient, but it can also be harsh on the buds, removing some of the trichomes in the process.
Technique: Wet Trimming
Description: Wet trimming is a technique that involves trimming the buds while they are still wet. This method is commonly used with Sativa strains because the leaves are so delicate that they can be easily damaged during the drying process. Wet trimming allows you to shape the buds while they are still malleable, resulting in a more attractive, uniform appearance. However, wet trimming can also lead to a loss of potency and flavor if not done correctly.
| Trimming Techniques | Description |
|---|---|
| Fingers Only | The finger trimming technique is the most delicate and time-consuming trimming method. With Sativa strains, this method works best for small leaves that hug the buds very closely. |
| Tumble Trimming | Tumble trimming is a method that uses machines to do the work for you. This method is a great time-saver for larger batches of Sativa plants. |
| Wet Trimming | Wet trimming is a technique that involves trimming the buds while they are still wet. This method is commonly used with Sativa strains because the leaves are so delicate that they can be easily damaged during the drying process. |
Choosing The Correct Trimming Tools
One of the most important aspects of trimming cannabis plants is choosing the correct tools. The right tools can make the process easier and more efficient, while the wrong tools can lead to frustration, hand fatigue, and potentially damage the buds. The tools you select depend on your personal preference, the size of the harvest, and the type of trimming you plan to do. In this section, we will discuss the different tools you can use for trimming and highlight their strengths and weaknesses. Let’s dive in and explore the world of cannabis trimming tools.
Scissors
When it comes to trimming cannabis, scissors are one of the most commonly used tools. Sharp, high-quality scissors are essential for trimming buds effectively without damaging or crushing them. Here are some key features to look for when selecting scissors for trimming:
- Size: The size of the scissors should be comfortable for your hand. Small scissors may be more nimble but require more passes to trim a single bud, while larger scissors may be more efficient but may be more unwieldy for some users.
- Blades: Look for scissors with fine, sharp blades made from high-quality metals such as stainless steel. Dull or low-quality blades can damage buds or make trimming more difficult and time-consuming.
- Comfort: Choose a model with ergonomic handles to minimize hand fatigue and improve your accuracy, especially if you plan on trimming for long periods of time.
- Cleanability: Finally, look for scissors that are easy to clean, particularly if you are using them to trim multiple strains. Some models feature detachable blades or easy-to-disinfect surfaces.
Remember to clean and sharpen your scissors regularly to maintain their effectiveness and extend their lifespan.
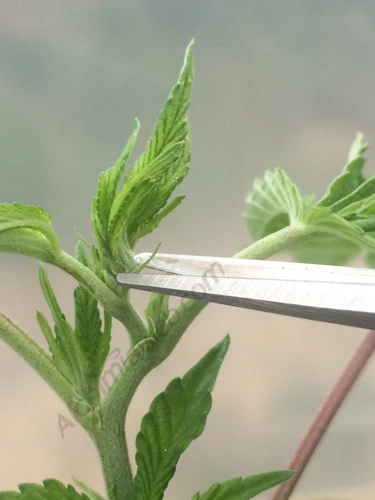
Razor blades
Razor blades are another popular tool used for trimming cannabis buds. They are extremely sharp and can be used to make precise cuts on the buds. However, they also require more skill and caution than other trimming tools such as scissors or pruning shears. Here are some key points to keep in mind when using razor blades for trimming:
- Sharpness is key: Make sure your razor blades are extremely sharp before beginning to trim. Dull blades can damage the buds and make your job harder.
- Angle your cuts carefully: When using a razor blade, it’s important to hold it at the right angle to make clean, precise cuts. Aim for a 45-degree angle and move the blade slowly and carefully.
- Watch out for your fingers: Razor blades are extremely sharp and can easily cut through skin. Use caution when handling them and consider wearing gloves to protect your hands.
- Use a cutting board: To prevent damage to your work surface, use a cutting board or other protective material when trimming with razor blades.
- Clean your blades regularly: After each use, clean your razor blades thoroughly with rubbing alcohol or another disinfectant to prevent the spread of bacteria or disease.
Razor blades can be an effective tool for trimming cannabis buds, but they require more skill and caution than other options. If you are comfortable using them and take the necessary safety precautions, they can produce excellent results.
Pruning shears
One of the best tools for trimming cannabis plants is pruning shears. These are a type of scissors designed specifically for trimming and pruning plants. They come in various shapes and sizes, but most pruning shears have a long handle, a curved blade, and a pointed tip.
Here are some benefits of using pruning shears:
- Helps with precision cutting, as the sharp blades can reach deep into plants without damaging them.
- Ideal for trimming hard-to-reach areas or areas with dense foliage, such as the center of the plant.
- Lightweight and easy to use, making them ideal for prolonged trimming sessions.
- Many pruning shears come with a locking mechanism to keep them closed when not in use, which helps to protect the blades and prevent accidents.
Here are some tips for using pruning shears:
- Make sure the blades are sharp before use, as this will make trimming faster and easier.
- Hold the shears at a slight angle and use a light touch when trimming. This will help prevent accidentally cutting off too much or cutting into the plant’s stem.
- Clean the blades after each use to prevent sap and debris from building up and potentially causing the blades to stick or become dull.
- Consider using pruning shears with a non-stick coating to make cleaning easier.
Pruning shears are a great tool for any cannabis cultivator looking to achieve a precise and efficient trim. They are versatile, easy to use, and affordable, making them an essential tool for any cannabis grower or trimmer.
Different Trimming Techniques
When it comes to trimming cannabis, there are several techniques available for growers to choose from. Each technique has its advantages and disadvantages, and it is essential to understand them before selecting the one that suits their needs. Depending on the grower’s preference, they can choose between wet, dry, or surgical trimming. Understanding the differences and benefits of each technique is critical to ensuring that the final product looks and tastes excellent. In this section, we will discuss the different trimming techniques available and how to execute them.
Wet Trimming
When it comes to trimming techniques, “wet trimming” is one option that growers can choose. This technique involves trimming the leaves and excess material immediately after harvesting the buds, before they are dried. Here are some key points to keep in mind when deciding whether to use wet trimming:
| Advantages | Disadvantages |
|---|---|
| More efficient – trimming is easier when the leaves are still moist and flexible. | Increased risk of mold – wet buds are more prone to developing mold, especially if they are not dried properly after trimming. |
| Faster processing – wet trimming can save time compared to other techniques because it eliminates the need to wait for the buds to dry. | Loss of potency – some growers argue that removing the leaves immediately after harvesting can lead to a loss of potency because the plant has not had a chance to fully develop its trichomes. |
| Easier to handle – wet buds are easier to handle and move around, which can be an advantage if you have limited space for drying or curing. | Less precise – it can be harder to get an accurate trim when the leaves are wet, which can result in a less consistent product. |
Keep in mind that wet trimming is not necessarily better or worse than other techniques like “dry trimming” or “surgical trimming“. The best technique for you will depend on a variety of factors, including the size of your crop, the strains you are growing, and your personal preferences and experience.
Dry Trimming
Dry trimming is another trimming technique that is most commonly preferred by the cultivators, especially those who are growing small or medium-sized plants. In this technique, the buds are trimmed when they are dry, which can take up to 7-10 days. Dry trimming can be much easier and less messy than wet trimming, because the dried buds do not have as many leaves, making it easier to differentiate the parts that should be removed from the valuable parts that should be kept.
The advantages of dry trimming are:
- Easy to work with and less labor-intensive
- The dried buds are more compact, better for storage and transportation
- It allows the bud to stabilize and develop its aroma and taste profile during the drying process
The disadvantages of dry trimming are:
- The trimming process can take longer because the dried buds can be more brittle and delicate
- The potential risk of losing trichomes and resin during the handling process
- The buds can be more difficult to handle and manipulate than freshly harvested ones
To perform a dry trimming process, you will need:
| Tools | Benefits |
|---|---|
| Scissors | Useful for precision trimming and reaching awkward areas |
| Pruning shears | Ideal for bulk trimming and cutting thicker stems |
| Bud trimmer machine | Speed up the trimming process and provide a cleaner outcome |
The step-by-step guide of dry trimming technique:
- Harvest the buds and hang them in a dark and cool room for 7-10 days until they are fully dry.
- Prepare the trimming area with adequate lighting and ventilation. A trimming tray or table is recommended to easily collect the trimmed foliage.
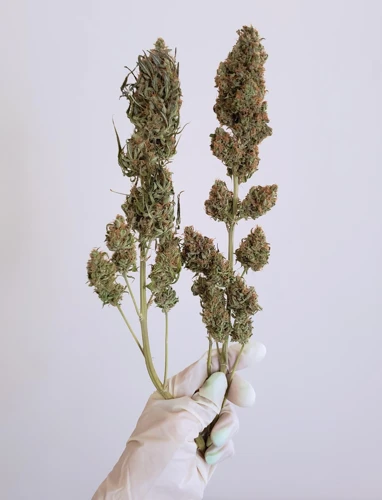
- Wear gloves to avoid direct contact with the buds and prevent contaminating them with your fingerprints.
- Start trimming the bigger fan leaves with sharp scissors or pruning shears, leaving only a small amount of the sugar leaves on the flowers.
- Pay attention to the density of the buds and adjust your trimming technique accordingly. For loose buds, you can use scissors, while for denser buds, pruning shears would be more suitable.
- Trim the buds systematically, working in small sections at a time until all the unwanted leaves have been removed, revealing the resinous buds underneath.
- After trimming, place the buds in an airtight container or a jar to cure for a few weeks before consumption. This will allow the buds to further develop their aroma and flavor, enhancing their potency and quality.
By following these steps, you’ll achieve a clean and precise result, giving your buds the desired look and feel. Remember, whichever trimming technique you choose, the goal is to produce a high-quality product that will provide you with a pleasurable and enjoyable experience.
Surgical Trimming
Surgical trimming is a meticulous and time-consuming technique that involves using sharp trimming tools to carefully cut away excess plant material from each individual bud, including small leaves and stems. This technique is ideal for growers who want their buds to have a clean and polished appearance, although it can be challenging and requires patience and skill. Here are some of the steps involved in surgical trimming:
- Step 1: Choose a clean and well-lit area to work in, ideally with a white or light-colored surface that will allow you to see the plant material clearly.
- Step 2: Select the appropriate trimming tools for the job, such as fine-tipped scissors or sharp pruning shears. It’s important to choose tools that are sharp and clean to avoid damaging the delicate buds.
- Step 3: Carefully examine each bud and remove any unwanted plant material, such as small leaves and stems, using the trimming tool. Be careful not to cut into the buds themselves, as this can damage the potency and aroma of the final product.
- Step 4: Take your time and work slowly and methodically to ensure that each bud is trimmed to perfection. This can be a repetitive and tiring process, so taking breaks and stretching your hands and wrists periodically can help prevent fatigue and strain.
- Step 5: Once you have finished trimming all of your buds, place them in airtight containers and store them in a cool, dark place to cure. This will help to enhance the flavor and potency of your buds, as well as improve their overall appearance.
Surgical trimming is a precise and demanding technique that requires skill and patience, but can result in beautiful and high-quality buds. If you are willing to devote the time and effort necessary, this technique can be a great way to enhance the appearance and potency of your harvest.
The Best Techniques for Different Strains
One of the most important aspects of achieving a successful harvest is understanding that different strains require different techniques for trimming. It can be perplexing to figure out which technique is best suited for your specific strain. But fear not, as this section will delve into the best techniques for trimming Lowryder Autoflowering, Sour Diesel, and G-13 strains. With a little bit of knowledge and practice, you’ll be able to achieve perfectly trimmed buds every time. So, let’s dive right in and discover the secrets to achieving the perfect trim for each strain!
Trimming Lowryder Autoflowering
When it comes to trimming Lowryder Autoflowering strains, there are a few key techniques to keep in mind:
- Start early: Lowryder Autoflowering strains tend to have a shorter vegetative phase and a faster flowering time than other strains. This means that you’ll want to start trimming early to ensure that your plants reach their full potential.
- Focus on the buds: Lowryder Autoflowering strains tend to produce smaller buds than other strains, so it’s important to focus on maximizing the quality of each individual bud.
- Use precision: Because of the smaller size of the buds, you’ll need to use precision trimming techniques to ensure that you don’t accidentally trim away too much of the plant material.
- Dry trim: Many growers prefer to dry trim their Lowryder Autoflowering buds to help preserve the plant’s natural flavors and aromas.
By following these simple tips, you can ensure that you’re getting the most out of your Lowryder Autoflowering crop. Remember to take your time and be patient, as this strain requires a bit more attention to detail than some other strains. With the right tools and techniques, however, you can definitely achieve outstanding trimming results.
Trimming Sour Diesel
When it comes to trimming Sour Diesel, it’s important to consider the unique characteristics of this strain. Here are some tips to help you achieve the best possible results:
- Be prepared for a sticky experience: Sour Diesel is known for its resinous buds, which can make trimming a bit challenging. To avoid getting your scissors or shears gummed up, you may want to try using a bit of rubbing alcohol to clean them as you work.
- Focus on the sugar leaves: While you should certainly remove any large fan leaves or stems, Sour Diesel’s sugar leaves are where you’ll find the majority of the plant’s THC content. Take your time to carefully trim around these leaves to maximize your harvest.
- Trim in small batches: Because Sour Diesel buds can be quite large and dense, they can be difficult to manage if you try to trim too much at once. Instead, work in small batches to ensure that you’re able to give each bud the attention it deserves.
- Consider dry trimming: While wet trimming can be a good option for some strains, many growers prefer to dry trim their Sour Diesel to avoid damaging the delicate trichomes on the buds. If you decide to dry trim, be sure to hang your buds in a cool, dark place with good air circulation until they’re ready.
- Don’t rush the curing process: After you’ve finished trimming your Sour Diesel, it’s important to cure the buds properly to bring out their full flavor and potency. This means storing them in a cool, dark place with good air circulation for at least a week or two, opening the jars periodically to allow any excess moisture to escape.
By taking these tips into account, you can ensure that your Sour Diesel buds are trimmed to perfection and ready to enjoy.
Trimming G-13
When it comes to trimming G-13, it’s important to take a careful approach to maintain the quality of the buds. This strain is known for its potency, so you want to make sure you don’t accidentally trim away any of the valuable trichomes that contain the plant’s beneficial compounds.
One technique for trimming G-13 is the wet trimming method. This involves trimming the buds immediately after harvest, while they are still wet. This can help prevent the buds from developing mold or mildew during the drying process. However, some growers prefer to wait until the buds are dry and use the dry trimming method instead.
No matter which method you choose, it’s important to have the right tools on hand. For G-13, you may want to use a pair of scissors with small, sharp blades or pruning shears to get into tight spots. Avoid using razor blades, as they can easily damage the fragile trichomes.
When you are ready to begin trimming, take your time and work carefully. Start by removing the larger fan leaves from the buds, being careful not to damage the surrounding flowers. Next, carefully trim away any excess leaves that may be covering the buds. It can be helpful to use a magnifying glass or jeweler’s loupe to get a better view of the trichomes and make sure you are not trimming away too much.
Finally, after you have completed the trimming process, it’s important to cure the buds properly. This involves storing them in a dark, humidity-controlled environment for several days or even weeks, depending on your preference. This can help improve the flavor, potency, and overall quality of your G-13 buds.
Trimming G-13 requires patience, attention to detail, and the right tools. By following the proper techniques and taking care during the trimming process, you can ensure that your plants produce high-quality buds that are perfect for smoking or using in other forms of cannabis products.
| Tools Recommended for Trimming G-13: |
|---|
| 1. Scissors with small, sharp blades |
| 2. Pruning shears |
| 3. Magnifying glass or jeweler’s loupe |
Step-by-Step Guide to Trimming
So, you’ve successfully harvested your buds and dried them to perfection. Now comes the most crucial step in achieving perfectly trimmed buds – trimming! It can be a daunting task, especially if you’re a first-timer. But fret not, with the right tools and techniques, you can achieve immaculate results. In this section of the article, we’ll guide you through a step-by-step process of trimming your buds like a pro. From preparing your workspace to selecting the right trimming tools and techniques, we’ve got you covered. So let’s dive in and learn how to trim cannabis buds with precision and finesse.
Step 1: Harvesting the buds
Before you begin trimming, it’s important to properly harvest the buds. This step is crucial for producing high-quality buds.
Timing is the key when harvesting buds. The ideal time to harvest depends on the strain and the growing conditions. Generally, it’s best to harvest when the trichomes, which are the resin glands that contain the active compounds, have turned from clear to a milky white color. Another way to know if the buds are ready for harvest is to check if the pistils, which are the small hairs on the buds, have turned orange or brown.
Tools needed at this stage are a pair of sharp scissors or a hand-held pruner. It’s important to use clean and sharp tools to avoid damaging the buds and preventing any contamination.
Method of harvesting will also differ based on the strain. For sativa strains, it’s best to harvest the top buds first as they mature earlier than the lower buds. For indica strains, it’s best to harvest the lower buds first as they tend to mature earlier. When harvesting, cut the buds along with a small stem, leaving about an inch or two of the stem attached to the bud.
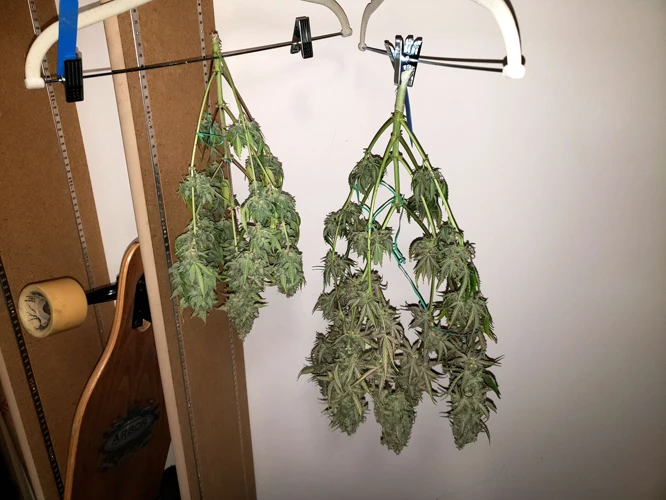
Once the buds are harvested, they need to be dried before trimming. This can be done by hanging the buds upside down in a cool, dark room with good ventilation. A hygrometer can be used to monitor the humidity levels during this time to ensure the buds don’t become too dry or too moist.
Step 2: Drying the buds
After harvesting the buds, the next crucial step is to dry them properly. This process is crucial for preserving the potency and flavor of the buds. The right drying technique can make or break the final product. Here are some tips for drying the buds:
| Step | Description |
|---|---|
| Step 1 | Trim the excess leaves: Before drying, you need to trim the excess leaves from the buds. This will help to speed up the drying process and avoid mold growth, which can ruin the buds. |
| Step 2 | Hang the buds: Once you have trimmed the buds, tie them in small bunches and hang them upside down in a cool, dark, and well-ventilated area. The ideal temperature for drying is around 70 degrees Fahrenheit, with a humidity level of 50%. The buds need to be hung for at least 5 days for a proper dry. |
| Step 3 | Check for dryness: After 5 days, check the buds for dryness. The stems should snap when bent, and the buds should be dry and crispy to the touch. If the buds are not dry enough, hang them for another day or two until they are properly dried. |
| Step 4 | Trim again: Once the buds are dry, you will need to trim them again to remove any remaining leaves that were not removed during the first trim. This will help to make the buds look more presentable. |
Proper drying is an essential step in the cultivation process. Be sure to follow these steps to ensure that you have high-quality buds that are bursting with flavor and potency.
Step 3: Prepare the trimming space
Preparing the trimming space is a crucial step in getting perfect trimming results. Here are the steps to follow:
Step 1: Choose a clean and dry area for trimming. Make sure the area is well-lit and ventilated. You can use a trimming tray or a clean table for this purpose.
Step 2: Clean the trimming space to remove any debris, dust, or other impurities that may contaminate your buds. Use a disinfectant to sanitize the area and your tools.
Step 3: Gather all the necessary tools for trimming. This includes trimming scissors, pruning shears, razor blades, and gloves. Make sure that the tools are sharp and clean before using them.
Step 4: Set up a station for the trimmed buds. This can be a drying rack, a sterilized container, or a glass jar. Label the buds according to their strain and date of trimming for easy identification.
Step 5: Place a garbage bag or a bin near the trimming space for easy disposal of the excess plant matter. This will help keep your trimming space clean and organized.
By following these steps, you can create a clean and organized trimming space that will help you achieve perfect trimming results. Remember to always keep your tools and trimming area clean and sanitized to prevent any contamination.
Step 4: Choose the correct tools
When it comes to trimming cannabis, choosing the correct tools can make a huge difference in the quality of the end product. Here are some tools you should consider having on hand for a successful trimming session:
- Scissors: A pair of sharp, high-quality scissors is crucial for trimming cannabis. Look for scissors with a small, pointed tip for precision trimming.
- Razor blades: For some strains, using a razor blade may be more effective than scissors. However, make sure to use a high-quality, sharp razor to avoid damaging the buds.
- Pruning shears: Pruning shears can be useful for trimming larger fan leaves or for some surgical-style trimming techniques.
It is important to select a tool that suits the specific trimming technique that you will be using. Additionally, it is essential to keep your tools clean and sharp to avoid damaging the buds or spreading contaminants. Before starting the trimming process, make sure that you have all of the necessary tools and that they are in good condition. This will help you to achieve the best possible results.
Step 5: Begin trimming
Now that you have prepared your trimming space, chosen the correct tools, and dried your buds, it’s time to begin trimming. Here are the steps to follow:
- Remove any large leaves by hand that are not sugar leaves or important to the structure of the bud.
- Choose the correct technique based on the strain and personal preference. If doing a wet trim, make sure to have a bucket of water nearby to rinse the scissors after each cut.
- Identify the areas of the buds that need to be trimmed. Typically, this will be around the edges of the bud where there are excess leaves.
- Hold the bud gently and use the chosen tool to carefully trim away the excess leaves. Be careful not to cut too much as this can damage the buds.
- Take your time and work through each bud thoroughly, making sure to trim all the areas that need attention.
- Dispose of the excess leaves in a bag or container to keep the trimming area clean.
- Once all the buds have been trimmed, take a break if needed and stretch your hands to prevent cramping.
- Check each bud to make sure it has been trimmed evenly, and make any necessary touch-ups.
- Once all the buds have been trimmed to your satisfaction, hang them or place them in a curing jar to complete the curing process.
Remember, trimming can be a long and tedious process, but taking your time and using the correct techniques and tools will ultimately lead to a better product. Good luck with your trimming process!
Step 6: Cure the trimmed buds
After trimming your buds, it’s important to properly cure them before using or storing them. Here are the steps for curing your trimmed buds:
| Step 1: | Place the trimmed buds in a glass jar or airtight container. Add a humidity control packet to the jar as this will help maintain the required humidity level. |
| Step 2: | Place the jar in a cool, dark place, away from direct sunlight or heat sources. This will ensure that the buds dry evenly. |
| Step 3: | Check the humidity level in the jar daily. The ideal humidity level for curing buds is between 60% and 65%. If you find that the humidity level is too high, open the jar for a few hours to allow the moisture to escape. If it’s too low, you can add a small piece of lettuce or orange peel to the jar to add moisture. |
| Step 4: | Continue checking the jar and adjusting the humidity level until the buds are dried and cured. The curing process generally takes between 2 to 4 weeks, depending on the humidity level and the strain of cannabis. |
| Step 5: | Once the buds are fully dried and cured, you can store them in an airtight container in a cool, dark place. Properly cured buds will have a smooth smoke, a better flavor, and a longer shelf life. |
Keep in mind that the curing process is just as important as trimming the buds. By curing your buds properly, you ensure that they are at their best quality for consumption.
Tips to Get Perfect Trimming Results
Now that you have learned about different trimming techniques and the tools required for them, it’s time to focus on achieving the best possible results. The following tips will help you achieve perfect trimming results for your cannabis buds. Keep these in mind for a more efficient and enjoyable trimming experience.
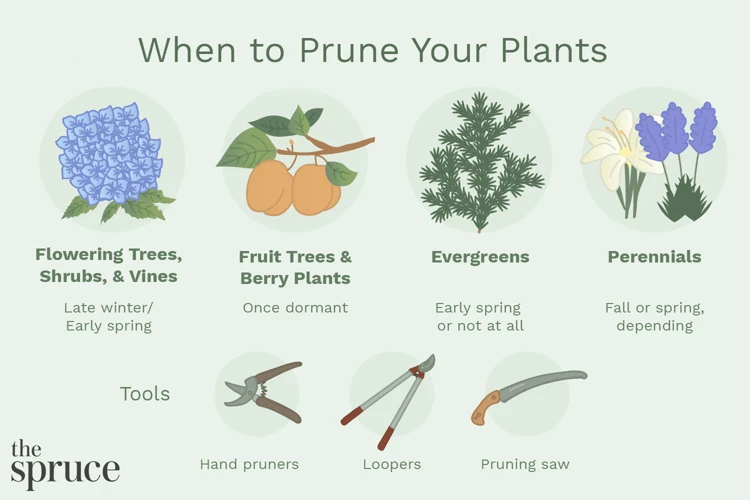
Trimming at the right time
As a cannabis grower, understanding when to trim your plants is crucial for achieving the best results. Trimming at the right time can make a significant difference in the yield and quality of your harvest. So, when is the right time to start trimming your cannabis plants?
| Strain type | Harvest time | Trimming time |
|---|---|---|
| Indica | 6-8 weeks flowering | After drying |
| Sativa | 10-12 weeks flowering | After drying |
| Autoflowering | 8-10 weeks from seedling | During growth |
As you can see from the table, Indica and Sativa strains should be harvested before the trimming process begins. On the other hand, Autoflowering strains can be trimmed during the growth process as they do not have a distinct vegetative and flowering phase.
Trimming too early will result in a lower yield, as the buds will not have fully developed. On the other hand, waiting too long to trim can cause the buds to become too dry, making them difficult to trim neatly. Additionally, waiting too long can result in mold or mildew growth, which can ruin your entire crop.
In conclusion, trimming at the right time is crucial for the success of your cannabis harvest. Understanding the different trimming times for various strains is essential in achieving the best results. Remember to be patient and allow your plants to fully mature before starting the trimming process, and you will be rewarded with high-quality buds.
Keep your tools sharp
One important tip to get perfect trimming results is to keep your tools sharp. Having dull tools can not only make the process more difficult and time-consuming, but it can also damage the buds. A dull pair of scissors or pruning shears can crush or tear the delicate cannabis buds, which can affect the overall quality of the final product.
To avoid damaging your cannabis buds, it’s essential to keep your trimming tools sharp. You can use a sharpening stone or a specialized sharpening tool for pruning shears to maintain the sharpness of your blades. Keeping your scissors, pruning shears, or razor blades sharpened will not only make the trimming process easier and more comfortable, but it will also ensure that you get the most out of your harvest.
Here are some tips to keep your trimming tools sharp:
- Sharpen your tools regularly: regular sharpening will help maintain the blades’ sharp edges, which will help to avoid crushing your cannabis buds.
- Use the right sharpening tool: different trimming tools require different sharpening techniques. Invest in a specialized sharpening tool specifically designed for scissors, pruning shears, or razor blades.
- Be gentle: excessive force when sharpening can cause damage to the blades. Use a light touch when sharpening your trimming tools.
- Keep your tools clean: trimmings can build up on blades, reducing their effectiveness. Be sure to clean your blades thoroughly before and after each use.
- Store your tools properly: after cleaning and sharpening your trimming tools, store them in a dry, cool place to prevent any moisture build-up.
By keeping your trimming tools sharp, you’ll be able to trim your cannabis buds quickly, efficiently, and without damaging them, ensuring a high-quality final product.
Use gloves
When it comes to trimming cannabis, using gloves is highly recommended. Here are some reasons why:
- Hygiene: Wearing gloves ensures that your trimmed buds don’t come in contact with your skin, reducing the risk of contamination or introducing bacteria.
- Resin: Trimming cannabis can be a sticky situation, and gloves help protect your hands from the sticky resin of the plant. This helps keep your tools from getting gummed up and makes the trimming process cleaner and more efficient.
- Protection: Some cannabis strains can cause skin irritation or allergic reactions in some people. Wearing gloves serves as a protective barrier against any potential irritation.
- Precision: Gloves provide greater grip and dexterity when handling the buds. This enables more precise trimming, reducing the chance of accidentally cutting off too much.
- Appearance: Finally, wearing gloves keeps your hands clean and prevents your skin’s natural oils and dirt from getting on the buds. This helps maintain the buds’ appearance and overall quality.
When it comes to choosing gloves, look for nitrile or latex gloves that fit well and offer the necessary protection. Make sure to change gloves frequently to avoid transferring any contaminants. By using gloves during the trimming process, you can ensure that your buds are clean, healthy, and of the highest quality possible.
Conclusion
In conclusion, trimming marijuana plants is an essential process that affects the overall quality and potency of the final product. It not only removes excess leaves and improves the appearance of buds but also provides a chance to identify and eliminate mold or pest-infected areas before they spread. Understanding strain-specific trimming techniques is crucial to achieve the desired shape and structure of buds for optimal potency and yield.
Choosing the correct trimming tools plays an important role in the success of the whole process, and it’s important to select the right tools based on personal preferences, strain characteristics, and specific trimming techniques chosen. Scissors, razor blades, and pruning shears are among the most commonly used tools for trimming cannabis.
Different trimming techniques, such as wet trimming, dry trimming, and surgical trimming, have their own pros and cons and suitable for different situations. The best technique for a particular strain also depends on personal preferences and desired outcomes.
To achieve perfect trimming results, timing is important. It’s best to trim the buds after they have dried enough to prevent damage and preserve the trichomes. Keeping the trimming tools sharp and wearing gloves are other tips that can ensure a smooth trimming process.
The step-by-step guide to trimming provided in this article aims to help beginners understand the basics of the process and feel comfortable enough to trim their own buds. By following these simple steps and understanding the strain-specific techniques and tools, anyone can achieve a perfect trim and produce high-quality cannabis. Happy growing and trimming!
Frequently Asked Questions
1. What equipment do I need for trimming?
You will need scissors, razor blades or pruning shears for trimming. A pair of gloves and a trimming tray is also recommended.
2. When is the best time to trim my cannabis plants?
The best time to trim your cannabis plants is after harvesting and drying them. You want to make sure they are completely dry before trimming to avoid damaging the buds.
3. What is the difference between wet trimming and dry trimming?
Wet trimming is when you trim the leaves from the buds right after harvesting. Dry trimming is when you trim the leaves from the buds after they have been dried completely.
4. Why is curing important after trimming?
Curing allows the buds to release excess moisture and develop their full aroma and flavor. This process also helps to reduce harshness and increase potency.
5. How do I choose the best trimming technique for my strain?
It’s important to research the specific strain you are growing and understand its characteristics. From there, you can choose a trimming technique that suits its needs.
6. Can I use regular scissors for trimming?
Yes, you can use regular scissors for trimming, but it’s recommended to use scissors specifically designed for trimming to avoid bruising or damaging the buds.
7. Can I use my hands for trimming?
While it is possible to use your hands for trimming, it is not recommended as it may damage the trichomes, which contain valuable cannabinoids and terpenes.
8. What are the benefits of surgical trimming?
Surgical trimming involves removing only the necessary leaves and preserving more of the valuable buds. This technique can result in higher potency and better appearance of the final product.
9. How can I prevent mold or pests during trimming?
It’s important to inspect the buds thoroughly before trimming and remove any signs of mold or pests. You can also use gloves and a sterilized trimming tray to prevent contamination.
10. How long does it take to trim a batch of cannabis?
The time it takes to trim a batch of cannabis depends on the size of the harvest and your personal speed and technique. It can range from several hours to several days for larger batches.
References

