How to Test Your Soil for Nutrient Deficiencies When Growing Cannabis
Growing cannabis is a complex and rewarding experience that requires careful attention to detail. One important aspect of growing cannabis is ensuring that the soil has the right nutrients for the plant to thrive. However, it can be difficult to know exactly what nutrients your soil is lacking. This is where soil testing comes in handy. Testing your soil can help you identify nutrient deficiencies and take corrective action, ensuring that your plants grow healthy and strong. In this article, we will guide you through the process of testing your soil for nutrient deficiencies when growing cannabis, step-by-step.
Why Test Your Soil?
Contents
When it comes to growing cannabis, ensuring that the soil is healthy and nutrient-rich is crucial for a successful harvest. However, it’s not always easy to determine if your soil has the necessary nutrients your plants need. This is where soil testing comes in. By testing your soil, you can identify any nutrient deficiencies and make informed decisions on how to correct them. In this section, we will explore the importance of soil pH, understanding nutrient deficiencies, and why it is crucial to test your soil.
Importance of Soil pH
Maintaining the correct soil pH is critical for the successful growth of cannabis plants. The soil pH affects the availability of the nutrients needed by the plant. It is important to ensure that the pH is within the correct range for the cannabis plants to be able to absorb nutrients optimally.
Here are some important points to keep in mind regarding the significance of soil pH:
- Soil pH affects nutrient availability: If the soil pH is too high or too low, it can affect the availability of essential nutrients such as phosphorus, potassium, and iron. When the pH is too high or alkaline, nutrients like iron, copper, and zinc become less available, leading to deficiencies. Similarly, if the pH is too low, the plant may have a hard time absorbing calcium and magnesium.
- Pests and diseases: Maintaining the soil pH can also help to prevent pests and diseases. When the pH is maintained at the optimal range, it creates an environment where beneficial microorganisms can thrive, thus protecting the plant from diseases and pests.
- Optimum pH range: The ideal pH range for soil is between 6.0 and 7.0. In this pH range, the cannabis plant can absorb nutrients efficiently. Outside of this range, the plant may experience nutrient deficiencies or toxicities.
- Testing soil pH: To ensure that the soil pH is within the correct range, it is crucial to test the soil regularly. Testing the soil helps to identify any changes in soil pH, allowing growers to take corrective measures before any damage is done to the plant.
To sum up, the soil pH plays a crucial role in the growth and development of cannabis plants. It affects nutrient availability, pest and disease resistance, and ultimately impacts the quality and yield of the plant. It is essential for growers to regularly test the soil pH and take corrective measures to maintain the optimal range for the plant.
Understanding Nutrient Deficiencies
One of the critical reasons to test soil when growing cannabis is to identify nutrient deficiencies. Understanding these deficiencies is crucial to providing the right nutrients to the plant.
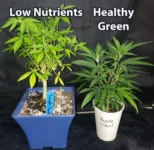
Nutrient Deficiency occurs when a plant is not getting the necessary nutrients that it needs to grow and thrive. There are numerous causes of nutrient deficiencies in cannabis plants, such as pH imbalance, incorrect nutrition, inadequate amounts of water, and much more. Nutritional deficiencies directly affect the plant’s health, such as stunted growth, weak stems, yellow leaves, dead spots, and the inability to flower properly.
The following table provides an overview of common nutrient deficiencies, their signs, and symptoms:
| Nutrient | Function | Deficiency Signs and Symptoms |
|---|---|---|
| Nitrogen (N) | Supports leafy growth and protein synthesis | Yellowing of lower leaves, reduced growth, thin stem, poor flowering, and wilting |
| Phosphorus (P) | Supports root and flower development | Purpling of stem and leaves, dark green leaves, small flowers, and weak stem |
| Potassium (K) | Supports overall plant health and aids in water and nutrient uptake | Brown spots on leaves, scorched leaf tips and margins, weak stems, and reduced resistance to diseases |
| Calcium (Ca) | A structural component in cell walls and aids in nutrient uptake | Leaf tip burn, stunted growth, and weak stems |
| Magnesium (Mg) | Supports chlorophyll production and aids in photosynthesis | Yellowing between leaf veins, brown spots or yellow shade at the margins |
| Sulfur (S) | Supports plant growth and aids in the production of essential oils and proteins | Yellowing leaves from the top downward, stunted canopy growth, and leaf drop |
| Iron (Fe) | Supports chlorophyll production and aids in respiration | Yellowing leaves with green veins, or whitish leaves and tips |
Without addressing nutrient deficiencies, the cannabis plant will not produce the desired yield or quality. Identifying nutrient deficiencies and treating them with the right fertilizers, supplements, or other organic sources is crucial to ensure a healthy and robust cannabis crop.
When to Test Your Soil?
Determining the right time to test your soil can be a perplexing task for cannabis growers. Not knowing when to test can lead to nutrient deficiencies, stunted growth, and minimized yields. As a rule of thumb, testing your soil before growing is a crucial step, but there are also other instances where testing is necessary. In this section, we will discuss the optimal times to test your soil, and why it’s important to do so.
Growing in a New Location
When you’re growing cannabis in a new location, it’s important to test your soil before planting. This is because different areas have different soil compositions and nutrient levels can vary greatly. Testing your soil will give you a better understanding of what nutrients you need to add for optimal growth.
To test your soil when starting in a new location, follow these steps:
| Step | Description |
|---|---|
| 1 | Collect soil samples from several different areas of your growing location. Take samples of soil from at least 6-8 inches deep, as this will give you a good representation of the soil composition. |
| 2 | Prepare the samples by removing any debris or organic matter, such as leaves or rocks. Mix the soil samples together well to create one consistent sample. |
| 3 | Use a soil pH tester to measure the pH level of the soil. The ideal pH level for cannabis plants is between 6.0 and 7.0. If the pH level is too low or too high, it can affect the plant’s ability to absorb nutrients from the soil. |
| 4 | Interpret the test results to determine which nutrients your soil may be lacking. If you find that your soil is deficient in certain nutrients, you will need to add them to the soil before planting your cannabis plants. |
Testing your soil before planting in a new location can save you a lot of time and effort in the long run. By knowing exactly what nutrients your soil needs, you can ensure that your cannabis plants will thrive and produce high-quality buds.
After Seeing Signs of Nutrient Deficiencies
When you see signs of nutrient deficiencies, it is important to test your soil to determine the exact cause. Some common signs of nutrient deficiencies include yellowing or browning leaves, slow growth, and small yields. In order to accurately diagnose and correct the issue, you’ll need to perform a soil test.
The first step is to collect soil samples from the affected areas. Use a clean trowel to dig soil samples from several different spots in the garden. Combine the soil samples in a clean container and mix well.
Once you have collected your soil samples, you’ll need to test the soil pH and nutrient levels. A soil pH tester can be purchased at your local garden supply store. Follow the instructions provided with the tester to obtain accurate readings.
After you have tested the soil, you’ll need to interpret the results to determine what nutrients are lacking. Refer to a nutrient deficiency chart to understand what each nutrient does and what symptoms indicate a deficiency. Once you’ve identified the nutrient(s) lacking, you can take steps to correct the issue.
Choosing the right fertilizer is important in correcting nutrient deficiencies. Look for a fertilizer that contains the specific nutrient(s) your soil is lacking. You may need to apply the fertilizer more frequently than the recommended rate until the plants recover.
Organic nutrient sources, such as compost or manure, can also be beneficial in correcting nutrient deficiencies. Apply the organic material to the soil and work it into the top few inches.
Remember that correcting nutrient deficiencies takes time, so be patient and monitor your plants closely. With proper soil testing and corrective actions, your cannabis plants can thrive and produce healthy yields.
How to Test Your Soil?
Now that we understand the importance of testing soil for nutrient deficiencies when growing cannabis, the next step is to learn how to actually test your soil. This can be a daunting process for those who have never done it before. However, by following these step-by-step instructions, you’ll be able to collect soil samples, use a soil pH tester, and interpret soil test results with ease. So, let’s dive in and learn how to test your soil for optimal cannabis growth.
Collecting Soil Samples
When it comes to testing your soil for nutrient deficiencies, the first step is collecting soil samples using the following steps:
- Choose a representative area – It’s essential to choose an area that is representative of the entire cannabis growing area. Avoid areas with visible signs of nutrient deficiencies or areas that were recently fertilized.
- Tools you need – You will need a garden trowel, a clean bucket, and a ziplock bag.
- Dig soil samples – Use the garden trowel to dig several small holes around the cannabis plants up to a depth of six inches. Make sure to remove any debris such as rocks or plant matter.
- Collect samples – Gather approximately 1 cup of soil from each of the holes dug and mix them in the clean bucket. Repeat this process in different areas of your cannabis growing area to create a composite sample.
- Allow soil to air dry – Spread the composite sample on a flat surface and let it dry for a day or two. Avoid exposing the soil to heat or direct sunlight.
- Place soil in a ziplock bag – Once the soil is dry, transfer it to a ziplock bag and label it with the location and date you collected it. Store the sample in a cool and dry place until you’re ready to test it.
It’s important to note that collecting soil samples should be done correctly for accurate results. By following these steps, you will have a representative sample of your cannabis growing area to test for nutrient deficiencies.
Using a Soil pH Tester
To test the pH levels in your soil, you can use a soil pH tester. The following steps will help you accurately test your soil:
- Step 1: Fill a container with distilled water.
- Step 2: Collect a small soil sample from the area you want to test.
- Step 3: Add the soil sample to the container of distilled water.
- Step 4: Mix the soil and water thoroughly. Make sure there are no large clumps of soil left.
- Step 5: Allow the mixture to sit for 10-15 minutes.
- Step 6: Wet the soil pH tester electrode with distilled water.
- Step 7: Insert the electrode into the soil mixture. Make sure it is completely covered.
- Step 8: Read the pH level on the tester after a few minutes.
- Step 9: Rinse the electrode with distilled water and store it according to the manufacturer’s instructions.
It’s important to note that different types of plants thrive in different pH levels. For example, cannabis plants prefer a pH level between 6.0 and 7.0. If your soil pH is too acidic or alkaline, it can lead to nutrient deficiencies and poor plant growth. Use a pH tester to determine the pH level of your soil and adjust it accordingly.
Interpreting Soil Test Results
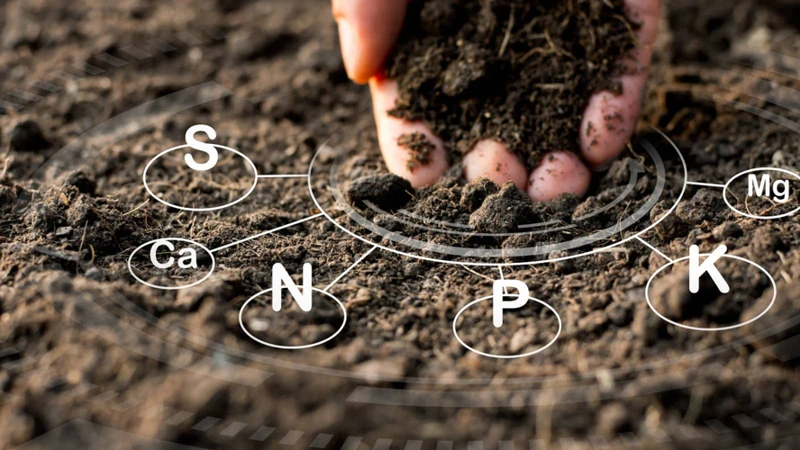
Once the soil test results are in, it’s important to know how to interpret them to determine what nutrients your cannabis plants need. The soil test results usually include several values, such as pH, nitrogen, phosphorus, potassium, calcium, magnesium, and sulfur. Here’s how to interpret each of these values:
pH: The pH level of your soil is crucial for nutrient uptake by cannabis plants. The ideal pH range for cannabis is between 6.0 and 7.0. A pH level outside of this range can cause nutrient deficiencies, even if there are sufficient nutrients in the soil.
Nitrogen: Nitrogen is essential for growth and chlorophyll production in cannabis plants. A soil test will show the nitrogen level in your soil, and if it’s low, your plants will appear yellow and stunted.
Phosphorus: Phosphorus is critical for root growth and flowering in cannabis plants. If the soil test shows a low phosphorus level, you may notice slow or stunted growth, and your plants won’t produce flowers as quickly.
Potassium: Potassium is vital for many of the metabolic processes in cannabis plants, including photosynthesis and water regulation. A low potassium level may cause slow growth, yellow leaves, and reduced yields.
Calcium: Calcium is essential for cell growth and division in cannabis plants. If the soil test shows a low calcium level, you may notice dark spots on leaves and slower growth.
Magnesium: Magnesium is needed for chlorophyll production and other enzyme reactions in cannabis plants. A low magnesium level may cause yellow or reddish leaves.
Sulfur: Sulfur is necessary for protein synthesis and chlorophyll production in cannabis plants. A low sulfur level may cause slow growth and yellow leaves.
By understanding the soil test results, you can determine which nutrients are deficient in your soil and correct the problem. This will help ensure that your cannabis plants are healthy and produce high-quality buds.
Correcting Nutrient Deficiencies
If you’ve tested your soil and discovered nutrient deficiencies, don’t despair. There are several ways to address the issue and get your cannabis plants back on track. With a bit of know-how and the right tools, you can choose the appropriate fertilizers or organic nutrient sources and learn how to apply them correctly. In this section, we’ll explore your options for correcting nutrient deficiencies and help you choose the best approach for your particular situation.
Choosing the Right Fertilizer
When choosing the right fertilizer to correct nutrient deficiencies in your cannabis soil, it’s important to consider several factors. Here are a few key points to keep in mind:
| Type of Nutrient Deficiency | Recommended Fertilizer |
|---|---|
| Nitrogen deficiency | A high-nitrogen fertilizer, such as blood meal, fish meal, or urea. |
| Phosphorus deficiency | A high-phosphorus fertilizer, such as bone meal or rock phosphate. |
| Potassium deficiency | A high-potassium fertilizer, such as potassium chloride or potassium sulfate. |
| Calcium deficiency | A calcium-rich fertilizer, such as gypsum or dolomite lime. |
| Magnesium deficiency | A magnesium-rich fertilizer, such as Epsom salt or dolomite lime. |
It’s important to note that some fertilizers may contain a combination of these nutrients, while others may be more focused on just one or two. Be sure to read the label carefully and choose a fertilizer that is specifically formulated to address the nutrient deficiency you’re dealing with.
Additionally, it’s important to consider the nitrogen-to-phosphorus-to-potassium (NPK) ratio of the fertilizer. This refers to the relative amounts of these three macronutrients in the fertilizer. Different plants have different requirements for NPK ratios, so it’s important to choose a fertilizer with a ratio that is appropriate for cannabis.
Choosing the right fertilizer depends on identifying the specific nutrient deficiency and selecting a fertilizer that is formulated to address it, taking into account the NPK ratio and other factors.
Applying Fertilizer
Once you have identified the nutrient deficiencies in your soil, it’s time to apply the right fertilizer. Fertilizers are available in different formulations and ratios, each designed to address specific nutrient deficiencies. Using the right fertilizer is crucial to ensure healthy plant growth and maximum yield.
Table: Common Fertilizers for Cannabis Plants
| Fertilizer Name | NPK Ratio | Primary Nutrients | Secondary Nutrients |
|---|---|---|---|
| General Purpose Fertilizer | 10-10-10 | Nitrogen, Phosphorus, Potassium | Calcium, Magnesium, Sulfur |
| Bloom Fertilizer | 0-10-10 | Phosphorus, Potassium | Calcium, Magnesium, Sulfur |
| Grow Fertilizer | 10-5-5 | Nitrogen, Phosphorus, Potassium | Calcium, Magnesium, Sulfur |
| Nitrogen Fertilizer | 21-0-0 | Nitrogen |
Before applying fertilizer, make sure to read and follow the instructions on the label carefully. Over-fertilization can be harmful to the plants and can lead to other problems. It’s always best to start with a lower dose and gradually increase if necessary.
When applying fertilizer, it’s important to distribute it evenly in the soil around the base of the plant. This can be done manually or using a fertilizer spreader. Water the plants after applying fertilizer to ensure that the nutrients are readily available to the roots.
Note: Organic fertilizers, such as compost and manure, can also be used to correct nutrient deficiencies in the soil. These organic sources not only provide nutrients but also improve soil structure and promote beneficial microbial activity. When using organic fertilizers, be cautious not to over-fertilize, as they release nutrients slowly over time.
Using Organic Nutrient Sources
One option for correcting nutrient deficiencies in your cannabis soil is using organic nutrient sources. There are many benefits to incorporating organic fertilizers into your soil, including improved soil structure, increased microbial activity, and reduced risk of nutrient burn. Here are a few examples of organic nutrient sources you can use:
- Compost: Compost is essentially decomposed organic matter, and it can be a great source of nutrients for your plants. You can make your own compost by collecting kitchen scraps, yard waste, and other organic materials and allowing them to break down over time. Once your compost is fully decomposed, you can mix it into your soil to provide a slow-release source of nutrients.
- Bone meal: Bone meal is a great source of phosphorus, which is an essential nutrient for cannabis growth. It can also provide some calcium and trace minerals. You can mix bone meal into your soil before planting, or you can use it as a top dressing throughout the growing season.
- Blood meal: Blood meal is a high-nitrogen fertilizer that can help correct nitrogen deficiencies in your soil. It’s made from dried animal blood and can be mixed into your soil or used as a top dressing.
- Fish emulsion: Fish emulsion is a liquid fertilizer made from fish waste. It provides a good source of nitrogen, phosphorus, and potassium, as well as trace minerals. You can dilute fish emulsion in water and use it as a foliar spray or soil drench.
- Kelp meal: Kelp meal is made from dried seaweed and is a great source of micronutrients, including iron, magnesium, and zinc. It can also help stimulate plant growth and build soil structure. You can mix kelp meal into your soil or use it as a top dressing.
Organic fertilizers can be a great way to correct nutrient deficiencies in your cannabis soil, but it’s important to keep in mind that they can take longer to become available to your plants than synthetic fertilizers. It’s also important to follow the manufacturer’s instructions and not overapply, as too much of certain nutrients can be harmful to your plants.
Conclusion
After following the steps outlined in this article for testing your soil for nutrient deficiencies when growing cannabis, you should have a better understanding of what your plants need to thrive. Remember that a healthy soil is the foundation for healthy plants, and testing your soil regularly can help prevent potential problems before they arise.
In conclusion, it’s important to pay attention to your plants and their growth patterns, as they can provide valuable information about the health of your soil. If you notice signs of nutrient deficiencies, such as yellowing leaves or stunted growth, it’s best to test your soil right away to determine the root cause of the problem.
Collecting soil samples and using a soil pH tester are both simple and effective ways to obtain accurate results. Once you have interpreted your test results, you can take steps to correct any deficiencies by choosing the right fertilizer and applying it correctly.
Don’t forget that organic nutrient sources can also be a great way to provide your plants with the nutrients they need without relying on chemical fertilizers. Following these tips will help ensure that your cannabis plants are healthy, strong, and able to produce an abundant harvest.
Frequently Asked Questions
What is the best time to test soil nutrient levels for cannabis plants?
The best time to test soil nutrient levels for cannabis plants is before planting or during vegetative growth.
What should the ideal pH range of the soil be for growing cannabis plants?
The ideal pH range of the soil for growing cannabis plants is between 6.0 and 7.0.
How do nutrient deficiencies affect cannabis plant growth?
Nutrient deficiencies can result in stunted growth, yellowing leaves, poor yield, and reduced potency in cannabis plants.
What are the common signs of nutrient deficiencies in cannabis plants?
The common signs of nutrient deficiencies in cannabis plants include yellowing or browning of leaves, slow growth, and reduced yield.
Why is it important to interpret soil test results accurately?
Interpreting soil test results accurately ensures that the appropriate corrective action can be taken to address any nutrient deficiencies in the soil.
What are the different types of fertilizers for cannabis plants?
The different types of fertilizers for cannabis plants include organic nutrients, mineral nutrients, and synthetic fertilizers.
What are the advantages of using organic nutrient sources for cannabis plants?
Using organic nutrient sources for cannabis plants promotes healthy soil, better nutrient absorption, and improves the overall quality of the plant.
How often should fertilizers be applied to cannabis plants?
The frequency of fertilizer applications depends on the type of fertilizer used, the growth stage of the plant, and the nutrient needs of the plant. However, generally once a week is a good rule of thumb during vegetative growth and early flowering.
What are the best practices for applying fertilizers to cannabis plants?
The best practices for applying fertilizers to cannabis plants include choosing the right fertilizer, following the recommended quantities, avoiding over-fertilization, and watering plants before and after application to prevent nutrient burn.
What are the benefits of testing soil regularly for cannabis plants?
Regular soil testing helps to identify nutrient deficiencies early on, prevent over-fertilization, maintain soil pH levels suitable for cannabis growth, and optimize plant yield and potency.


