
Tips for Handling and Storing Freshly Harvested Cannabis Buds
As a cannabis enthusiast, there’s nothing quite as satisfying as growing and harvesting your own buds. However, many people often overlook the importance of proper handling and storage when it comes to freshly harvested cannabis. The process of preserving the flavor and potency of your crop goes beyond simply drying and curing them. In this article, we’ll dive into the essential steps you need to take to ensure your buds stay fresh for as long as possible. From trimming to testing, we’ll cover everything you need to know about how to handle and store your freshly harvested buds.
Why Proper Handling and Storage is Important
Contents
Proper handling and storage of freshly harvested buds is crucial to preserve their flavor, potency, and prevent mold or mildew from forming. By handling and storing your buds correctly, you can enjoy the full benefits of your harvest for a long time to come.
One reason why it’s important to handle and store your buds properly is to preserve their flavor and potency. Cannabis plants contain a variety of volatile compounds, such as terpenes and cannabinoids, that give them their unique taste and effects. However, these compounds are fragile and can easily be lost or degraded if the buds are not treated carefully. By handling your buds gently and storing them in the right conditions, you can help to preserve these compounds and make sure your buds stay fresh and flavorful.
Another reason why proper handling and storage is important is to prevent mold and mildew from forming. When buds are harvested, they are still moist and contain a lot of organic matter that can support the growth of harmful microorganisms. If left untreated, mold and mildew can quickly take over your buds and ruin your entire harvest. Proper handling and storage methods, such as trimming, drying, and curing your buds, can help to prevent mold and mildew and ensure that your buds stay safe to use.
In addition to these reasons, proper handling and storage of your buds can also help to increase their shelf life and maintain their quality over time. By choosing the right containers, controlling the temperature and humidity, protecting them from light, and avoiding exposure to air and oxygen, you can help to extend the lifespan of your buds and keep them fresh and potent for months or even years.
It’s clear that proper handling and storage of freshly harvested buds is crucial to preserve their quality, safety, and potency. By following the right methods, such as harvesting at the right time, hand-trimming the buds, and drying and curing them properly, you can ensure that your buds stay fresh, flavorful, and safe to use.
Preserves Flavor and Potency
The way you handle and store your freshly harvested buds can greatly impact their flavor and potency. Proper handling and storage is crucial to preserving the essential oils and terpenes that give marijuana its unique taste and high.
Flavor is a key factor in the overall enjoyment of cannabis. By preserving the complex flavors and aromas of your marijuana, you can enhance your smoking or vaping experience. The secret to preserving the flavor of your buds lies in properly curing them. Curing is the process of letting your buds dry slowly while maintaining a consistent temperature and humidity level. This allows the buds to break down chlorophyll and other unwanted compounds, while retaining their natural flavors and aromas.
Potency is another important aspect of the smoking experience. The level of THC, CBD, and other cannabinoids in your buds determines the intensity and duration of the high. Proper storage can help preserve the potency of your buds by preventing the breakdown of these key compounds. Exposure to light, air, and moisture can all contribute to the degradation of cannabinoids, so it’s important to store your buds in a cool, dark, and dry place.
By taking the time to properly handle and store your freshly harvested buds, you can enjoy a more flavorful and potent smoking experience. To learn more about the importance of harvesting buds at the right time, check out our article on the importance of harvesting buds at the right time. For tips on how to hand trim your buds after harvest, see our article on hand trimming buds after harvest. And for guidance on how to dry your buds, read our article on drying buds after harvest.
Prevents Mold and Mildew
Proper handling and storage of freshly harvested buds is crucial to preserve the quality of the marijuana. One major reason for this is that it helps prevent the growth of mold and mildew. Mold is a common problem that can occur when cannabis is improperly handled or stored. Mold spores can be present in the air, and they thrive in warm and moist environments. If your buds are damp or stored in a humid environment, they can quickly become a breeding ground for mold and mildew.
Mold can not only affect the taste and aroma of your buds, but it can also be harmful to your health. Inhaling mold can cause respiratory issues and allergic reactions. Black mold is particularly dangerous and can produce toxins that can have serious health effects.
To prevent mold from developing on your marijuana, you should make sure that the buds are completely dry before storing them. Even a small amount of moisture can encourage mold growth. You should also store your buds in a dry and cool place, away from direct sunlight. The ideal temperature range for storing cannabis is between 60-70 degrees Fahrenheit, and the ideal humidity level is between 55-62%.
It is also important to store your buds in an airtight container to prevent the growth of mold and to avoid exposure to oxygen. Oxygen can cause the breakdown of cannabinoids and terpenes, which can reduce the potency and flavor of your buds. Make sure to check on your stored buds regularly and remove any that show signs of mold. Taking these steps will help ensure that your marijuana stays fresh and mold-free.
How to Handle Freshly Harvested Buds
After a successful harvest, it’s crucial to properly handle and prepare your buds for consumption. The process involves three main steps: trimming, drying, and curing.
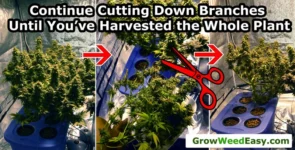
Trim Your Buds: Before you start drying and curing your buds, it’s important to trim them first. This involves removing all the large fan leaves and any small leaves that are sticking out from the bud. Use scissors or a sharp blade to trim these leaves as close to the bud as possible. This will help your buds dry more evenly and prevent moisture buildup inside the buds during the drying process.
Hang Your Buds to Dry: After trimming, you need to dry your buds. Hanging your buds upside down is the most traditional method for drying them out. Use a clothes hanger or some string to hang your buds in a cool, dark and well-ventilated place. The temperature should be around 60-70°F (15-21°C) with humidity levels between 45-55%. It’s important to keep a consistent temperature and humidity throughout the drying process, as rapid changes could damage the buds’ potency and flavor.
Cure Your Buds: Once your buds are dry, it’s time to cure them. Curing involves sealing the buds in an airtight container to allow the moisture inside to redistribute evenly through the buds. Use glass jars, as plastic can cause static buildup and degrade the quality of your buds. Place your dried buds in the jar and seal the lid, keeping the temperature between 60-70°F (15-21°C) with humidity levels between 55-62%. For the first few days, it’s recommended to “burp” the jars by opening them for 10-15 minutes each day to release any moisture buildup. After a few weeks, your buds should be fully cured and ready for long-term storage.
By following these simple steps, you can ensure that your buds are properly handled, dried and cured for optimal flavor, potency, and longevity.
Trim Your Buds
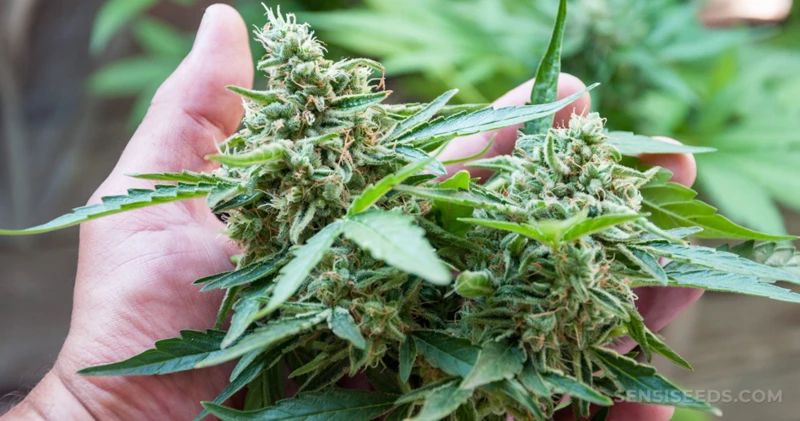
When you’ve harvested your cannabis buds, the next step is to trim them. This process involves removing unwanted leaves and stems to reveal the potent flower beneath. If you skip or rush through this step, it can negatively impact the overall quality and flavor of your final product.
Firstly, gather your tools – gloves, scissors or trimming shears, and a clean and flat surface. Carefully pick up each bud and start snipping away the fan leaves that are sticking out. These leaves don’t contain much THC or other valuable cannabinoids, so they can be discarded.
Next, focus on the sugar leaves – the small leaves that grow close to the buds themselves. You want to leave some of these leaves intact, as they contain valuable trichomes, but remove any excess or damaged ones. Trimming these leaves will reveal the buds’ true size and density.
Trimming your buds can be time-consuming, so it’s important to take breaks and stay patient throughout the process. A rushed job can result in harsh-tasting buds with a lower THC potency. If you’re having trouble getting everything done in one go, store your trimmed buds in an airtight container and pick up where you left off later.
Taking the time to properly trim your buds will result in a higher-quality final product with a superior taste and aroma.
Hang Your Buds to Dry
Once you have trimmed your buds, the next step in handling them is to dry them properly. This is a crucial step that will help ensure that your buds retain their flavor, aroma, and potency. Drying your buds is also important in preventing the growth of mold and mildew on them. Here’s how you can hang your buds to dry:
Step 1: Remove any leaves and stems from your buds, leaving only the flower clusters.
Step 2: Tie a string or a wire around the stem of each bud cluster, leaving enough space between each one for air to circulate. Make sure the string or wire is strong enough to hold the weight of the buds.
Step 3: Hang the bud clusters upside down in a cool, dark, and dry place. A garage, a closet, or an unused room will work well. Avoid hanging your buds in areas that are damp, humid, or exposed to direct sunlight.
Step 4: Allow your buds to dry for at least 7-10 days, or until they feel dry to the touch. During this time, check your buds regularly for any signs of mold or mildew growth. If you notice any, remove the affected buds immediately to prevent it from spreading.
Step 5: Once your buds are fully dried, you can then move on to the next step: curing them. Curing is the process of letting your buds age slowly, which will enhance their flavor and potency.
Remember, proper drying is a crucial step in handling your buds. Rushing this process or doing it improperly can result in moldy or over-dried buds, which can ruin your entire harvest. So be patient, follow these steps carefully, and you’ll be rewarded with high-quality, flavorful buds that will provide you with a pleasant smoking or vaping experience.
Cure Your Buds
After hanging your buds to dry, the next step is to cure them. Curing buds is an essential part of the harvesting process that helps to improve the quality and potency of your cannabis.
To begin, remove the buds from the hanging lines and place them in a sealed container, such as a glass jar with a tight-fitting lid. The jar should be only about 75% full, allowing plenty of air space for the buds to breathe.
For the first week of curing, you should “burp” the jar once a day. This involves opening the lid for a few minutes and allowing fresh air to circulate inside. Be sure to check the buds for any signs of mold or mildew during this time.
After the first week, you can reduce the frequency of burping to once every few days. The curing process typically takes between two to four weeks, depending on the humidity levels and the size and density of the buds.
During the curing process, enzymes in the buds break down the remaining chlorophyll and other undesirable compounds, resulting in a smoother, more enjoyable smoking experience. Properly cured buds will have a better flavor, aroma, and overall potency.
It is important to monitor the humidity levels inside the curing jar. You want to aim for a relative humidity (RH) level of around 60-65%. You can use a hygrometer to measure the humidity inside the jar. If the humidity is too high, you can remove the buds from the jar and allow them to air out for a few hours before placing them back in the jar. If the humidity is too low, you can add a small piece of moistened paper towel to the jar.
Remember, patience is key when it comes to curing buds. Rushing the process can result in buds that are harsh and unpleasant to smoke. Take your time and be sure to give your buds the care they deserve.
How to Store Freshly Harvested Buds
After harvesting and curing your buds, it is important to store them properly in order to maintain their quality over time. Proper storage can help to preserve the flavor and potency of your harvest, as well as prevent the growth of mold and mildew.
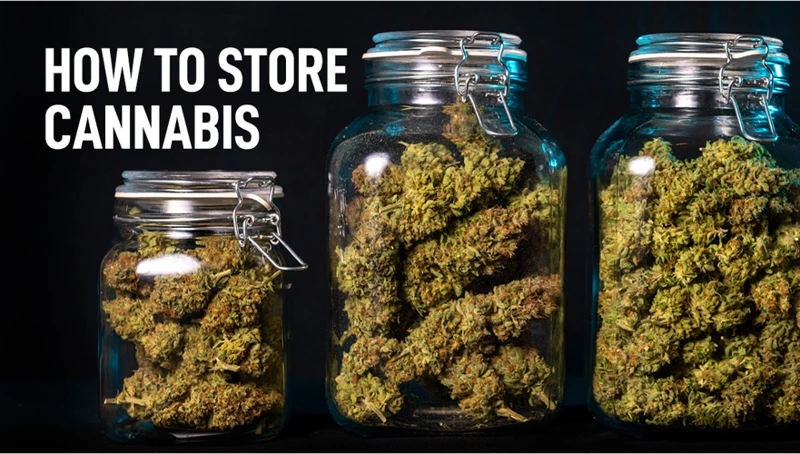
Choose the Right Container: The first step in storing your buds is to choose the right container. Mason jars or other airtight glass containers are often the best choice, as they help to retain the freshness of the buds. Avoid using plastic bags or other containers that can trap moisture and odors, which can spoil the buds.
Control the Temperature and Humidity: It is important to store your buds in a controlled environment, with both temperature and humidity levels being critical factors. Buds should be stored in a cool, dark place, with temperatures ranging between 60-70 degrees Fahrenheit. Humidity levels should be kept at around 60-65%, as too much moisture can encourage mold growth, while too little can cause the buds to dry out too quickly.
Protect from Light: Exposure to light can degrade the quality of your buds, causing them to lose potency and flavor. It is important to store your buds in a dark place, such as a closet or drawer. If storing in a clear glass container, make sure to store in a dark place or wrap the container in a cloth to prevent exposure to light.
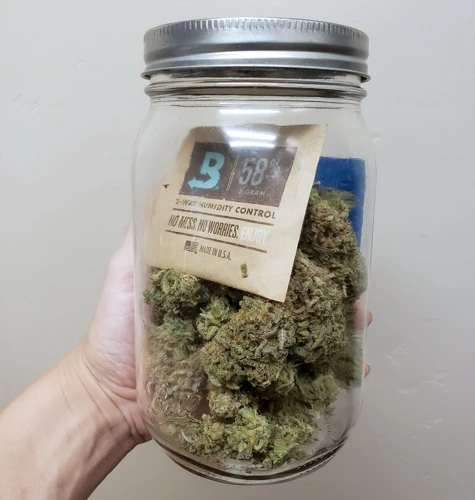
Avoid Exposure to Air and Oxygen: Exposure to air and oxygen can also degrade the quality of your buds, causing them to lose potency and flavor. Make sure to close the lid of your container tightly, avoiding any unnecessary opening or exposure to air. It may also be beneficial to add a humidity control pack to your container to help maintain proper moisture levels.
Properly storing your buds can help to maintain their quality over time. By selecting the right container, controlling temperature and humidity levels, protecting from exposure to light, and avoiding exposure to air and oxygen, you can enjoy your harvest for months to come.
Choose the Right Container
When it comes to storing freshly harvested buds, choosing the right container is key. You want a container that will keep your buds fresh without compromising their quality. The container you choose should be made of a material that does not let in too much light or air. This will help maintain the potency and flavor of your buds.
Glass jars are a popular choice for storing buds. They are airtight and do not allow light to pass through, which helps preserve the potency and flavor of your buds. When using glass jars, be sure to choose a size that will comfortably fit your buds without squishing or overcrowding them.
Plastic containers are also an option, but it is important to choose a BPA-free container. BPA is a chemical often found in plastics that can seep into your buds and affect their flavor and potency. Like glass jars, plastic containers should be airtight and opaque to maintain the quality of your buds.
Vacuum-sealed bags are another option for storing buds. They are airtight and can keep buds fresh for an extended period of time. However, vacuum-sealed bags can be expensive and are not as easy to access as jars or plastic containers.
Metal containers should generally be avoided for storing buds, as they can react with the cannabinoids in the buds and compromise their potency and flavor.
Ultimately, the container you choose should be airtight, opaque, and made of a material that will not affect the quality of your buds.
Once you have chosen your container, label it with the strain and date of harvest. This will help you keep track of your buds and ensure that you are consuming them before they get too old.
Control the Temperature and Humidity
To ensure the freshness and potency of your harvested buds, it is important to properly control the temperature and humidity level of their storage environment. This will prevent the growth of mold or mildew and keep the buds from drying out too quickly or becoming too moist.
The ideal temperature for storing freshly harvested buds is between 60-70°F (15-21°C). This can be achieved by keeping the buds in a cool, dark place like a basement or closet, away from any sources of heat such as radiators or direct sunlight.
The humidity level of the storage environment is equally important. The moisture content of the buds should be around 55-62%, which can be measured using a hygrometer. If the humidity is too low, the buds will dry out and lose their flavor and potency. On the other hand, if the humidity is too high, the buds can develop mold or mildew, which can be dangerous to consume.
To maintain the proper humidity level, place your buds in an airtight container made of glass, metal, or a food-grade plastic. You can also add a humidity pack or a piece of citrus peel to help regulate the humidity level inside the container.
It’s important to note that temperature and humidity can vary depending on the climate and season. In colder months, the air tends to be drier, so you may need to increase the humidity level slightly to prevent the buds from becoming too dry. Similarly, in humid months or in areas with high humidity, you may need to decrease the humidity level to prevent mold growth.
By carefully controlling the temperature and humidity levels of your harvested buds, you can ensure that they stay fresh and flavorful for longer, allowing you to enjoy the full benefits of your harvest.
Protect from Light
One crucial factor in storing freshly harvested buds is protecting them from light, which can degrade the potency of the buds over time. When exposed to light, the cannabinoids in the buds can break down and degrade, reducing their overall potency.
To protect your buds from light, it’s important to store them in a dark location. This could be in a closet or cabinet that doesn’t receive any natural light, or in a opaque container that blocks out all light. Airtight containers that are also light-proof are the ideal choice for storing buds long-term, as they provide an additional layer of protection against light and air.
Be sure to keep your buds in their container whenever possible, and only take them out when necessary. When checking on your buds, use a small flashlight or other low-intensity light source to minimize their exposure to light. You should also avoid storing your buds in clear or translucent containers, as these can still allow light to pass through and degrade the potency of the buds.
By taking steps to protect your buds from light, you can help ensure that they remain potent and flavorful for weeks or even months after harvest. This simple step can make a big difference in the quality of your cannabis, and is an important aspect of properly handling and storing freshly harvested buds.
Avoid Exposure to Air and Oxygen
Proper storage of freshly harvested buds must ensure that they are protected from exposure to air and oxygen. This is because air and oxygen can lead to oxidation, leading to the breakdown of the active compounds found in the buds, such as THC and CBD. To prevent this, use airtight containers such as glass jars with tight-fitting lids that can be sealed completely.
Additionally, storing buds in vacuum-sealed bags can also help protect them from oxidizing agents. Oxygen absorbers, such as silica gel packets, can also be added to the container before sealing to remove any extra air and reduce the chances of oxidation.
It is important to avoid opening the container unnecessarily. Each time the container is opened, the buds are exposed to air, oxygen and moisture, and the potency and flavor can be degraded. When opening the container, make sure to remove only the amount of buds that are required and then seal the container again as quickly as possible.
It is also recommended that the buds be kept in a cool and dark place, such as a pantry or a cellar, as exposure to light, heat and humidity can also cause oxidation and loss of potency. Make sure to store buds away from any strong odors or contaminants, as they can alter the flavor and aroma of the buds.
By following these tips, you can help ensure that your freshly harvested buds retain their potency, flavor and aroma over an extended period of time.
Testing Your Buds
After you have properly handled and stored your freshly harvested buds, it’s time to test them. Testing your buds will help you determine if they are ready to be consumed or if they still need some more time to cure.
The Smell Test: The smell test is the first step to testing your buds. Great cannabis should have a strong and pleasant odor. When you open the container, take a deep breath and try to identify its aroma. If it smells off or moldy, then it’s not worth smoking.
The Visual Test: The visual test is also important when testing your buds. Look for buds that are evenly trimmed and have a healthy green color with orange pistils. Check for any signs of mold or discoloration. If the buds are too dry, then they may crumble when touched.
The Touch Test: The touch test will help you determine if the buds are too dry or too wet. Squeeze the buds lightly and if they feel moist and spongy, then they still need time to dry. If they feel too dry or crumbly, then they may be over-dried.
The Smoke Test: The smoke test is the final test for testing your buds. While smoking, look for signs of harshness or bitter taste. Good cannabis should have a smooth and flavorful smoke.
By performing these tests, you can ensure that your buds are of high quality and potency. Remember to take your time when testing your buds and don’t rush to smoke them if they are not ready. The curing process is crucial to achieve the best results. Enjoy your freshly harvested buds responsibly and share them with your friends.
The Smell Test
When it comes to testing the quality of your freshly harvested buds, one of the most important assessments you can make is the smell test. The aroma of your buds can reveal a lot about their potency, flavor, and overall quality.
To perform this test, take a small amount of your dried and cured buds and hold them close to your nose. Take a deep inhale and pay attention to the scent. Does it smell fresh and pungent, or does it seem muted or stale?
A potent and high-quality bud should have a strong, distinct odor. The smell should be fragrant and complex, with notes of pine, citrus, or earthiness, depending on the strain. If the scent is weak or non-existent, it could indicate that the buds are low quality or have not been properly cured.
Another important aspect to consider when smelling your buds is the presence of any off-putting or musty odors. If the buds smell like mold or mildew, this could be a sign of over-drying or improper storage. Moldy buds can be dangerous to consume and should be discarded immediately.
Lastly, it’s important to note that different strains can have different smells, and some strains may have more subtle aromas than others. However, the overall potency and freshness of the scent should still be apparent. The smell test is a crucial step in assessing the quality of your buds and ensuring that they have been stored and cured properly.
The Visual Test
When it comes to assessing the quality of your freshly harvested buds, the visual test can be a useful tool. By examining the appearance of your buds, you can gain insight into their potency, freshness, and overall quality.
Color: One of the first things to look for when visually examining your buds is their color. High-quality buds should be vibrant and green, with reddish or orange hairs and crystal-like trichomes covering the surface. If the buds appear brown, yellow, or dull in color, this could be a sign that they are old or have been exposed to light or air.
Density: Another important visual characteristic to look for is density. High-quality buds should be relatively dense, with a solid structure that doesn’t fall apart easily. If the buds feel spongy or airy, this could be an indication of poor quality or improper storage.
Trichomes: The presence of trichomes on the surface of your buds is also an important indicator of quality. Trichomes are the tiny, crystal-like structures that contain cannabinoids and terpenes, which contribute to the potency and flavor of your buds. If your buds are covered in a thick layer of frosty trichomes, this is a good sign that they are strong and flavorful.
Mold: Finally, any signs of mold or mildew on your buds should be cause for concern. Mold can grow quickly in the presence of moisture, so it’s important to inspect your buds closely for any signs of fuzzy white or gray patches. If you notice mold on your buds, it’s best to dispose of them immediately to avoid any potential health risks.
The visual test can be a helpful tool for assessing the quality of your freshly harvested buds. By looking for vibrant color, solid density, abundant trichomes, and the absence of mold or mildew, you can ensure that your buds are potent, flavorful, and safe to consume.
The Touch Test
When it comes to testing the quality of your freshly harvested buds, the touch test can be a very useful tool. Firstly, take a small bud and give it a gentle squeeze between your fingers. You should feel some give, but it should also rebound back to its original shape fairly quickly. If the bud feels overly moist or spongy, it may not have been dried and cured properly and could be at risk for developing mold or mildew over time. Additionally, overly dry buds may feel brittle and break apart easily, indicating that they may have lost some potency over time.
Another aspect to consider when performing the touch test is the stickiness of the buds. Good quality buds will often have a resinous, sticky feel to them, indicating the presence of trichomes and a high level of THC. However, if the buds feel excessively sticky and wet, this could also be a sign of insufficient drying or curing.
Finally, the touch test can also reveal the density of the buds. Good quality buds should have a dense, compact feel to them, with a good weight in your hand. Conversely, buds that feel light and airy could indicate a lower quality product that may not produce the desired effects.
With the touch test, you are looking for a balance of moisture, stickiness, and density that indicates a properly dried, cured, and high-quality product.
The Smoke Test
When it comes to testing your freshly harvested buds, the ultimate test is the smoke test. Before diving into smoking your entire stash, it’s important to test a small portion first to ensure that it produces the desired effects.
Step 1: Choose the Right Time
Timing is key when it comes to the smoke test. You want to make sure that you’re in a comfortable environment where you can fully enjoy the experience. This may mean waiting until you have some downtime or are in the company of trusted friends.
Step 2: Prepare Your Bud
Before testing your bud, make sure it’s dry and properly cured. Grinding your bud can also improve the smoking experience by ensuring that it burns evenly.
Step 3: Light Up
Now for the fun part – light up your bud! Pay attention to the taste and the effects it produces. Does it produce the desired high? Is the flavor pleasant? Take note of any negative effects such as coughing or discomfort.
Step 4: Monitor Your High
As you’re smoking, pay attention to the effects the strain produces. Does it make you feel energetic or relaxed? Is there a noticeable difference between this strain and others you’ve tried?
Step 5: Take Notes
After trying out your freshly harvested bud, take detailed notes on your experience. This will help you remember which strains you enjoyed and which to avoid in the future.
By following these steps and taking the time to properly test your bud, you can ensure that you’re getting the best possible experience from your freshly harvested harvest.
Conclusion
In conclusion, handling and storing freshly harvested buds properly is essential for preserving their potency, flavor, and overall quality. By trimming, drying, and curing your buds correctly and utilizing the appropriate storage container and environment, you can ensure that your cannabis stays fresh and free from mold, mildew, and other contaminants.
Remember to always test your buds using the smell, visual, touch, and smoke tests before enjoying them. This will ensure that your cannabis is of the highest quality and provide a better overall experience.
While it may seem tedious, taking the time to properly handle and store your buds will ultimately pay off in the end by providing you with a superior product that is sure to please. So, always take the necessary steps to ensure that your buds are properly cared for and preserved, and you’ll be rewarded with the best possible cannabis experience.
Frequently Asked Questions
What tools do I need to trim my buds?
You will need a good pair of trimming scissors, trimming gloves or finger cots, and a clean, flat surface to work on.
How long should I hang my buds to dry?
Hang your buds to dry for 7-10 days or until the stems snap instead of bending.
How long should I cure my buds?
Cure your buds for at least 2 weeks, but ideally up to a month, in an airtight container.
What type of container should I use to store my buds?
Choose an airtight container made of glass, ceramic, or metal to store your buds.
What temperature and humidity should I maintain when storing my buds?
Maintain a temperature of 60-70°F and a humidity level of 58-62% when storing your buds to maintain their potency and flavor.
Can I store my buds in the fridge or freezer?
No, storing your buds in the fridge or freezer can damage their potency and flavor.
Should I store my buds together with other herbs or spices?
No, storing your buds with other herbs or spices can compromise their flavor and aroma.
Why is exposure to light bad for storing buds?
Exposure to light can break down the cannabinoids and reduce the potency of your buds.
How often should I burp my container when curing my buds?
Burp your container at least once a day during the first week of curing, then gradually reduce to once a week as the process continues.
When should I start testing my buds?
Test your buds after they have been cured for at least two weeks to allow them to reach their full flavor and potency.

