

The Benefits of Extended Curing for Your Cannabis Harvest
As cannabis enthusiasts, we all want to get the most out of our harvest. But sometimes, the quality of our buds doesn’t quite live up to expectations. That’s where extended curing comes in. This time-consuming, yet worthwhile process involves drying and curing your buds over an extended period of time to improve potency, flavor, and overall smoking experience. But just how does it work? And what steps do you need to take to ensure success? In this article, we’ll explore the benefits of extended curing and guide you through the step-by-step process of maximizing your cannabis harvest. So grab your gloves and let’s get started!
What is Extended Curing?
Contents
When it comes to cannabis cultivation, the curing process is just as important as the growing process itself. Extended curing, in particular, is a technique used by many experienced growers to enhance the potency and flavor of their buds. So, what exactly is extended curing? Well, in simple terms, it’s the process of allowing your buds to age in a controlled environment for an extended period of time. During this time, the buds will continue to break down chlorophyll and other unwanted compounds while developing a truly exceptional flavor profile. Let’s dive deeper into why this process is so important.
Why is it Important?
Extended curing is a crucial process in achieving the highest quality of cannabis. There are several reasons why it’s important to take the time to properly cure your buds:
- Potentcy: Extended curing allows the buds to fully develop their cannabinoid profile, resulting in higher levels of THC and other cannabinoids. This means a more potent and effective high for the consumer.
- Flavor: Proper curing enhances the natural flavors and aromas of the cannabis, resulting in a more enjoyable smoking or vaping experience for the user. This is due to the breakdown of chlorophyll and other compounds during the curing process.
- Smooth Smoke: Cured cannabis is smoother to smoke or vape than uncured buds, as the curing process removes harshness and impurities from the plant material.
Taking the time to properly cure your cannabis not only results in a better end product, but it also shows a level of care and attention to detail in the growing process. By extending the curing process and focusing on quality, growers can provide an exceptional product to consumers that will keep them coming back for more.
The Benefits of Extended Curing

When it comes to harvesting your cannabis, you want to ensure that you’re maximizing every aspect of your plant. That’s where extended curing comes in. By taking the time to properly cure your buds, you’ll not only see an improvement in potency, but you’ll also experience a better flavor and a smoother smoke. Let’s dive into the various benefits that come with extended curing and how it can take your cannabis experience to the next level.
Improved Potency
Extended curing is a process that allows cannabis to dry and mature slowly over time, resulting in improved potency. The longer the cure, the more pronounced the effect. This is because the cannabinoids present in the flowers continue to develop and breakdown during the curing process, leading to a stronger and more potent product.
Here are some ways in which extended curing can improve potency:
- Increased THC: THC is the psychoactive compound in cannabis that is responsible for the “high”. During the curing process, THC levels can increase by up to 5% or more, leading to a stronger and longer-lasting high.
- Improved CBD: CBD is another compound found in cannabis that has a range of therapeutic benefits. Extended curing can lead to increased levels of CBD, which may enhance the medicinal properties of the plant.
- Enhanced Terpenes: Terpenes are aromatic compounds found in cannabis that contribute to its unique flavor and aroma. During the curing process, terpenes can become more pronounced, resulting in a richer and more complex flavor profile.
Extended curing can greatly enhance the potency of your cannabis harvest, resulting in a more enjoyable and satisfying experience.
Better Flavor
One of the most notable benefits of extended curing is the significant improvement in the flavor of your cannabis. Not only will the flavor become more complex, but it will also become smoother and more enjoyable to smoke.
During the curing process, the terpenes in the buds will continue to break down and develop, enhancing the flavor profile of your cannabis. This is especially true for strains with high terpene content, such as OG Kush or Sour Diesel.
Additionally, extended curing can reduce the harshness of cannabis smoke. As the buds continue to cure, the chlorophyll content decreases, leading to a smoother smoke. This makes for a more pleasant smoking experience and can be especially beneficial for medical cannabis users who may struggle with harsh hits.
To fully appreciate the improved flavor of your cannabis, it’s important to take your time during the curing process. Rushing the cure can result in a less flavorful and less enjoyable final product. However, with a little patience and attention to detail, your buds will reward you with a rich, complex flavor that is truly unmatched.
Smooth Smoke
One of the benefits of extended curing is the smooth smoking experience it provides. When cannabis is not properly cured, it can produce a harsh smoke that irritates the throat and lungs. However, when the curing process is extended, the smoke becomes much smoother and more enjoyable. This is due to the breakdown of chlorophyll and other harsh compounds that naturally occur in the plant.
During the curing process, the terpenes in the cannabis are also allowed to fully develop. Terpenes are the compounds responsible for the unique flavors and aromas of each strain. When terpenes are properly cured, they provide a full-bodied flavor profile that is smooth and enjoyable to smoke. This allows for a more enjoyable smoking experience as you can fully appreciate the unique characteristics of the strain.
In order to ensure a smooth smoke, it is important to properly dry and cure your buds. By taking the time to properly dry and cure your cannabis, you can significantly improve the smoking experience. This is especially important for medical users who rely on cannabis for relief, as a harsh smoking experience can be counterproductive to their treatment.
Extended curing provides many benefits, including a smooth smoking experience. By taking the time to properly cure your cannabis, you can enjoy a full-bodied flavor profile and a smoke that is easy on the throat and lungs, making for a more enjoyable smoking experience.
How to Extended Cure Your Cannabis
Now that you understand the importance of extended curing for your cannabis harvest, you may be wondering how to successfully achieve this process. Curing can seem intimidating, but with the right techniques and equipment, it can be a simple yet highly effective way to improve the overall quality of your buds. In the following steps, we will guide you through the process of extended curing, starting with drying your buds and ending with proper monitoring and storage techniques. By the end, you’ll have all the tools you need to finish your cannabis cultivation journey with a successful harvest.
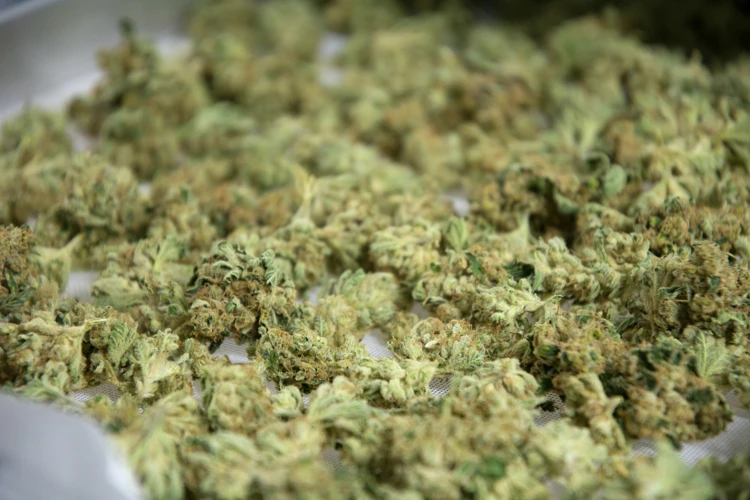
Step 1: Drying Your Buds
The first step in the extended curing process is drying your buds. Proper drying is crucial to ensure that excess moisture is removed from the buds, allowing for a high-quality end product.
Here are some steps to follow:
- Trim: Once you have harvested your cannabis, it is essential to trim off any excess leaves or stems. This will allow for better air circulation and more even drying.
- Hang: After trimming, hang your buds upside down in a cool, dark, and well-ventilated area, such as a closet or drying tent. This will allow for the moisture to evaporate slowly over time.
- Avoid direct sunlight: It is important to keep your buds away from direct sunlight, as this can cause the terpenes and cannabinoids to degrade.
- Monitor: Check on your buds daily, and make sure to remove any mold or damaged plant material.
- Cure time: Depending on the humidity and temperature of your drying area, it can take seven to fourteen days for the buds to dry completely.
Proper drying is an essential first step in the extended curing process. By following these steps and taking your time, you can ensure that your buds are dried to perfection and ready for the next stage of curing.
Step 2: Jar Curing
After drying your buds, the next step in the extended curing process is to begin the jar curing phase. This step is crucial to achieve the full benefits of extended curing. Here’s how to do it:
- Gather Clean Airtight Jars – Before beginning this step, make sure that you have an adequate amount of clean and airtight jars. It is recommended to opt for glass jars with airtight seals to maintain the quality and freshness of your buds.
- Fill the Jars – Once you have your clean jars ready, begin filling them with your dried buds. As you add the buds, ensure that they are not too tightly packed as this could lead to impeded airflow, which could hinder the curing process.
- Avoid Overfilling – It’s advisable to fill your jars to about 75% to allow for adequate air circulation during the curing process. Overfilling the jars can trap moisture and cause mold formation, which could render your buds unusable.
- Label and Store the Jars – After filling the jars with your buds, label each jar with the date of harvesting to ensure you can keep track of how long each jar has been curing. Store the jars in a cool, dry, and dark place to maintain the ideal environment for curing.
Jar curing is a critical part of the extended curing process. It allows for the buds to retain and increase potency, flavor, and smoothness. By following the above steps, you can ensure that your curing process is complete and your buds will be in prime condition for use.
Step 3: Burping & Monitoring Your Jars
After the initial drying process, the next step in extended curing your cannabis is the jar curing stage. This is where burping and monitoring your jars becomes crucial. Here’s how to do it:
| Step | Description |
|---|---|
| 1 | Prepare your properly dried buds by trimming them down to their final size. |
| 2 | Place the buds into airtight glass jars. Mason jars are a popular choice for this. |
| 3 | For the first week, leave the jars unopened in a cool, dark place. This allows excess moisture to escape from the buds and be absorbed by the air inside the jar. |
| 4 | After the first week, start “burping” the jars once a day. This involves opening the jars for a few minutes to let in fresh air and release any built-up moisture. |
| 5 | Monitor the buds as they cure. They should feel slightly sticky to the touch but not too moist. If they feel too wet, leave the jars open for a little longer than usual during burping. |
| 6 | Continue burping and monitoring the jars for at least 2-4 weeks, though some professionals extended cure their bud for several months. |
Burping your jars helps to prevent the growth of mold and mildew, which can ruin your entire harvest if it spreads. It also ensures that the buds cure evenly and develop their full flavor and potency. Remember to be patient and give your buds enough time to cure properly. Rushing the process can result in sub-par buds that don’t live up to their full potential.
Tips & Techniques for a Successful Curing Process
So, you’ve completed the extended curing process for your cannabis harvest – congratulations! But the journey doesn’t end there. Now it’s time to focus on maintaining the quality and potency of your buds for as long as possible. This is where these tips and techniques come into play. By following these guidelines, you’ll be able to ensure a successful curing process and enjoy high-quality cannabis for months to come. Let’s dive in!
Humidity Control
Maintaining proper humidity levels is crucial during the curing process to achieve the optimal outcome. Here are some tips for humidity control:
- Invest in a Hygrometer: A hygrometer is a tool used to measure the humidity in the air. It’s important to track humidity levels throughout the curing process so that you can make adjustments accordingly.
- Aim for 60-65% Humidity: During the first few days of jar curing, you want to aim for a humidity level of around 60-65%. This allows the buds to slowly release excess moisture while still retaining their terpenes and cannabinoids.
- Don’t Let it Get too Dry: If the humidity drops too much, the buds will become too dry and lose their potency and aroma. If this happens, try adding a damp paper towel to the jar or rehydrating the buds with a humidifier.
- Watch Out for High Humidity: On the other hand, if the humidity gets too high, your buds might develop mold. If you notice condensation forming on the lid of the jar, it’s a sign that the humidity is too high. You can reduce humidity by removing the lid for a little while or placing the jars in a less humid environment.
- Use Humidity Packs: Humidity packs, also known as “Boveda packs,” can help regulate the humidity in your jars. They come in different humidity levels, so make sure to choose the one that best suits your needs.
- Check on Your Jars Regularly: Make sure to check on your jars at least once a day during the first two weeks of curing. This allows you to monitor humidity levels and make adjustments as needed.
By following these humidity control tips, you can ensure that your buds maintain their optimal potency and flavor throughout the curing process.
Storage & Shelving
Proper storage and shelving are crucial factors to consider when extended curing your cannabis. Light exposure is one of the most significant threats to the quality of your bud. Ultraviolet light, in particular, can degrade the potency of your cannabis over time. It’s essential to store your curing jars and containers away from direct light. A dark, cool place like a closet or pantry can be an ideal location for your curing jars.
It is also worth considering the type of container or jar you use. Glass jars with a tight-fitting lid are best for curing cannabis. Avoid using plastic containers or bags as they can add an unwanted flavor to your bud. Glass mason jars are an excellent choice that allows you to burp your jars quickly and conveniently.
Another important factor to keep in mind is humidity control. Many seasoned growers recommend using a hygrometer, a tool that measures humidity levels. Keeping humidity levels at a stable 60% will help keep your cannabis fresh without becoming too moist or dry.
Lastly, when it comes to shelving, it’s essential to choose a clean and dry area. Avoid damp, dirty, or dusty spaces. Additionally, you should consider labeling your jars with the date of initial curing to help keep track of the length of the curing process.
By taking the time to properly store and shelve your cannabis, you’ll be ensuring that your bud retains its flavor and potency for an extended period. It’s a crucial process for every grower, so make sure to give your curing jars the attention they deserve.
Avoiding mold
Mold can be a serious problem during the curing process, and can leave your cannabis unusable. In order to avoid mold, there are several precautions you can take.
One of the most important steps is to maintain the right level of humidity in your curing jars. To do this, it’s recommended to aim for a level of around 55-65% humidity. If the humidity is too high, mold can develop, but if it’s too low, your buds may dry out too quickly and lose potency.
Another way to avoid mold is to properly dry your buds before placing them in the jars. If the buds are too wet, they will not dry in the jars and can become a breeding ground for mold. This is why it’s important to ensure that your buds are fully dried before starting the curing process.
It’s important to make sure that your jars are clean and free of any mold spores. Wash them thoroughly with hot water and soap, and sterilize them with rubbing alcohol before use.
During the curing process, it’s also important to regularly check your buds for signs of mold. This can include a musty smell, discoloration, or white powdery spots on the surface of the buds. If you notice any signs of mold, remove the affected buds immediately and dispose of them.
Avoiding mold during the curing process requires careful attention to humidity levels, proper drying techniques, and regular monitoring for signs of mold. By taking these precautions, you can ensure that your cannabis is safe, potent, and free of any unwanted mold growth.
| Steps to avoid mold during curing process |
|---|
| Maintain humidity level around 55-65% |
| Ensure buds are fully dried before placing in jars |
| Thoroughly clean jars before use and sterilize with rubbing alcohol |
| Regularly check buds for musty smell, discoloration or white powdery spots and dispose of affected buds immediately |
Length of Cure
Determining the proper length of cure is an important aspect of the extended curing process. The length of time that you should cure your cannabis will depend on a variety of factors, such as humidity levels, the strain of cannabis, and personal preference. Here is a breakdown of some general guidelines to follow when considering the length of your cannabis cure:
| Length of Cure | Benefits |
|---|---|
| 2 weeks to 1 month | Cannabis will have a milder flavor and odor but may still provide a potent high. |
| 1 to 2 months | Cannabis will improve in flavor and aroma with a smoother smoke. This length of cure is recommended for most cannabis strains. |
| 2 to 4 months | Cannabis will continue to improve in flavor and potency, with a smoother and more complex smoke. This length of cure is recommended for connoisseur-grade cannabis. |
| 4 months or longer | Cannabis will have the strongest flavor and potency and a smooth smoke. This length of cure is recommended for those who want the very best out of their cannabis harvest. |
It’s important to note that longer curing times do not necessarily equate to better quality cannabis. Every strain is unique, and the curing time should be determined by the individual characteristics and effects that you desire from your cannabis. Remember to always be patient during the curing process and take the time to properly monitor your cannabis to achieve the best results.
Conclusion
In conclusion, extended curing is a crucial process in maximizing the quality of your cannabis harvest. By properly drying and curing your buds, you can enjoy improved potency, better flavor, and a smoother smoke.
It’s important to remember that humidity control is key during the curing process to prevent mold growth, and proper storage and shelving can also make a big difference in the final outcome of your buds.
Additionally, it’s important to monitor your jars during the burping process to ensure optimal humidity levels and to avoid any potential issues.
While the length of the curing process can vary depending on personal preference and strain, it’s generally recommended to cure for at least two weeks, with some enthusiasts choosing to cure for several months to really bring out the best in their cannabis.
So, whether you’re a seasoned grower or a first-time cultivator, taking the time to properly cure your cannabis can greatly enhance the overall experience and ultimately result in a more enjoyable harvest.
Frequently Asked Questions
How long should you cure your cannabis?
The length of the curing process depends on personal preference and the strain of cannabis being cured. Generally, a minimum of 2-4 weeks is recommended.
Why is humidity control important during curing?
Controlling the humidity during curing is important in preventing mold and preserving the quality of the buds. Too high of humidity can lead to mold, while too low can dry out the buds.
How often should you burp your curing jars?
You should burp your jars daily for the first week, and then gradually decrease to every couple of days. This allows excess moisture to escape and prevents mold.
What is the ideal temperature for curing cannabis?
The ideal temperature for curing cannabis is around 60-70°F (15-21°C). High temperatures can cause the buds to dry out too quickly, while low temperatures can slow down the curing process.
How can you tell if your buds are properly cured?
Properly cured buds will have a pleasant aroma, a smooth smoke, and a desirable potency. They will also be slightly springy to the touch, but not too moist or too dry.
Should you remove stems during the curing process?
It is not necessary to remove the stems during the curing process, but some people prefer to do so for aesthetic reasons. Leaving the stems on can help preserve the shape of the buds during curing.
What type of containers should you use for curing cannabis?
Opaque glass jars with airtight lids are the most commonly used containers for curing cannabis. Plastic containers can also be used, but they may not be as effective in preserving the quality of the buds.
Can you cure cannabis without using jars?
While using jars is the most effective method for curing cannabis, some people also use paper bags or cardboard boxes. However, these methods may not provide as much humidity control.
How can you prevent mold during the curing process?
To prevent mold during the curing process, make sure to properly dry the buds before jarring them, control the humidity levels in the jars, and burp the jars regularly. Also, make sure to inspect the buds for any signs of mold and remove any affected areas immediately.
Can you over-cure your cannabis?
It is possible to over-cure your cannabis, which can cause it to lose potency and flavor. However, as long as you monitor the buds during the curing process and adjust humidity levels accordingly, over-curing should not be a concern.

