
Understanding the Flowering Stage of Auto-Flowering Cannabis Plants
As you gaze upon your auto-flowering cannabis plants, you’re probably wondering what to expect during the flowering stage. This is a crucial stage of growth that determines the quality and quantity of your harvest. While auto-flowering plants offer several benefits, the flowering stage can be tricky to navigate for growers of all levels. With varying lighting, temperature, and humidity needs, it’s important to optimize the environment to maximize yield. Additionally, common issues such as nutrient burn and bud rot can arise during this stage, making proper care a must. Don’t fret – we’ve got you covered. In this article, we’ll guide you through the flowering stage of auto-flowering plants, from the basics of when and how long it lasts, to how to optimize your growing conditions for maximum yield, and tips for harvesting and drying.
The Benefits of Auto-Flowering Cannabis Plants
Contents
As cannabis cultivation becomes increasingly popular, growers are constantly seeking out new and improved strains to cultivate. One such strain gaining popularity in recent years is auto-flowering cannabis plants. Unlike traditional cannabis strains, auto-flowering plants offer a range of benefits that make them an attractive option for growers at any experience level. From shorter cycle times to increased control over harvest times, the advantages of auto-flowering plants are plentiful. In this section, we will dive deeper into these benefits and explore what makes auto-flowering cannabis plants such a valuable addition to any cannabis garden.
Shorter Cycle Times
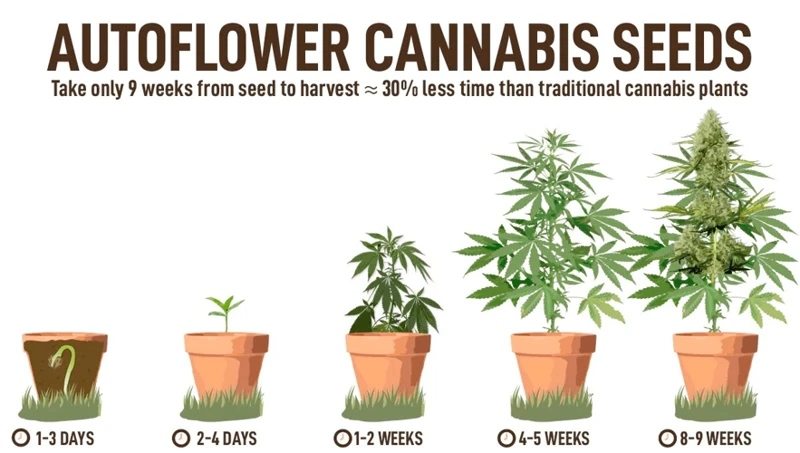
Auto-flowering cannabis plants have shorter cycle times compared to traditional photoperiod plants. This means that you can expect your plants to go from seed to harvest in a much shorter amount of time. The table below breaks down the average cycle times for auto-flowering plants:
| Stage | Duration |
|---|---|
| Seedling Stage | 1-3 weeks |
| Vegging Stage | 3-5 weeks |
| Flowering Stage | 5-7 weeks |
| Total Cycle Time | 9-15 weeks |
As you can see, the flowering stage typically lasts only 5-7 weeks. This is a much shorter time frame compared to photoperiod plants, which can take 8-10 weeks or longer to flower. This short cycle time is one of the biggest benefits of auto-flowering plants.
Additionally, auto-flowering plants do not require special lighting schedules to induce flowering. Traditional photoperiod plants require 12 hours of darkness to induce flowering, which means you need to manually adjust the light schedule or invest in a special flowering light. With auto-flowering plants, the plants will automatically enter the flowering stage after a certain amount of time, regardless of lighting schedules. This means less work for you and a more convenient growing experience.
Less Pruning and Training Needed
One of the key benefits of auto-flowering cannabis plants is that they require less pruning and training than traditional cannabis plants. This is because auto-flowering plants typically stay relatively small and don’t require as much maintenance as their photoperiod counterparts.
Pruning and training are important techniques that are used to maximize yields and keep cannabis plants healthy. Pruning involves removing certain parts of the plant, such as leaves or branches, in order to improve airflow and light penetration. Training, on the other hand, involves manipulating the plant’s growth pattern by tying or bending branches to create a more even canopy and promote bud development.
While pruning and training can be effective, they can also be time-consuming and require a certain level of expertise. With auto-flowering plants, however, less pruning and training is needed. This is because auto-flowering plants have a predetermined growth cycle that’s largely determined by genetics. As a result, they tend to grow in a more compact and uniform way, which means they need less intervention from the grower.
Of course, it’s still important to keep an eye on your auto-flowering plants and make sure they’re healthy and growing properly. You may still need to do some minor pruning or training, particularly if you notice any issues with airflow or light penetration. However, overall, auto-flowering plants are a great option for growers who want to minimize the amount of time and effort they need to put into pruning and training their cannabis plants.
To summarize, auto-flowering cannabis plants require less pruning and training compared to traditional photoperiod plants because they tend to grow more compactly and uniformly. While some minor pruning or training may still be necessary, it’s generally much less intensive than with other types of cannabis plants. This can save growers time and effort, while still producing high-quality yields.
| Traditional Photoperiod Plants | Auto-Flowering Plants |
|---|---|
| Require more pruning and training | Require less pruning and training |
| Growth cycle is less predictable | Growth cycle is predetermined |
| Vary in size and shape | Tend to grow more compactly and uniformly |
Ability to Control Harvest Times
Auto-flowering cannabis plants offer a distinct advantage over traditional photoperiod plants in terms of the ability to control harvest times. This is because auto-flowering plants do not rely on changes in light cycles to initiate the flowering stage. Instead, they automatically transition from the vegetative stage to the flowering stage based on their age and maturity.
Advantages of Controlling Harvest Times
Controlling the harvest time of your cannabis plants can have a significant impact on the potency, flavor, and overall quality of your yield. Harvesting too early can result in lower potency and a harsher flavor, while harvesting too late can lead to the loss of potency and an increase in CBN content (which can cause drowsiness). By being able to control the harvest time of your auto-flowering plants, you can ensure that you are harvesting at the optimal time for your desired results.
Factors Affecting Harvest Time
The timing of the harvest is largely dependent on the strain of auto-flowering cannabis plant you are growing. Some strains may be ready to harvest after just 8 weeks from seedling, while others may take up to 16 weeks or longer. Additionally, environmental factors such as lighting, temperature, and humidity can also affect the timing of the harvest.
The following table outlines some common auto-flowering strains and their average harvest times:
| Cannabis Strain | Average Harvest Time |
|---|---|
| AK-47 Auto | 10-11 weeks |
| Critical Jack Auto | 9-11 weeks |
| Super Skunk Auto | 8-9 weeks |
| Northern Lights Auto | 8-9 weeks |
Harvesting Techniques
When it comes to harvesting auto-flowering cannabis plants, there are a few different techniques you can use. One popular method is to harvest the buds in stages, starting with the colas (the main buds on the plant) and then moving on to the smaller buds as they mature. This can help to maximize yield and ensure that each bud is harvested at its optimal maturity.
Another technique is to harvest the entire plant at once. This can be a good option if you are growing a smaller number of plants and want to simplify the harvesting process. Additionally, harvesting the entire plant at once can help to ensure that each bud receives the same amount of light and nutrients throughout the growing process, which can lead to a more uniform final product.
Drying and Curing Your Harvest
Once you have harvested your auto-flowering cannabis plants, the buds will need to be dried and cured before they can be consumed. Drying involves hanging the buds in a cool, dark, and dry area for several days to remove moisture. Curing involves storing the buds in an airtight container for several weeks to allow them to develop their full flavor and potency.
The ability to control the harvest time of your auto-flowering cannabis plants is a significant advantage that can lead to a higher quality and more potent final product. By understanding the factors that affect harvest time, choosing the right harvesting techniques, and properly drying and curing your harvest, you can ensure that you get the most out of your auto-flowering plants.
The Flowering Stage Explained
For any cannabis grower, the flowering stage is a crucial time when it comes to the final yield and potency of the plant. Understanding what happens during this stage can help ensure a successful harvest. The process of flowering is triggered by several factors that impact the plant’s growth and development. In this section, we’ll explore the fundamental concepts of the flowering stage and what changes you can expect to see in your auto-flowering cannabis plants. We’ll also discuss how long the flowering stage lasts and answer some key questions about this important stage of growth.
When Does Flowering Begin?
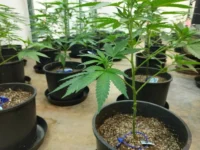
The timing of flowering in auto-flowering cannabis plants can vary depending on the strain and growing conditions. However, on average, flowering typically begins around 3-4 weeks after the seedlings have sprouted.
During the vegging stage, the plant is focused on growing tall with lots of foliage. When the plant reaches a certain age or size, it will start to shift its focus onto flowering. This happens once the plant has reached maturity and the light cycle changes.
It’s important to note that auto-flowering plants will automatically start flowering during a set period of time, regardless of the light cycle. This is different from photoperiod plants which rely on a specific light cycle to start flowering.
As the plants enter the flowering stage, you will notice a few changes in their behavior. The plant will start to produce buds and stop growing taller. The leaves may also start to turn yellow and drop off to redirect nutrients to the buds. This is a natural process and shouldn’t be a cause for concern.
The flowering stage is a critical period in the life cycle of cannabis plants. It’s important to understand when it begins and what changes to expect so that you can optimize the growing conditions and maximize your yield.
What Changes Occur During Flowering?
During the flowering stage of auto-flowering plants, several changes occur that are crucial to the overall quality and quantity of the final harvest. Here is a breakdown of these changes and what they mean for your plants.
Change Description
Bud Formation During the early stages of flowering, small buds will begin to form at the nodes where the branches meet the stem. These buds will gradually increase in size and density as the flowering stage progresses.
Pistil Growth Shortly after the buds begin to form, small hair-like structures called pistils will emerge from them. These pistils are female reproductive organs that will eventually develop into the plant’s flowers.
Trichome Production The trichomes are tiny, resinous crystals that cover the buds and leaves of the plant. These trichomes contain the majority of the plant’s THC and other cannabinoids. As the flowering stage progresses, trichome production will increase, resulting in higher potency buds.
Leaf Yellowing As the plant focuses its energy on producing flowers, leaves that are not receiving sufficient nutrients will start to yellow and eventually die off. This is a normal part of the flowering process and should not be a cause for concern.
Calyx Swelling Calyxes are the small pods that form around the pistils, and they are responsible for holding the plant’s seeds. During the flowering stage, these calyxes will begin to swell and increase in size, indicating that the plant is getting closer to maturity.
Stretching During the early stages of the flowering stage, some auto-flowering plants may experience a final growth spurt, known as stretching. This occurs when the plant’s stem and branches elongate in an effort to reach more light. While some stretching is normal, excessive stretching can lead to weak stems and lower yields.
How Long Does the Flowering Stage Last?
The flowering stage typically lasts between 6-10 weeks for auto-flowering cannabis plants, depending on the strain and growing conditions. Some strains may start flowering as early as 2-3 weeks after germination, while others may take up to 4-5 weeks to show signs of flowering.
It’s important to keep track of the plant’s development during this stage as it can directly affect the quality and yield of the buds. In order to determine the progress of flowering, many growers rely on a flowering timeline that outlines the expected changes during each week of flowering.
Here is a general outline of what to expect during each week of the flowering stage:
| Week | What to Expect |
|---|---|
| 1-3 | During this time, the plant will enter the early flowering stage. Pre-flowers will start to form and develop into buds. The buds will start to increase in size and begin to produce small white hairs called pistils. |
| 4-5 | The buds will continue to grow and gain weight. The pistils will also continue to grow and change color, often from white to orange or red. The plant will become more fragrant as the buds develop, and their resin production will increase. |
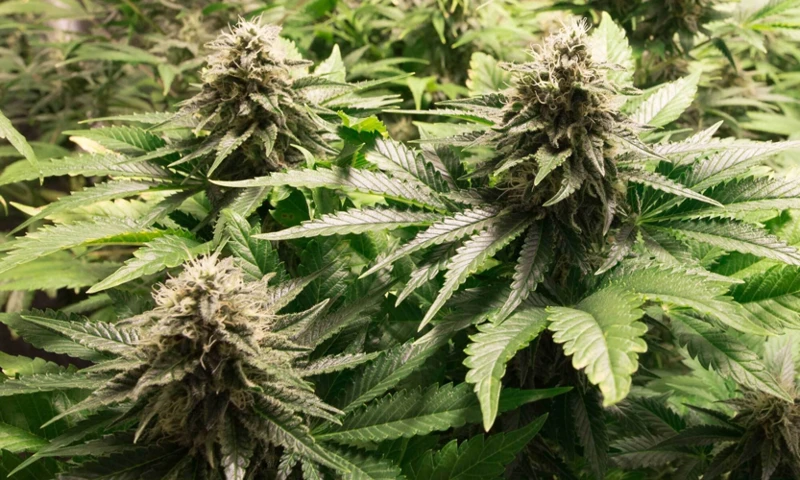
| 6-7 | The buds will continue to swell and gain density. The pistils will begin to recede and change color, indicating that the buds are nearing maturity. Trichome production will reach its peak during this time, giving the buds a sticky and resinous texture. |
| 8-10 | The buds will reach their peak ripeness during this time. The trichomes will be fully developed, and the pistils will have receded to about 50-70% of their original length. At this point, the buds will have their highest THC potency and are ready for harvest. |
It’s important to note that each strain may have different timelines and that these are just general guidelines. Additionally, environmental factors such as temperature, humidity, and nutrient levels can affect the timeline of the flowering stage.
Regularly monitoring the plant’s progress during the flowering stage and adjusting environmental factors as needed can help ensure the best possible yield and quality of the buds.
Optimizing the Flowering Stage for Maximum Yield
As a grower, you want to get the best possible yield from your auto-flowering cannabis plants. To maximize your harvest, it’s crucial to optimize the flowering stage. This stage is when the plant shifts its focus to producing buds, so it’s essential to ensure that your plants are getting everything they need to thrive. From lighting to nutrients, every detail counts to achieving maximum yield. By following the tips and tricks highlighted in this section, you can ensure that your plants reach their full potential during the flowering stage.
Lighting Requirements During Flowering
During the flowering stage, the lighting requirements for auto-flowering cannabis plants will differ from those in the vegetative stage. Here are some key considerations to keep in mind:
- Light intensity: During flowering, plants require strong and intense light to encourage bud development. Aim for a light intensity of at least 600-1000 µmol/m²/s.
- Light spectrum: Using the correct light spectrum can also enhance bud production. Red light stimulates flowering, so look for a light with a high proportion of red light (e.g. HPS, CMH, or LED lights designed for flowering).
- Light duration: During flowering, plants should receive 12 hours of continuous darkness each day to trigger the flowering process. Keep the light on for 18-20 hours per day during the vegetative stage, and then switch to a 12/12 light cycle to begin flowering.
- Light distance: Be careful not to place your lights too close to the plants, as this can cause light burn. Keep a distance of at least 12 inches between the top of the plant and the light source.
- Light timing: Consistency is key when it comes to setting the light schedule. Try to keep the light schedule as consistent as possible (e.g. turning the lights on and off at the same time every day).
By providing the correct light during the flowering stage, you can encourage your auto-flowering plants to produce large, healthy buds. Remember to also monitor your plants regularly and make any necessary adjustments to the lighting as needed.
Nutrient Needs During Flowering
During the flowering stage of auto-flowering cannabis plants, proper nutrient levels are critical for achieving optimal yields. The plant’s nutrient needs will change during this stage, as it transitions from primarily focusing on vegetative growth to flower production. Below are some important nutrient considerations to keep in mind during the flowering stage:
- Increased phosphorus and potassium: During the flowering stage, cannabis plants require an increased amount of phosphorus and potassium. These nutrients play a key role in the development and quality of buds. A bloom fertilizer high in phosphorus and potassium should be used during the flowering stage.
- Decreased nitrogen: While phosphorus and potassium levels need to increase during the flowering stage, nitrogen levels should decrease. Too much nitrogen during this stage can cause the plant to focus on vegetative growth over bud production.
- Calcium and magnesium: Calcium and magnesium are also important nutrients to maintain during the flowering stage. These nutrients are vital for ensuring proper root development, bud growth, and overall plant health.
- Micro-nutrients: In addition to the major nutrients mentioned above, cannabis plants also require a range of micro-nutrients during the flowering stage. This includes iron, zinc, and copper, among others. These nutrients help to support overall plant health and ensure proper bud development.
To ensure your auto-flowering cannabis plants receive the proper nutrient levels during the flowering stage, it’s important to monitor the pH levels of your soil or growing medium. Nutrient uptake is most efficient when the pH is within a specific range (typically around 6.0 to 6.5). A pH that is too high or low can inhibit nutrient uptake, leading to deficiencies or toxicity. Regularly testing and adjusting the pH levels of your growing environment can help maximize your plant’s nutrient absorption and overall yield.
Temperature and Humidity Considerations
During the flowering stage, it’s important to pay attention to the temperature and humidity levels in your growing environment. Maintaining the proper levels can help maximize yield and prevent issues such as mold and mildew.
Optimal Temperature: Auto-flowering cannabis plants thrive in temperatures ranging from 65-80°F (18-27°C) during the light cycle and slightly cooler temperatures of 60-70°F (15-21°C) during the dark cycle. It’s important to avoid extremes in temperature, as temperatures above 80°F (27°C) can cause stress to the plant and temperatures below 60°F (15°C) can slow growth or even cause damage.
Humidity: Humidity levels should initially be around 40-50% during the flowering stage, gradually decreasing to around 30% as harvest approaches. High humidity levels above 60% can lead to mold and mildew growth on buds, while low humidity levels below 30% can cause drying and nutrient imbalances. The use of a dehumidifier can be helpful in maintaining proper humidity levels.
Fluctuations: Rapid changes in temperature and humidity levels should be avoided, as this can cause stress to the plant and affect final yield. It’s important to maintain a consistent environment throughout the flowering stage.
Air Circulation: Proper air circulation is also important during the flowering stage. Use of a small fan to circulate air around the plant can help prevent mold and mildew growth on buds.
By monitoring and maintaining optimal temperature and humidity levels, growers can help ensure a successful flowering stage and a bountiful yield of high-quality buds.
Common Issues During Flowering and How to Solve Them
As your auto-flowering cannabis plants enter the flowering stage, it’s important to keep a close eye on them for any signs of trouble. Unfortunately, many common issues can arise during this critical phase of growth, and neglecting to address them can have a devastating impact on your final yield. In this section, we’ll explore some of the problems that may arise, including nutrient burn, bud rot, and light burn, and offer practical solutions to help you overcome them. By identifying and addressing these issues early on, you can ensure that your plants remain healthy and productive until harvest.
Nutrient Burn
Nutrient burn is a common issue that can occur during the flowering stage of auto-flowering cannabis plants, particularly if the plants receive too much or the wrong type of nutrients. This can lead to burned or discolored tips of the leaves, and in severe cases, can even cause the plant to die.
Causes:
1. Overfeeding or using too strong of a nutrient solution.
2. pH imbalances in the soil or growing medium.
3. Poor drainage or waterlogged roots.
Symptoms:
1. Yellow, brown, or burnt-looking tips of the leaves.
2. Leaves may curl or appear crispy.
3. Discoloration and spotting on the leaves.
Prevention and Treatment:
1. Use a high-quality nutrient solution and follow the recommended dosages.
2. Test the pH of the soil or growing medium regularly and adjust if necessary.
3. Ensure proper drainage and avoid overwatering.
If nutrient burn does occur, it is important to address it as soon as possible to prevent further damage. This can involve flushing the soil or growing medium with pH-balanced water and cutting back on the amount of nutrients given to the plant. In severe cases, it may be necessary to prune or remove damaged leaves to prevent the issue from spreading.
Bud Rot
Bud rot is a fungal infection that can affect auto-flowering cannabis plants during the flowering stage. The fungus attacks the buds, causing them to become soft and brown. Left untreated, the infection can spread rapidly, causing severe damage to the plant and reducing the overall yield. To prevent bud rot, it is essential to maintain proper humidity levels, ensure adequate air circulation, and carefully manage nutrient levels.
| Cause of Bud Rot | Symptoms of Bud Rot | Prevention and Treatment |
|---|---|---|
| Humidity Levels: High humidity levels, especially in the flowering stage, provide ideal conditions for the growth and spread of fungal infections like bud rot. | Soft, Brown Buds: The buds affected by bud rot will become soft and mushy, turning brown or black in color. A white mold may also be visible on the surface of the bud. | Humidity Control: It is essential to maintain humidity levels around 40-50% during the flowering stage, to prevent the growth of fungal infections. Good air circulation is also important, as stagnant air can create pockets of high humidity. |
| Nutrient Levels: Overfeeding your plants during the flowering stage can also increase the risk of bud rot. Excess nutrients can create excessively dense buds that trap moisture, creating an environment that is favorable to fungal growth. | Foul Odor: Buds affected by bud rot will often emit a foul smell, indicating that the fungal infection has progressed too far to be treated. | Nutrient Management: Careful management of nutrient levels is essential during the flowering stage. Follow the recommended feeding schedule for your specific strain, and monitor your plants closely for signs of nutrient burn and other issues. |
| Air Circulation: Poor air circulation around your plants can create an environment that is favorable to the growth of fungal infections like bud rot. This is especially true in humid conditions. | Spreading Infection: Bud rot can spread quickly from one bud to the next, infecting the entire plant and reducing the overall yield. | Air Movement: Good air circulation around your plants is crucial during the flowering stage. Consider using fans or other devices to promote airflow and reduce humidity levels. |
If you suspect that your plants may be affected by bud rot, it is important to act quickly to prevent the spread of the infection. Isolate the affected plants, remove any infected buds with sterile tools, and treat the remaining plants with an antifungal agent. In severe cases, the entire crop may need to be destroyed to prevent the spread of the infection to other plants. By carefully monitoring your plants and taking steps to prevent and treat bud rot, you can maximize your yield and produce high-quality auto-flowering cannabis.
Light Burn
Light burn is a common issue that can occur during the flowering stage of auto-flowering cannabis plants. When the plants are exposed to too much light or heat, the tips of the leaves may appear burnt or bleached. This can lead to stunted growth, reduced yield, and even death of the plant if not addressed promptly.
The best way to prevent light burn is to ensure that the plants are receiving the proper amount and intensity of light. This can be achieved by adjusting the distance and intensity of the grow lights. A good rule of thumb is to keep the lights at least 12 inches away from the plants and to monitor the temperature regularly.
If light burn does occur, it is important to act quickly. Pruning off the burnt leaves can help to prevent further damage and allow the plant to focus its energy on healthy growth. However, it is important to avoid over-pruning, as this can also stress the plant and reduce yield.
In addition to adjusting the grow lights, it is important to monitor the temperature and humidity levels in the grow room. High temperatures and low humidity can exacerbate light burn and other issues, such as nutrient burn and bud rot. Using a fan or air conditioner to regulate the temperature and a humidifier to maintain appropriate humidity levels can help to prevent these problems.
Preventing light burn and other issues during the flowering stage is essential for maximizing yield and producing high-quality cannabis plants. With careful attention to lighting, nutrient, temperature, and humidity requirements, auto-flowering cannabis growers can ensure a successful harvest.
When to Harvest Auto-Flowering Cannabis Plants
One of the most significant aspects of growing auto-flowering cannabis plants is knowing when to harvest them. Harvesting at the right time can make a substantial difference in the quality and potency of the end product. However, determining the correct time to harvest can be confusing for new growers. In this section, we’ll uncover some of the signs to look for and the best practices for harvesting and drying auto-flowering cannabis plants. So, let’s dive in and discover the optimal time to harvest your plants!
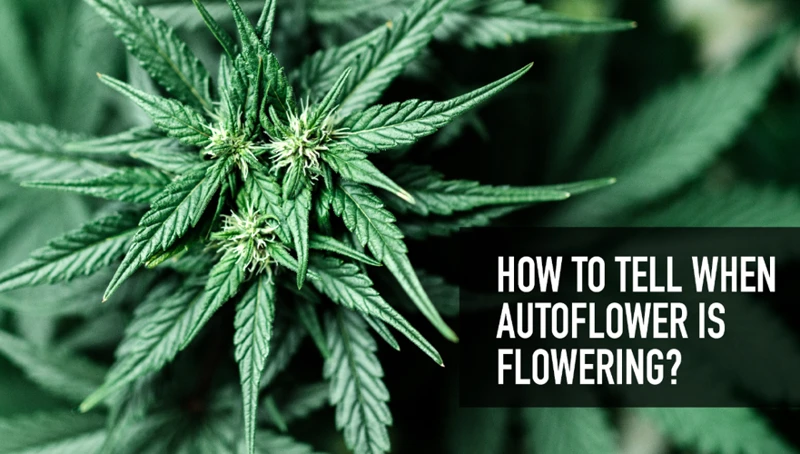
Signs to Look For
As an assistant, I am happy to write in detail about the signs to look for when it comes to harvesting auto-flowering cannabis plants. The following are the indicators that growers should pay attention to:
- Pistil color: One of the most reliable indicators of maturity is the color of the pistils. In the early stages of flowering, they will be white, but as the plant matures, they will turn red, orange, or brown, indicating that it’s time to harvest.
- Trichome color and density: Trichomes are the resin glands that cover the buds and leaves of the cannabis plant. They serve as a chemical factory responsible for producing the cannabinoids that are responsible for the plant’s therapeutic effects. As the cultivator harvests the plant, it is essential to look at the trichomes’ color and density using a magnifying glass. If the trichomes are cloudy and amber, it means that the plant has reached its peak potency.
- Bud size: The size of the buds is another factor that growers should consider when determining whether their plants are ready for harvest. The buds should be plump, firm, and dense, with no signs of wilting or damage.
- Fading leaves: Before harvesting, growers should check the plant’s leaves for any signs of discoloration or fading. As the plant matures, the leaves will start to turn yellow or brown, indicating that it is time to harvest.
- Aroma: Another telling sign that the buds are ready for harvest is their aroma. When the plant matures, it will start emitting a pungent, sweet, and earthy scent that is characteristic of high-quality cannabis.
- Time: Lastly, an indicator of maturity is the time that has passed since the plant began to flower. Most auto-flowering strains will reach maturity within eight to ten weeks from seedling stage. As the plant gets closer to this time frame, growers should begin checking the buds for the signs mentioned above to ensure that they harvest the highest-quality crop.
These signs are crucial when determining the best time to harvest cannabis plants. Proper timing will ensure that the buds reach their full potential and deliver the desired effects, while waiting too long can result in a loss of potency and quality.
Harvesting and Drying Methods
Harvesting and Drying Methods
After observing the signs that indicate it is time to harvest, it is important to properly harvest and dry the auto-flowering plants to maximize potency and flavor. The following table outlines some tips for proper harvesting and drying techniques:
| Harvesting Tips | Drying Tips |
|---|---|
| Harvest during the cooler parts of the day, when temperatures are between 60-70°F | Hang freshly harvested plants upside down in a cool, dry, and well-ventilated space |
| Use sharp pruning shears to snip off the branches just above the bud clusters | Trim off any excess plant material and remove any damaged or discolored buds |
| Handle the buds carefully to avoid damaging the trichomes | Keep the humidity between 45-55% to prevent mold growth and preserve terpene flavor profiles |
| Dry the buds in a dark place to preserve potency and prevent degradation from light | After drying for approximately one week, place the buds in airtight containers to cure for an additional 1-2 weeks |
By following these techniques and properly drying and curing, auto-flowering cannabis plants can reach their full potential in terms of potency, flavor, and aroma.
Conclusion
In conclusion, auto-flowering cannabis plants offer a number of benefits to growers, including shorter cycle times, less need for pruning and training, and the ability to control harvest times. During the flowering stage of auto-flowering plants, it’s important to understand the changes that occur and take steps to optimize growth for maximum yield. This includes providing appropriate lighting, nutrient, temperature, and humidity levels.
However, even with proper care, there are still common issues that can arise during flowering, such as nutrient burn, bud rot, and light burn. It’s important to keep an eye out for signs of these issues and take action promptly to avoid losing your crop.
When it comes to harvesting auto-flowering plants, it’s important to look for signs of maturity in the flowers, such as milky trichomes and amber hairs. Once ready, plants can be harvested and dried using various methods, depending on personal preference and the size of the crop.
Overall, auto-flowering cannabis plants provide a convenient and efficient option for growers, but require attention to detail throughout the growing process to ensure a successful yield. Whether you’re a seasoned grower or just starting out, following the guidelines outlined in this article can help you achieve the best possible results with your auto-flowering plants.
Frequently Asked Questions
Can auto-flowering plants grow outdoors?
Yes, auto-flowering plants can grow outdoors as long as the climate is suitable for cannabis cultivation.
Do auto-flowering plants require different nutrients during the flowering stage?
Yes, auto-flowering plants require different nutrients during the flowering stage than during the vegetative stage.
How can I prevent nutrient burn during the flowering stage?
You can prevent nutrient burn during the flowering stage by carefully monitoring the amount of nutrients you add to your plants and by flushing them with water periodically to remove excess salts.
What is light burn and how can I prevent it during the flowering stage?
Light burn occurs when cannabis plants are exposed to too much light, which can cause stress and damage to the leaves. You can prevent light burn during the flowering stage by positioning your lights at the appropriate distance from your plants and by reducing the amount of time your plants are exposed to light each day.
How should I adjust my watering schedule during the flowering stage?
You should adjust your watering schedule during the flowering stage to accommodate for the fact that auto-flowering plants tend to use less water during this time. When in doubt, it is better to underwater than overwater.
What temperature and humidity levels are ideal for auto-flowering plants during the flowering stage?
Ideal temperature and humidity levels for auto-flowering plants during the flowering stage will vary depending on the strain, but generally they prefer temperatures between 65-80°F and humidity levels between 40-50%.
What should I do if my auto-flowering plants develop bud rot during the flowering stage?
If your auto-flowering plants develop bud rot during the flowering stage, you should immediately remove the affected buds and take steps to improve air circulation and reduce humidity levels in your grow space.
Can I harvest my auto-flowering plants early if I want a milder effect?
Yes, you can harvest your auto-flowering plants early if you want a milder effect. However, this will also result in a smaller overall yield.
What is the best way to dry auto-flowering plants after harvesting?
The best way to dry auto-flowering plants after harvesting is to hang them upside down in a dry, well-ventilated space with temperatures between 65-75°F and humidity levels around 50%. Drying can take anywhere from 5-10 days.
Are auto-flowering plants suitable for beginner growers?
Yes, auto-flowering plants are often considered suitable for beginner growers because they require less attention and have shorter growing cycles than photoperiod strains.

