

Mastering the Art of Manicuring Cannabis Buds
Introduction
Contents
The process of manicuring cannabis is an essential step in bringing out the full potential of your buds. Properly trimming your cannabis buds is crucial for not only improving the overall appearance of the final product but also for enhancing the potency and flavor. Without thorough manicuring, your buds are at risk of containing unwanted plant material that can degrade the overall quality of the product. In this article, we will delve into the art of hand-trimming cannabis and provide you with tips and tricks to get the most out of your harvest.
The Importance of Proper Manicuring
Proper manicuring plays a vital role in the final quality of your cannabis buds. It involves removing excess leaves and stems from your dried buds to improve their appearance, flavor, and potency. Some of the key benefits of proper manicuring include:
- Enhanced Flavor: Removing unwanted leaves and stems from your buds helps concentrate the flavor, which leads to a better taste.
- Improved Potency: Removing leaves and stems exposes more of the resinous trichomes, which store the cannabinoids responsible for the bud’s potency.
- Better Appearance: Properly manicured buds appear more appealing and professional, which is important if you plan to sell your crop in the legal market.
- Reduced Harshness: Removing leaves and stems reduce harshness when smoking or vaping, leading to a smoother and more enjoyable experience.
If you skip the manicuring process or don’t do it properly, your buds may not reach their full potential, which can be disappointing after all the hard work of growing the plant. Always remember, proper manicuring can be the key difference between average buds and high-quality ones.
Tools Required for Hand-Trimming Cannabis

When it comes to manicuring your cannabis, it’s essential to have the right tools to ensure your buds receive the attention and care they deserve. Without the proper tools, you risk damaging your buds, leaving behind unwanted trimmings, and even contaminating your harvest. It’s crucial to invest in the right equipment to make the trimming process smooth, efficient, and enjoyable. In this section, we’ll discuss the various tools you’ll need to hand-trim your cannabis to perfection. From scissors to pruners, we’ll cover everything you need to know to make your trimming experience a success.
Scissors
One of the most important tools for hand-trimming cannabis are scissors. However, not all scissors are created equal when it comes to trimming cannabis buds. It’s important to choose a pair of scissors specifically designed for this purpose. Here are some key features to look for when selecting your trimming scissors:
| Feature | Description |
| Blade Shape | Choose scissors with a curved blade for better control when trimming around the contours of the buds. |
| Blade Size | Trimming scissors should have smaller blades for more precision when manicuring the buds. A blade size of 2-3 inches is ideal. |
| Blade Material | The most common materials for blade construction are stainless steel and titanium. Stainless steel is more affordable, while titanium is more durable and long-lasting. |
| Handle Comfort | Since you’ll be using these scissors for an extended period of time, it’s important to choose a pair with comfortable handles. Look for scissors with ergonomic grips and cushioned handles for reduced hand fatigue. |
| Sharpness | Sharp blades are necessary for a clean, precise cut. Make sure your scissors are sharp before starting your trimming process. |
With the right pair of scissors, you’ll have greater precision and control over the appearance and quality of your buds. Don’t skimp on this essential tool when hand-trimming your cannabis.
Trimmers
When it comes to hand-trimming cannabis, having the right tools is crucial for achieving a quality final product. While scissors and pruners are commonly used, trimmers are also an option worth considering.
Types of Trimmers:
- Bowl Trimmers – a manual hand-cranked unit that trims the buds as they are rotated against a serrated blade.
- Automated Trimmers – an electric unit that uses a series of sharp blades to trim the buds as they pass through the machine.
- Hand-Held Trimmers – an electric or battery-operated unit that trims buds by rapidly spinning them against a series of sharp blades.
Advantages of Trimmers:
- Speed – trimmers can be significantly faster than hand-trimming, allowing for larger quantities to be trimmed in less time.
- Consistency – trimmers can provide a consistent trim on all buds, reducing the risk of over or under manicuring.
- Ease of Use – trimmers require less physical effort than hand-trimming, which can be especially beneficial for those with hand and wrist pain.
Disadvantages of Trimmers:
- Expense – trimmers can be a significant investment, especially for high-quality automated models.
- Potential Damage – if not used correctly, trimmers can potentially damage the buds by removing too much material or crushing delicate trichomes.
- Cleaning – trimmers require regular cleaning and maintenance to ensure they continue to function properly.
Ultimately, the decision on whether to use a trimmer or stick to hand-trimming will depend on individual preferences and circumstances. It is important to weigh the advantages and disadvantages before making a decision, as well as to consider the specific type and quality of trimmer being used.
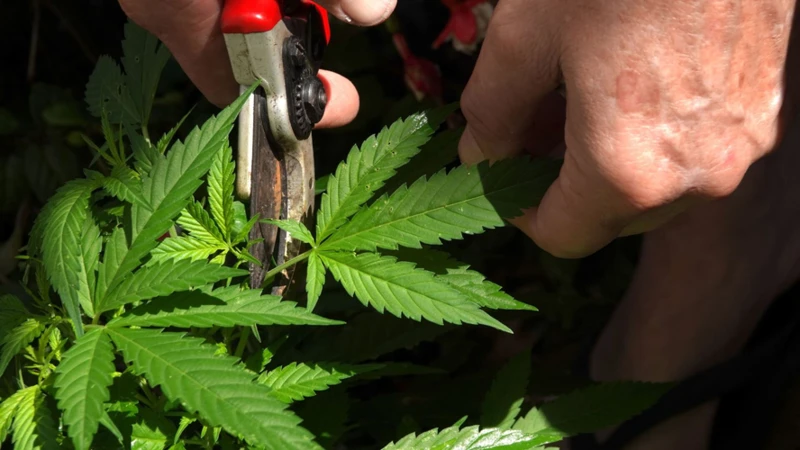
Pruners
Pruners are another tool you may choose to use when hand-trimming your cannabis buds. Unlike scissors and trimmers, pruners are specifically designed for cutting through thick stems with ease. These tools come in different sizes and shapes, so it’s important to choose the right pruner for the job.
Types of Pruners
| Type of Pruner | Description | Best Used For |
|---|---|---|
| Straight-Bladed Pruners | These pruners have a straight blade and work like scissors to make precise cuts. | Useful for trimming close to buds or reaching tight spots. |
| Curved-Bladed Pruners | The curved blade helps to make clean cuts around stems. | Great for precision trimming and handling heavier branches. |
| Needle-Nose Pruners | The thin, pointed blades allow for delicate, precise cuts around buds and leaves. | Useful for trimming small flowers and tight spaces. |
Pruners can help to make quick work of larger stems and branches that may be difficult to cut with scissors or trimmers. However, it’s important to be careful when using pruners, as they can easily damage the buds or trim off too much material if not used carefully.
Before using pruners, it’s important to sanitize them to prevent the spread of any bacteria or fungus. You can do this by wiping down the blades with a clean, damp cloth soaked in rubbing alcohol. Additionally, it’s important to use pruners that are sharp and in good condition to avoid any accidental damage to the buds.
Pruners can be a great tool to add to your hand-trimming arsenal, but should be used with caution and care to ensure the best results for your cannabis buds.
Preparing Your Buds for Manicuring
Now that you have harvested your cannabis buds, it’s time to prepare them for the manicuring process. This crucial step involves drying your buds and removing any unwanted fan leaves. Preparing your buds properly will make it easier and more efficient to hand-trim them. By taking the time to carefully complete this step, you can ensure that your final product will have a clean and polished appearance. Let’s take a closer look at the key aspects of preparing your buds for manicuring.
Drying Your Buds
Drying your buds properly is an important step before manicuring. Here are some tips to ensure they are ready for the next step:
- Hang in a dry, dark space: After harvesting, hang your buds upside down in a dry, cool, and dark place to protect them from light and humidity. This will allow them to dry slowly over the course of several days.
- Check for dryness: To check if your buds are dry, gently bend the stems. If they snap rather than bend, they are ready for the next step.
- Trim excess leaves: Before you begin trimming, gently remove any excess leaves from your buds to make the process easier and more efficient.
- Use a proper drying rack: You can also use a drying rack to allow air to circulate around the buds for optimal drying. However, avoid using a fan as it can dry out the buds too quickly.
Properly drying your buds will not only make the next step of manicuring easier, but it will also help prevent mold and ensure the potency and quality of your cannabis.
Removing Fan Leaves
Once you have finished drying your cannabis buds, it is time to prepare them for hand-trimming. One of the first steps of this process is removing any fan leaves that have not already fallen off during the drying process.
Fan leaves are those large, iconic leaves of the cannabis plant that have 5-7 leaflets. Although fan leaves are part of the beauty of the plant, they are not usually smoked or considered part of the final product.
To remove fan leaves, start by identifying the stem that attaches them to the main cola. Hold the stem with one hand and, using your other hand, gently pull the fan leaf away from the stem. Be sure to remove only the fan leaves, and not any other parts of the marijuana buds, as this can damage the trichomes and affect the potency of the final product.
It is also important to remove any other non-essential parts of the plant, such as stems or small leaves, as these can also affect the overall quality of the buds. Be sure to leave enough of the stem intact, however, as this will help to make the trimming process easier.
Removing fan leaves can be a bit time-consuming, but it is an important step in creating high-quality cannabis. By taking the time to remove these unwanted parts of the plant, you will be left with a more aesthetically pleasing and potent finished product.
Hand-Trimming Techniques
When it comes to manicuring cannabis, there are a variety of hand-trimming techniques you can employ to help achieve the ideal bud shape and appearance. Whether you choose to use your fingers, scissors, or a combination of tools, it’s important to have a solid understanding of the different methods available and how to properly execute them. In this section, we’ll explore the most popular hand-trimming techniques and provide step-by-step instructions for each. By the end of this section, you’ll have the knowledge and confidence to take your bud trimming skills to the next level.
The Finger Trim
The finger trim is a popular method of manicuring cannabis buds that is preferred by many growers because it is relatively quick and doesn’t require any specialized tools. However, it does require a bit of finesse and patience to do it properly.
The Finger Trim Technique:
To begin with the finger trim technique, start by removing any fan leaves that are blocking the view of the buds. Once you have a clear view, take a bud between your thumb and forefinger and gently pull away any sugar leaves that surround it. Sugar leaves are the smaller leaves that grow out of the buds and are covered in trichomes.
Using a gentle twisting motion, work your fingers around the buds, carefully removing any sugar leaves that come loose. Try to avoid pulling too hard or damaging the delicate trichomes on the buds as you work.
Once you’ve removed all of the protruding sugar leaves, examine the bud closely for any remaining leaves that may still be attached. Gently use your fingers to remove any remaining leaves.
Continue this process for each bud until they are all properly manicured. Be sure to inspect each bud closely to ensure that all of the leaves have been removed and that they are all uniform in appearance.
Advantages of the Finger Trim Technique:
One of the biggest advantages of the finger trim technique is that it is simple and easy to do. You don’t need any specialized tools, and you can do it with just your fingers. It’s also a quick technique that doesn’t require a lot of time or attention, making it ideal for growers who have a lot of buds to trim.
Another advantage of the finger trim technique is that it is gentle on the buds. Because you’re using your fingers to remove the leaves, you’re less likely to damage the delicate trichomes. This can help preserve the flavor, aroma, and potency of your buds.
Disadvantages of the Finger Trim Technique:
One of the biggest disadvantages of the finger trim technique is that it can be time-consuming if you have a lot of buds to trim. Because you’re using your fingers to remove the leaves, it can take longer than using specialized tools like scissors or trimmers.
Another disadvantage of the finger trim technique is that it may not be as precise as other methods. Because you’re using your fingers, you may not be able to trim the buds as closely as you would with scissors or trimmers. This can result in buds that are not as aesthetically pleasing as they could be.
The finger trim technique is a simple and easy way to manicure cannabis buds that can be done with just your fingers. While it may not be as precise as other methods, it is gentle on the buds and can help preserve their potency and flavor. However, it can be time-consuming if you have a lot of buds to trim and may not be ideal for growers who are looking for a more precise and efficient method of manicuring their buds.
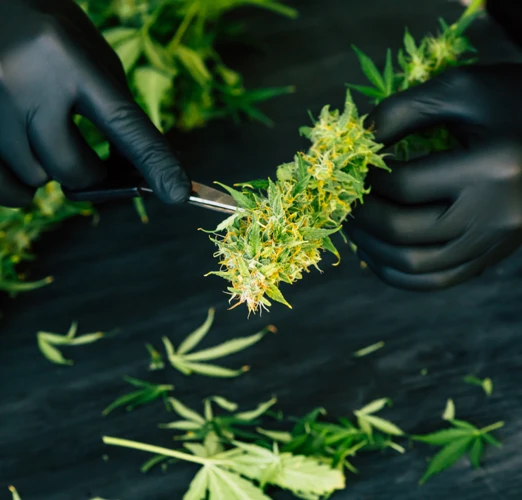
The Scissor Trim
When it comes to hand-trimming cannabis, using scissors is a popular choice. Scissor trimming allows for precise cuts and control over the manicure. Here are some steps to follow when using scissors for trimming:
Step 1: Select a pair of sharp, pointed scissors for the best precision. Make sure they are sanitized before use.
Step 2: Hold the bud with one hand and use the other hand to carefully snip off any excess leaves from the side of the bud.
Step 3: With the bud facing you, use the scissors to make small, precise cuts around the edges of the buds. Trim off any small leaves that remain.
Step 4: Work your way around the entire bud, making sure to take your time and not rush the process. This will ensure a smooth and even manicure.
Step 5: After you’ve trimmed the edges, gently remove any leaves from the top of the bud using the scissor tips. Be careful not to snip off any of the trichomes, as they contain the valuable cannabinoids and terpenes.
Step 6: Once the top is cleared, you can move onto the bottom of the bud. Trim off any excess stem or leaves that may be found there.
Step 7: After completing the trimming process, inspect the buds to make sure all excess plant material has been removed. If needed, go back and make any final cuts to perfect your trim.
The scissor method can be time-consuming, but with practice, it can become a relatively quick and efficient process. Remember to take your time and be careful not to over-manicure your buds, as this can result in a loss of potency and flavor.
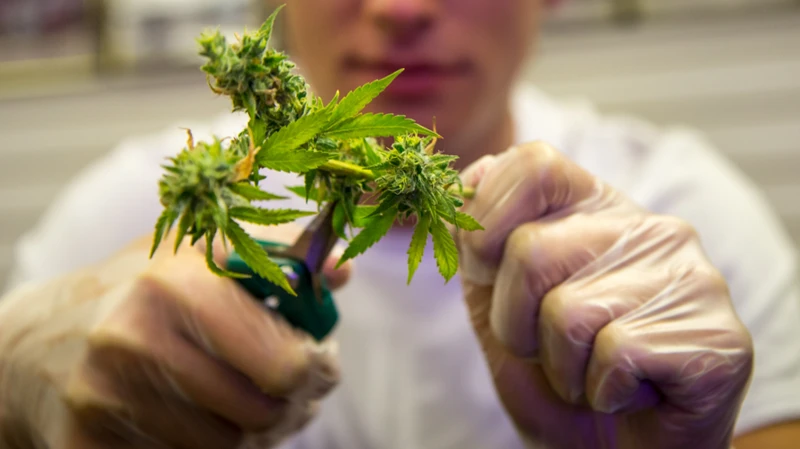
The Combination Trim
One of the most popular and effective hand-trimming techniques for cannabis is the combination trim, which utilizes both scissors and your fingers. This technique allows for a more detailed and precise trim, resulting in buds with a clean, neat appearance.
To perform the combination trim, you will need a pair of sharp scissors and a steady hand. Begin by carefully snipping away any large leaves or stems using the scissors, being careful not to cut into the actual buds themselves. Use the scissors to trim away any excess leaf material around the edges of the buds, making sure to only remove the leaves and not the trichomes.
Once you have removed the larger leaves, it’s time to move on to the finger trim. To do this, put on a pair of gloves or wash your hands thoroughly to avoid contaminating the buds. Gently grasp the bud with your fingers and carefully pinch away any remaining leaves or stems using a twisting motion. Be sure to avoid pulling too hard, as you do not want to damage the delicate trichomes that cover the bud.
When performing the combination trim, it’s important to use both scissors and your fingers in harmony to achieve the best results. This technique allows you to achieve a precise, detailed trim that showcases the buds’ natural beauty.
Combination Trim Tips:
1. Use sharp scissors for a cleaner trim.
2. Prioritize trimming away the larger leaves first.
3. Use your fingers to get into tight corners and hard-to-reach areas.
| Pros | Cons |
|---|---|
| Allows for more detailed and precise trim | May take longer to achieve desired results |
| Can showcase the natural beauty of the buds | Requires steady hand and patience |
| Minimizes damage to trichomes | May not be suitable for large harvests |
By mastering the combination trim, you can achieve finely manicured buds that are sure to impress. Just be sure to take your time and exercise caution throughout the process to avoid damaging the trichomes or over-manicuring the buds.
Common Mistakes to Avoid
As with any skill, there are common mistakes that can be made when hand-trimming your cannabis buds. These mistakes can lead to a suboptimal final product, which is why it is important to be aware of them and avoid them at all costs. In this section, we will discuss some of the common mistakes that you should be aware of and provide tips on how to avoid them. By following these tips, you can ensure that your buds are expertly manicured and ready to be enjoyed to their fullest potential.
Over-Manicuring
One common mistake that novice growers make when manicuring cannabis is over-trimming. This occurs when too much of the flower is removed, resulting in a less potent and less visually appealing product. Here are some signs that you may be over-manicuring your buds:
| Signs of Over-Manicuring |
| Cuts into trichomes, resulting in a lower potency |
| Strips away small leaves that contain trichomes |
| Damage to the bud structure, leading to a less appealing appearance |
| Loss of weight, which can negatively impact the yield |
Over-manicuring can be frustrating, but it is an easy mistake to avoid. If you find yourself cutting away more than necessary, take a step back and assess your trimming process. It can be helpful to have a second set of eyes to double-check your work. Remember that less is often more when it comes to manicuring cannabis, as the small leaves that are removed during trimming can contain valuable trichomes. So when in doubt, err on the side of caution and leave a bit of extra leaf on your buds.
Under-Manicuring
One common mistake when hand-trimming cannabis is under-manicuring, which occurs when the buds are not trimmed enough. This can lead to a lower-quality product with lower potency and less visually appealing buds.
Under-manicuring can be caused by time constraints or not having the proper tools, but it is important to not rush the process and take the time to trim the buds properly. Leaving too many leaves on the buds can also trap moisture and lead to mold growth, which can ruin the entire crop.
To avoid under-manicuring, it is recommended to use a combination of trimming tools such as scissors, trimmers, and pruners to get into all the small crevices of the buds. It is also important to take breaks and stretch your hands to avoid fatigue, which can affect the quality of the trimming.
Another tip to prevent under-manicuring is to use a magnifying glass to identify all the small leaves that need to be trimmed, especially those in hard-to-reach areas. It is essential to keep the work environment clean and organized to ensure that no buds are missed during the trimming process.
Under-manicuring can be a costly mistake when hand-trimming cannabis. It is crucial to take the necessary time and care to trim the buds properly to ensure a high-quality and visually appealing final product. Using the appropriate tools and taking breaks to prevent fatigue, using a magnifying glass, and keeping a clean work environment are all important techniques to avoid under-manicuring.
| Common Causes of Under-Manicuring | Ways to Avoid Under-Manicuring |
| Rushing the process due to time constraints | Take the proper amount of time needed for the trimming process. |
| Leaving too many leaves on the buds | Use a combination of trimming tools, take breaks to prevent fatigue, use a magnifying glass, and keep a clean work environment. |
| Not having the proper tools | Invest in a variety of trimming tools such as scissors, trimmers, and pruners. |
Not Sanitizing Your Tools
Maintaining proper hygiene while hand-trimming your buds is crucial for producing high-quality cannabis. One common mistake that many growers make is not sanitizing their tools. This can lead to the spread of harmful bacteria and fungus, compromising the quality and safety of your cannabis. To ensure that your tools are properly sanitized, follow these steps:
1. Clean Your Tools Before Use: Prior to trimming your buds, make sure to clean your scissors or pruners with rubbing alcohol or another effective sanitizer. This will help to eliminate any bacteria or germs that may be present on the surface of your tools.
2. Sanitize Your Tools During Use: While trimming your buds, it is essential to regularly sanitize your tools to prevent the spread of bacteria and fungus between different parts of the plant. To do so, dip your tools in rubbing alcohol or another sanitizer between each bud.
3. Clean Your Tools After Use: After you finish trimming your buds, it is essential to clean your tools thoroughly to remove any remaining plant material or residue. Use a cleaning solution specifically designed for cannabis tools, and follow the manufacturer’s instructions for optimal results.
4. Store Your Tools Properly: Once your tools have been sanitized and cleaned, make sure to store them in a dry, cool place to prevent the growth of mold and other harmful bacteria. Consider investing in a storage container specifically designed for cannabis tools to help keep them clean and organized.
By following these simple steps, you can ensure that your tools are properly sanitized and free of harmful bacteria and fungus, helping you to produce high-quality cannabis that is safe and enjoyable to consume.
Post-Trimming Care
Now that you’ve finished hand-trimming your buds, there are still a few important steps to take in order to ensure the highest quality final product. Proper post-trimming care is just as crucial as the manicuring process itself, and can make all the difference in the taste, potency, and overall enjoyment of your cannabis. Let’s take a look at some essential post-trimming tips and techniques to take your buds to the next level.
Curing Your Buds
Curing your buds is an essential process that should not be overlooked after the hand-trimming stage. This step is important for preserving the aroma, flavor, and potency of your cannabis. Here are the steps to properly cure your buds:
Step 1: Drying Your Buds
Before the curing process can begin, the moisture content in your buds must be decreased. Hang your trimmed buds upside down to dry in a cool, dry, and dark space. This can take anywhere from 7 to 14 days. To ensure even drying, check on your buds regularly and rotate them if necessary.
Step 2: Storing Your Buds in Jars
Once your buds have dried to a desirable moisture level, it’s time to cure them. The best way to do this is to store your buds in airtight jars made of glass. Mason jars are a popular choice for this purpose. Fill the jar up to 3/4 of the way with buds, leaving enough space for air to circulate.
Step 3: Burping Your Jars
While curing, it’s important to “burp” your jars daily. This means opening the jar for a few minutes to release any built-up moisture and to allow fresh air to enter. Do this once a day for the first week, then gradually decrease to once every few days for the next few weeks.
Step 4: Monitor Your Buds
During the curing process, keep an eye on your buds. If you find any mold or mildew, remove the affected buds immediately to prevent it from spreading.
Step 5: Patience is Key
Curing your buds is a slow process that requires patience, but the end result is well worth the wait. The longer you cure your buds, the smoother and more flavorful they will become.
| Steps to Curing Your Buds |
|---|
| Step 1: Hang your buds upside down in a cool, dry, and dark space to dry for 7-14 days |
| Step 2: Store your buds in airtight jars made of glass, filling up to 3/4 of the way |
| Step 3: “Burp” your jars daily for the first week, then gradually decrease to once every few days for the next few weeks |
| Step 4: Monitor your buds for mold or mildew and remove any affected buds immediately to prevent spreading |
| Step 5: Be patient and allow your buds to cure for as long as possible, the longer you cure them, the more flavorful they will become |
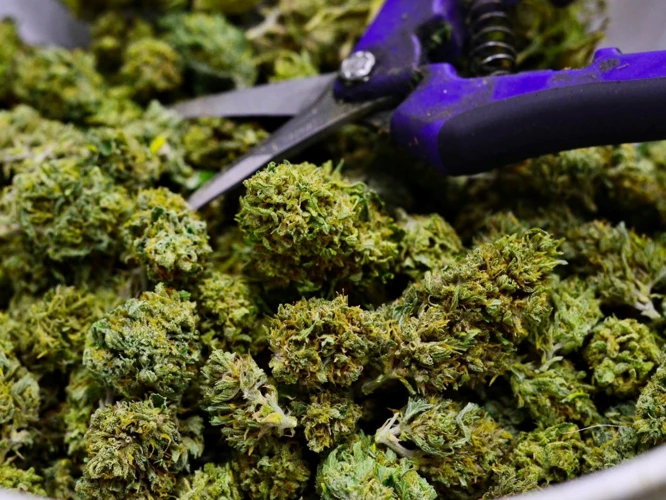
Storing Your Trimmings
After you have completed trimming your buds, don’t just throw away the trimmings – they can be used to make potent extracts or edibles. However, it is important to properly store these trimmings to ensure their potency and freshness are preserved.
Step 1:
First, collect all the trimmings together in a pile.
Step 2:
Next, remove any large stems or fan leaves that may have made their way into the pile.
Step 3:
To help preserve the freshness and potency of your trimmings, it is recommended to store them in airtight containers that are kept in a cool, dark place.
Step 4:
One option is to store the trimmings in a vacuum-sealed bag or jar to eliminate any excess air and prevent moisture from getting in. Another option is to use mason jars or Tupperware containers with secure lids, but be sure to burp them periodically to release any built-up air.
Step 5:
Label the container with the strain and date of the trimmings to keep track of them.
Step 6:
Store the containers in a cool, dark place like a pantry or a closet. Avoid storing them in areas that are exposed to heat or light, as this may degrade the potency of the trimmings.
Storing your trimmings properly is crucial for maximizing their potency and shelf life. Follow these six steps to ensure that you get the most out of your cannabis trimmings.
| Steps | Description |
|---|---|
| Step 1 | Collect all the trimmings together in a pile. |
| Step 2 | Remove any large stems or fan leaves that may have made their way into the pile. |
| Step 3 | Store them in airtight containers that are kept in a cool, dark place. |
| Step 4 | Use vacuum-sealed bags or jars, or mason jars or Tupperware containers with secure lids. |
| Step 5 | Label the container with the strain and date of the trimmings. |
| Step 6 | Store the containers in a cool, dark place like a pantry or a closet. |
Conclusion
In conclusion, achieving a perfectly manicured cannabis bud is crucial for ensuring the best possible flavor, smell, and potency. Hand-trimming is an art that requires patience and attention to detail, but the results are well worth the effort. Remember to choose the right tools for the job, prepare your buds properly, and use the appropriate trimming techniques to avoid common mistakes.
When trimming, it’s important not to over-manicure or under-manicure your buds, as either mistake can have negative effects on the final product. Additionally, sanitizing your tools before and after each use is essential for preventing the spread of bacteria and maintaining the quality of your buds.
Once you’ve finished trimming, don’t forget to cure your buds and store your trimmings properly. Curing allows the buds to dry and develop their full flavor and aroma, while storing the trimmings properly can provide valuable material for making concentrates or edibles.
In summary, hand-trimming your cannabis buds is a time-consuming but rewarding process that requires attention to detail, the right tools, and proper preparation. With practice and patience, anyone can master the art of cannabis manicuring and produce high-quality buds that are sure to impress.
Frequently Asked Questions
What is the optimal time to trim my cannabis buds?
The best time to trim your cannabis buds is after they have been dried and the stems snap instead of bend.
What tools do I need for hand-trimming my buds?
You will need scissors, trimmers, and pruners for hand-trimming your buds. These tools will allow you to effectively remove excess leaves and stems.
Can I sterilize my trimming tools with alcohol?
Yes, alcohol is an effective antiseptic that can be used to sterilize your trimming tools. A solution of 70% isopropyl alcohol is recommended.
What is over-manicuring?
Over-manicuring is when too many of the trichomes are removed from the buds during the trimming process, which can impact the quality and potency of the final product.
What is under-manicuring?
Under-manicuring is when not enough of the excess leaves and stems are removed from the buds during the trimming process. This can negatively impact the appearance and quality of the final product.
Can I use a machine to trim my buds?
Yes, there are trimming machines available that can be used to trim your buds. However, hand-trimming is often preferred for higher-quality results and greater attention to detail.
Why is curing important after trimming?
Curing is important after trimming because it allows the moisture in the buds to equalize and for the flavors and potency to develop further. Cured buds are also smoother to smoke or vaporize compared to those that have not been cured.
How long should I cure my buds after trimming?
Curing times can vary depending on the strain and environmental conditions. Generally, buds should be cured for at least 2-4 weeks. However, some people prefer to cure for up to 6 months for an even smoother and more potent smoke.
Can I trim my buds when they are wet?
It is not recommended to trim your buds when they are wet as the excess moisture can cause the trichomes to stick to your trimming tools, making the process more difficult and potentially damaging to the buds. It is best to allow your buds to dry first.
What can I do with the leftover trimmings?
Leftover trimmings can be used to make concentrates, edibles, or tinctures. They still contain cannabinoids and can be utilized to maximize the benefits of your cannabis plant.

